
Split screen on a Windows 11/10 computer lets you perform two or more tasks at once, improving efficiency and productivity without Alt-Tabbing between apps.
You can use a split-screen mode on your computer to reference data from one window while typing or applying it in the other window and perform a side-by-side document comparison for smooth multitasking.
Moreover, a split view allows you to drag and drop content between two windows easily, compare and analyze reports, images, or code easily for streamlined workflow, enhanced focus, and better data comparison.
Hence, this article explains how to use split screen on Windows in quick and easy ways. Before learning how to split screen on Windows 10/11, here is an overview of what split screen means on Windows.
What Is Split Screen on Windows
Split screen is a built-in Windows feature that lets you arrange two or multiple open app windows in a side-by-side or a quadrant view, without window minimizing or tab switching.
The split screen on a computer is especially helpful in deeper research (you can keep a PDF textbook open in one window and take notes in another), content creation (search images or videos in one window and edit them in another), analyzing data (open a spreadsheet and report side by side for accurate comparison and analysis, and collaboration with others (video call with your teammates on one side and edit a project document on another).
Now that you understand the split screen concept on Windows, let’s help you switch to a split view.
How to Split Screen on Windows
To use the Windows 10/Windows 11 split screen feature, enable it through the path Windows+I keyboard shortcut>System>Multitasking>Snap Windows. After activating this feature, you can follow the methods below, depending on your convenience, to split the screen on your computer.
Method 1: Use Snap Layouts to split the screen on a computer
The Windows 11 Snap Layouts feature lets you organize the open apps and windows on your PC to your liking, flexibly (up to 6 windows, depending on your screen size and resolution).
For example, if you are creating a financial report or content with your teammate, video call with them in the top-right window, work on a document in the top-left, have a spreadsheet open in the lower-right, and search the browser in the lower-left window.
Here is how to put this into action.
- Open the application you want to use.
- Use the Win + Z shortcut to open Snap Layouts.
- Select a layout zone and then click that zone to let Windows snap that window.
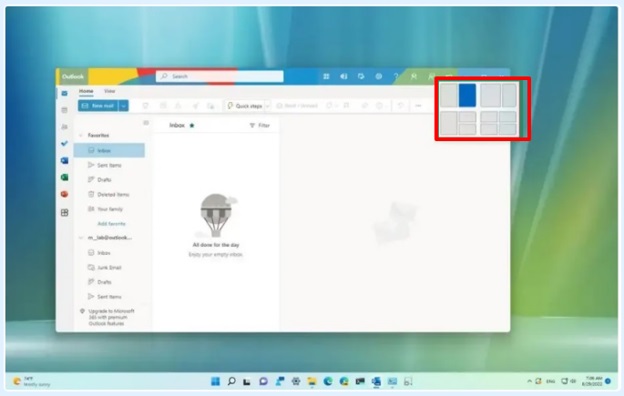
- Next, select additional apps to fill up the other positions.
- Drag the dividers to the correct size after you have arranged all the windows.
Also know: How to Solve the WordPress White Screen of Death (Working Methods)
Method 2: Split screen on Windows 11 using a shortcut key
Windows offers multiple shortcuts to split screen. Below are the key Windows split-screen shortcuts to snap Windows to the screen sides.
- Win + Right/Left arrow: Snaps the current window to the left or right half of your computer screen.
- Win + Up arrow: Maximizes your current window.
- Win + Down arrow: Minimizes your current window or restores it if already minimized.
- Win + Tab: Opens Task View to view all your virtual desktops and open windows.
- Win + Home: Maximizes all your windows except the window active currently.
- Win + Ctrl + Left/Right arrow: Switches between virtual desktops.
Snap Assist drags one window to the right and another window to the left side to get a split screen on the computer for smooth multitasking. Here is how to use the Snap Assist feature.
- Click and hold the title bar at the top of the first window to use with two or more active windows.
- Drag the window to the right or left of the screen.
- Release the mouse when you see a transparent outline. Once you have released the mouse, Windows will resize that window to fill the half part of your screen.
- After the window is fixed in its place, Snap Assist shows a thumbnail of other windows open on your computer. Click another window to fill up the other half of the PC screen.
- Lastly, drag the divider between two windows left or right to resize the split, allowing more space for the applications that need it.
If you want to split screen on multiple monitors, right-click the desktop, click Display Settings, click Extend these displays, arrange the displays to ensure they match the physical setup, and use keyboard shortcuts (Win + Arrow) or features such as Snap Assist (drag to the edge or corner) to snap windows into sections.
However, if there is no split view on the screen, ensure the split screen is enabled, update Windows, update your graphics drivers, and check for display issues.
Troubleshoot Split Screen Issues on a Windows Computer
Here is what you can do if the split screen on your computer is not working.
- Make sure split screen is activated: To ensure split screen is enabled on your computer, press Win + I, click System, click Multitasking, and then toggle on Snap windows.
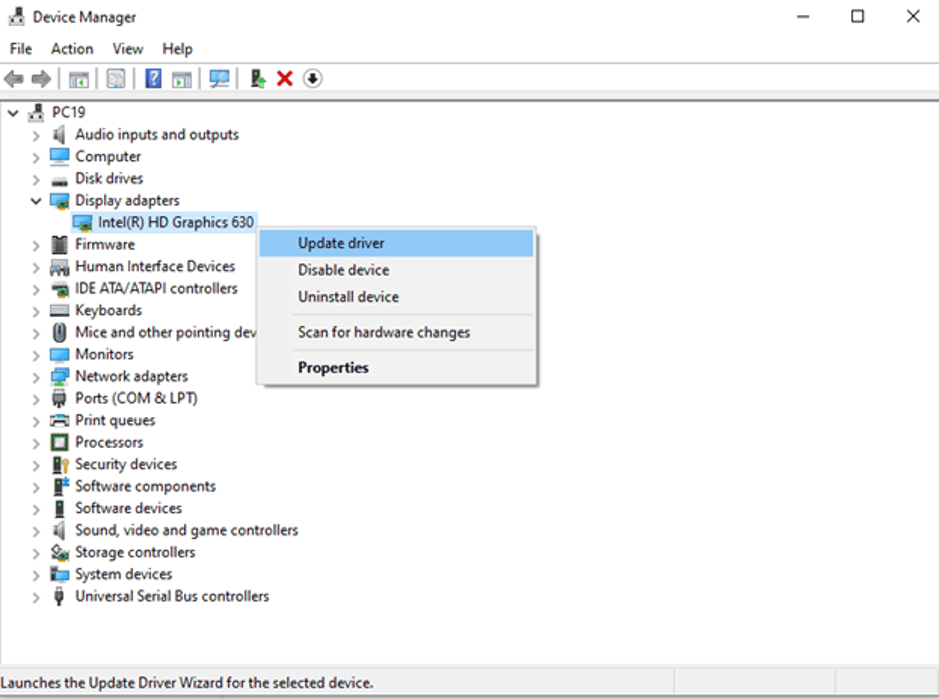
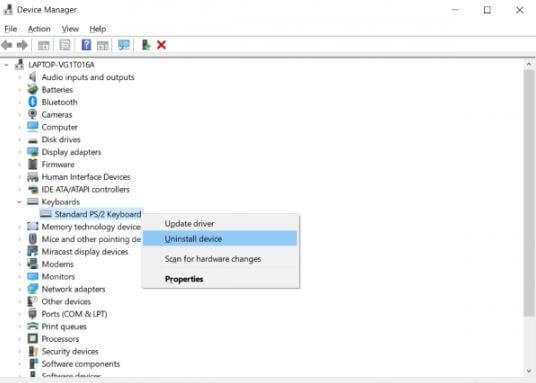
- Update your graphics drivers: To update the graphics drivers, press Win + S, search for and open Device Manager, double-click Display Adapters, right-click your graphics card, click Update Driver, click Search automatically for drivers, follow the instructions that appear on your screen, and then restart your PC.
- Check for display issues: Make sure there are no display problems, for example, unusual scaling values. If there is a display issue, adjust the display settings.
- Check application compatibility: Some apps do not support or are not compatible with split screen on Windows 11/10. One by one, disable or close each app temporarily to ensure the app is not the problem.
Additionally, a few tips can help you make the most of a split screen on your computer.
Also know: How to Make Your Chromebook Touchscreen
Tips to Use Split Screen on Windows Effectively
To make the best of split screen on your computer:
- Use a higher resolution or larger display for more space and a more comfortable experience.
- Use keyboard shortcuts for a faster workflow.
- Connect a second monitor to improve multitasking.
- Customize your Snap settings in Windows Settings to match your preferences.
- Use virtual desktops for an organized and clutter-free experience.
- Increase space for side-by-side windows using ultrawide monitors.
- Keep Windows up-to-date to get the latest features and fix bugs.
- Speed up app loading times using solid-state drives.
Also, check the answers to the frequently asked questions below if you have any confusion.
Frequently Asked Questions
Q1. How do I split my monitor into two screens?
To split your monitor into two screens, open the app you want to use in split screen, press Win + Z to open Snap Layouts, choose the desired layout zone, click the zone, select other apps to fill the empty positions, and then drag the dividers to the right size. For details and alternative methods, check the guide above.
Q2. How do I enable and use split screen on Windows 11?
To enable and use the Windows 11/Windows 10 split screen, follow the path: Windows key + I> System> Multitasking> toggle on Snap windows.
Q3. How to split the screen on a PC using the keyboard?
To split the computer screen using your keyboard, press Win + Right/Left Arrow (snaps the current window to the left or right of the screen). For more shortcuts, refer to the guide above.
Hope this helps you split the screen on your Windows 10/11 computer for smooth multitasking and enhanced productivity. However, if any confusion or questions persist, leave us a comment.