
The tpm.msc command opens the TPM Management Console, where you can manage Trusted Platform Module (TPM) settings. It stores cryptographic keys to improve system security and verify hardware and software integrity. You can also use it to enable TPM, manage TPM ownership, troubleshoot issues such as TPM device not detected, and clear TPM. It also helps configure TPM-based features, such as Secure Boot and BitLocker encryption.
This article walks you through accessing the tpm.msc command to enter the Trusted Platform Module, a small chip that enhances computer security, and solve related problems. First, let’s explain the Trusted Platform Module (TPM) and the tpm.msc command in more detail to avoid confusion.
What Is the Trusted Platform Module (TPM) in Windows
TPM, or Trusted Platform Module, is a specialized chip on your computer’s motherboard. It is a cryptographic processor that ensures hardware-level security for different functions, such as disk encryption, authentication, and key management. In other words, TPM is like a digital safe that protects your sensitive information from physical theft and external software attacks. Windows features, such as BitLocker and Windows Hello, use TPM to improve security.
What Is the tpm.msc Command
The tpm.msc command is a tool to interact with TPM; it provides a gateway, a graphical interface to access, configure, and manage your PC’s TPM settings. This command opens a Microsoft Management Console (MMC) snap-in known as TPM Management to check TPM availability or fix issues connected to Windows 11 compatibility, Windows Hello, BitLocker, and other hardware-related security features.
When you open TPM Management using the tpm.msc command, you can access information such as TPM status, TPM manufacturer name, TPM manufacturer version, and TPM specification version. For Windows 11, the TPM specification version must be TPM 2.0 to prevent errors such as This PC can’t run Windows 11.
Now that you are familiar with TPM and the tpm.msc command, let’s help you open it.
How to Access the tpm.msc Command
You can use the tpm.msc command to check and manage TPM, including checking the TPM version, through the Run command, Start search, or PowerShell/Command Prompt, depending on the method you find most convenient. Please note that you must have administrator rights to access the TPM on Windows. Below are all the methods explained in detail.
Method 1: Use the Run dialog to access the tpm.msc command
You can use the Run command to open the built-in Trusted Platform Module Management (tpm.msc) tool. Here is how.
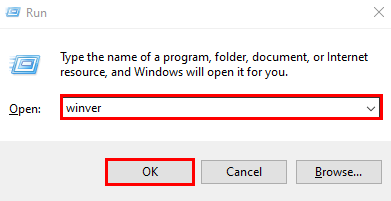
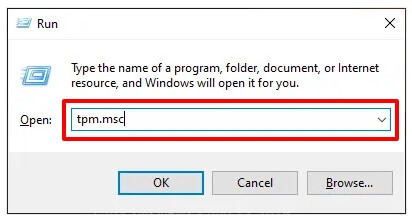
- Press the Windows key + R to access the Run utility.
- In the Run box, type tpm.msc and press Enter to open the TPM Management Console.
Also know: How to Show This PC on Desktop in Windows 11/10
Method 2: Access the tpm.msc command using Start search
Start search is another easy way to access TPM management using the tpm.msc command. The following steps explain how to do this.
- Click the Start button.
- Type msc in the search bar.
- Click Microsoft Common Console Document, TPM Management, or a matching search result.
Method 3: Launch the tpm.msc command using PowerShell or Command Prompt
If you are comfortable with command-line interfaces, you can run the tpm.msc command in Command Prompt or PowerShell, as explained below.
- Click the Start button.
- Type cmd or PowerShell in the search bar.
- Right-click Command Prompt or Windows PowerShell in the search results.
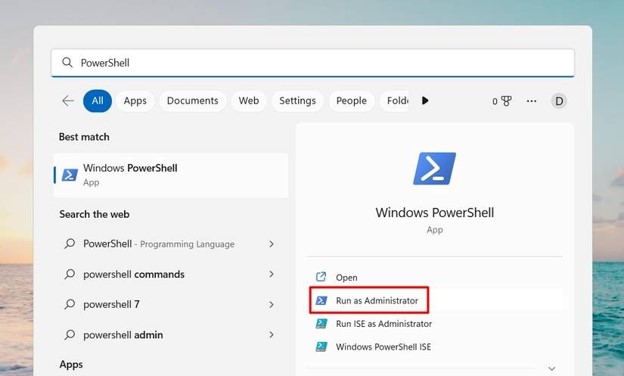
- Click Run as administrator.
- In the Administrator Command Prompt or Administrator Windows PowerShell, type the msc command and press Enter.
Once the TPM Management Console opens, you can check many useful details.
What to Check in tpm.msc
TPM status, manufacturer name, manufacturer version, and specification version are the most important details you can check in tpm.msc TPM Management.
- Status shows whether TPM is ready for use on Windows.
- Manufacturer name shows the platform security processor or TPM vendor.
- The manufacturer version shows the implementation version or firmware details.
- The specification version displays the TPM standard your device supports, such as 2.0.
If you see “The TPM is ready for use” in the status, Windows can successfully communicate with the TPM, and it is available for use by supported Windows functions. “The TPM is ready for use, with reduced functionality” indicates your PC is configured for legacy MBR boot mode or BIOS, while a TPM 2.0 device is installed; BIOS mode can restrict the functionality.
If you find the tpm.msc command too confusing, you can inspect your security processor using the Windows Security app.
Also know: Solved: Application Unable to Start Correctly 0xc0000142 Error
How to Check TPM Details Using Windows Security
To check TPM information using the graphical route of Windows Security:
- Press Windows key + I.
- Click Privacy & Security.
- Next, click Windows Security.
- Click Device Security.
- Navigate to Security processor, then click Security processor details.
However, you may not be able to enable TPM if it is disabled in firmware; enabling TPM requires changing the setting in the PC’s UEFI setup. To access UEFI, restart your computer and, as it starts up, press a key like F2, Del, Esc, or another key shown on your screen to enter the UEFI or BIOS settings menu. This process may differ depending on your device, so watch for instructions during startup.
How to Enable TPM
To enable TPM, change the UEFI firmware settings. Here is how.
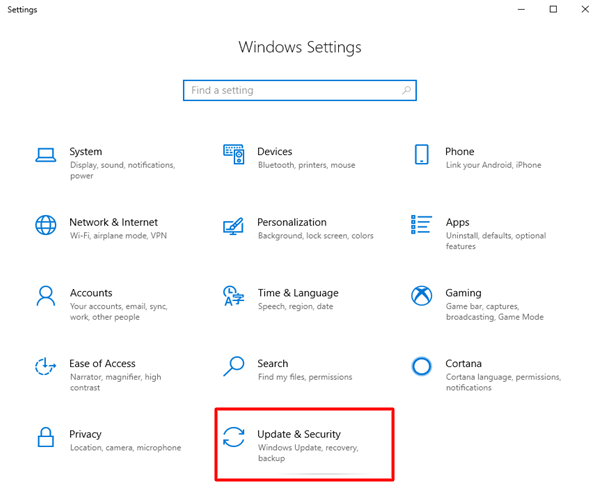
- Press the Windows key + I.
- Click System in the Settings panel.
- Click Recovery in the Settings menu.
- Next, click Advanced startup and then click Restart now.
- After your PC restarts, follow the path Troubleshoot > Advanced options > UEFI Firmware Settings > Restart.
- Enable the TPM setting in the firmware interface.
- Lastly, save the change and restart your computer.
However, if you encounter errors such as ” Compatible TPM cannot be found,” “cannot load management console,” “no security processor section in Windows Security,” “TPM is disabled and requires attention,” “a firmware update is needed for your security processor,” “your TPM isn’t compatible with your firmware,” or “TPM lockout or authorization errors,” check below for solutions.
Note: If you do not see any TPM options in your UEFI or BIOS settings, this may mean that your computer or motherboard does not support TPM, or TPM may need to be enabled in a different section. Check your device or motherboard manual, visit the manufacturer’s support website, or contact their support team to confirm hardware compatibility and see if a firmware update is available. Some older devices may not have a TPM chip, or the option may appear under names like “Security Device” or “Intel PTT” and “AMD fTPM.”
Troubleshooting Common TPM Errors
Take the steps below in order to fix various TPM problems.
- Restart Windows and then run the tpm.msc command again.
- If you cleared TPM recently in firmware, close and open tpm.msc again.
- Re-enable TPM in UEFI.
- In Administrator Windows PowerShell, run the command: $tpm = gwmi -n rootcimv2securitymicrosofttpm win32_tpm $tpm.SetPhysicalPresenceRequest(6)
- Follow the computer or motherboard manufacturer’s instructions to install a BIOS, UEFI, or security-processor firmware update.
- Clear the TPM. To clear the TPM, follow the path: Windows Security > Device security > Security processor details > Security processor troubleshooting > Clear TPM > Clear TPM. Remember to back up your important files and ensure you can retrieve your device-encryption recovery or BitLocker key before clearing the TPM.
To clear any persistent confusion, below we answer some common questions about TPM and the tpm.msc command.
Also know: How to Enable Hyper-V on Windows 11
Frequently Asked Questions
Q1. How to see TPM in CMD?
To check TPM in CMD, click the Start button, type cmd, right-click Command Prompt, click Run as administrator, and then run the command: wmic /namespace:\\root\CIMv2\Security\MicrosoftTpm path Win32_Tpm get /value
Q2. How to open TPM MSC as admin?
To open TPM MSC as admin, click the Start button, type cmd, right-click Command Prompt, click Run as administrator, type tpm.msc, and press Enter.
Q3. How to clear TPM MSC?
To clear TPM MSC, press Windows key + R, type tpm.msc, press Enter, click Actions, click Clear TPM, click Restart when prompted, and then follow the on-screen prompts to complete the process.
Hopefully, you can now use the tpm.msc command correctly to control your computer’s hardware-based security options. If you have questions or need clarification, feel free to leave a comment.