Main LogoLight Logo
  • Reviews
  • Top 10
  • How To
  • Tech News
  • OS
    • Windows
    • MAC
    • iOS
    • Android
  • Categories
    • Driver Updater
    • Cyber Security
    • Games
    • Fitness
    • Entertainment
    • Tips & Tricks
How To Windows
by Snigdha

How To Take a Screenshot on Windows HP Laptop?

May 20, 2020
1

If you are wondering how to take a screenshot on an HP laptop, then refer to our tutorial to learn about some extremely easy ways of taking screenshots.

Taking screenshots in today’s fast track world seems to be an easy option when you want to retain some information, image, etc for a while. 

But the method to take screenshots differs from device to device. For instance, smartphone devices come with some built-in screen capture apps or other third-party screenshot apps are available too. Similarly, for the iPad, there is a separate way to capture the screen.

As a newbie, sometimes it becomes challenging to understand how to do a particular task quickly; therefore, you might be in need of a blog like this to help you out.

For most laptops, the screenshot capturing process is the same. Let us now see how to screenshot on an HP laptop.

Table of Contents hide
Quick & Easy Methods to Take a Screenshot on HP Laptop
Method 1: Take a Screenshot of the Full Screen
Method 2: Take a Screenshot of the Active Window
Method 3: Custom Screenshot
Method 4: Using Microsoft’s Screenshot Tool
Method 5: Using Browser Extensions & Add-ons
Fix Your Screenshot Issue by Updating Device Drivers

Quick & Easy Methods to Take a Screenshot on HP Laptop

Below described are five methods to take a screenshot on the HP system.

Method 1: Take a Screenshot of the Full Screen

When you see a really important piece of information on your screen, an image, a person’s contact information, or wish to retain a chat for future reference, taking a quick screenshot seems like the only feasible option but if you have this question on your mind as to how to screenshot on HP, then we have got you covered with our first solution here.

To take a quick and easy screenshot, see the below steps:

  • Hit the PrtScn or Print Screen key on your laptop keyboard.
  • Launch the image editor apps such as the Paint or Photoshop application or simply open an MS Word file where you can paste the screenshot.
  • Now using the crop feature, edit the screenshot as per your needs and save the image on your HP laptop.

You can now use the screenshot as needed to simply retain it for some future reference or use.

An Alternative Method For Windows 8/10 Users

For Windows 8/10 users, there is another easier option to take a screenshot:

  • Hit the Windows key + PrtScn/Print Screen together on your laptop’s keyboard.
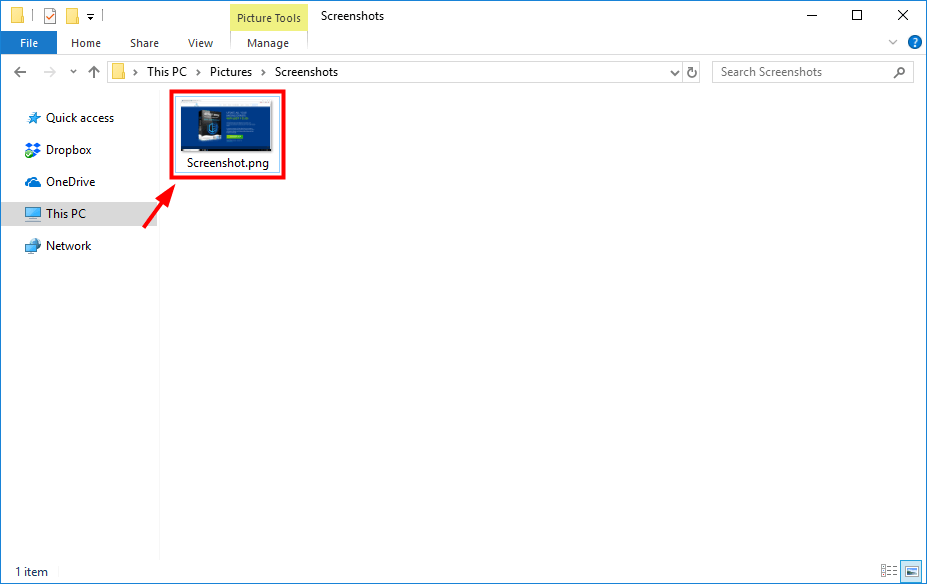
  • Now launch the File Explorer (press Win + E key simultaneously).
  • Navigate to the path: This PC > My Pictures > Screenshots
  • The screenshot would be saved here in this location.
Take a Screenshot of the Full Screen Using Print Screen Key

Read More: Dell vs HP: Which Laptop Brand is Better in 2020


Method 2: Take a Screenshot of the Active Window

Learn how to take a screenshot on HP laptop of the active window i.e. the window which is currently in use; from the below steps:

  • On your HP laptop keyboard, hit the Alt Key + PrtScn or Print Screen key together. 

This action will capture the active window of your system and a copy will be saved to the clipboard.

  • In the image editor app like the Paint or Photoshop application paste the screenshot.
  • Now edit the screenshot as you like with the editing tools and features and use it as required.

Method 3: Custom Screenshot

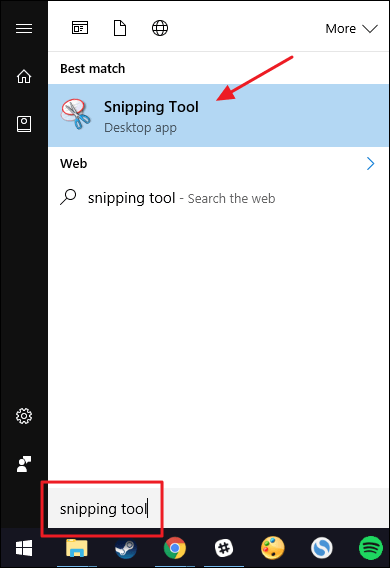
In order to take a specific screenshot on an HP laptop, you can use the Snipping Tool. Here’s how you can use the tool:

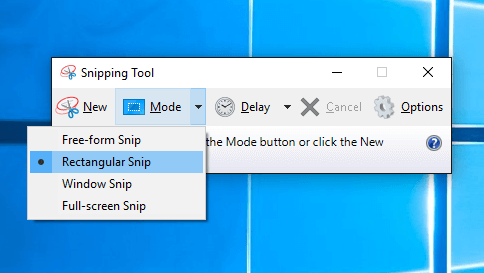
  • Go to the Snipping Tool desktop application and click on the icon “New” of the snipping tool window.
Use Custom Screenshot Method to Take a Screenshot on Windows HP Laptop
  • Now click and drag the mouse pointer over the area of the screen that you want to screenshot on your HP laptop. This will select the region you want to capture.
Use Custom Screenshot Method to Take a Screenshot
  • Once you have selected the region, you can then release the mouse.
Use Snipping Tool to Take a Screenshot
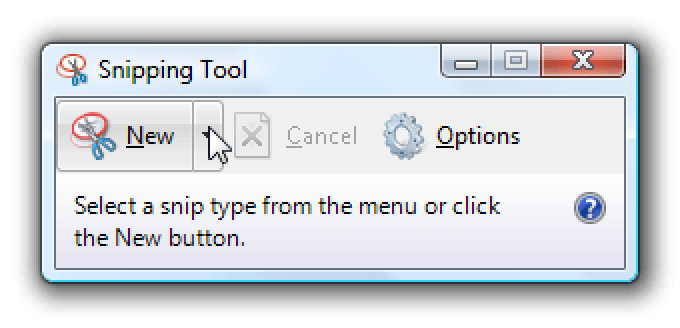
  • This will open the snippet in the Snipping Tool window, and to save it, you need to hit the Save button.

Method 4: Using Microsoft’s Screenshot Tool

Microsoft’s screenshot tool ‘Snip’ is a handy screenshot tool that you can find in your HP laptop. With this tool you can take screenshots on your HP laptop easily. Following are the steps to do this:

  • You can install “Microsoft Snip” from Microsoft’s Homepage.
  • You can then launch this tool and choose the option of “Capture” from the program interface.
  • Click on the window that you want to screenshot by pressing down the mouse button.
  • The image gets saved in the clipboard automatically.
  • It can further be saved to the albums and shared via email or other messengers.

Read More: How to Track Someone’s Location by Using Phone Number


Method 5: Using Browser Extensions & Add-ons

If you want to know how you can take a screenshot on your HP laptop from a web page, then you can use browser add-ons to capture a screenshot. 

Using an extension makes capturing a screenshot easy which can be pasted onto another webpage or file or can even be saved onto the hard drive. When it comes to choosing the best addons as per your web browser, then you can go with the below choices:

Google Chrome – FireShot, Lightshot, Awesome Screenshot

Mozilla Firefox – Fireshot, Awesome Screenshot Plus

Once you have decided which screenshot browser extension you want to use, you can then go to Chrome Web Store and install the extension by clicking “Add Add-On button.”

Once the installation is complete, you can then see the extension appear in the top right corner beside the search bar. If you want to remove the extension from the browser, then  you use a right-click to open the menu and choose the option of “Remove from Chrome.”

When you want to take a screenshot, you can click on the tool icon from the top bar and select the area that you want to capture. Then, you can either click on the “Copy” button to paste it elsewhere or else press the “Save” button to save it to the albums or My Picture folder.

So, this is all folks about how to screenshot on an HP laptop. However, if you are experiencing some issues while capturing the screenshots, then we have a suggestion to fix your screenshot issue.


Fix Your Screenshot Issue by Updating Device Drivers

When you are taking screenshots on your HP laptop, if you are unable to capture anything, or the screenshot appears to be black or twisted, then it might be happening due to outdated system drivers.

It is a known fact that device drivers play an important role in managing the overall function of your system. So, any issue with the system performance obviously indicates an underlying problem with the device drivers. You can update the device drivers as per the below outlined ways given in the below segment.

You can either opt to download and install the device drivers manually from the manufacturer’s website or else you can make use of a top-notch driver update software like the Bit Driver Updater.

Bit Driver Updater - Best Driver Updater Software

  • You can visit the website and install the tool on your HP system.
  • Once the installation is complete, you can then scan your system with this tool.
  • Upon scanning, the driver updater tool will detect all the potential driver-related issues in your system such as missing, out-of-date, or malfunctioning drivers.
  • It will retrieve the results and also download the updated versions of those drivers.
  • Using the one-click update feature, you can install all your outdated and faulty drivers at once.
  • If you face any issues in handling the tool, you can reach out to their customer support team at any time of the day and they will be able to assist you immediately.

Read More: Best Free Driver Updater Software For Windows 10/8.1/8/7


Summarizing: To Take a Screenshot on HP Laptop

Thus, you learned from this article that taking a screenshot is an extremely simple task and you can easily do so either by capturing the whole screen into the screenshot and then cropping it as per your need or by taking a custom screenshot.

Additionally, you also learned about troubleshooting screenshot capturing issues by automatically updating system drivers from this blog.

Hopefully, you found this article helpful in understanding how to take a screenshot on the HP laptop. Do let us know your thoughts and suggestions in the comments section below.

Author

Snigdha

Snigdha is a technical content writer with expertise in the field of science & technology. Though she has a very diverse academic and professional profile yet she finds writing to be a creative form that she was unable to explore so far. When not writing, she can be found indulging in other forms of creativity like painting or travelling.

View all posts

Related Posts
Best YTD YouTube Video Downloader Alternative for Mac & Windows

6 Best YTD YouTube Video Downloader Alternative for Mac & Windows

January 31, 2024
0

Tired of receiving failed messages while you try downloading videos through YTD YouTube downloader? Here are the 6 best options to replace it.

The Internet is a public space that has endless data available to download. But there are websites that provide access to browse their content but do not allow downloading options directly. Facebook and YouTube are examples of such platforms.

Talking about video downloads YTD is the most trusted and relevant source for downloading videos from YouTube and other such applications. It provides no restrictions on the number of downloads and is available for free. It can convert YouTube videos to audio format and audios also work well with iTunes.

A number of users have reported issues while downloading from YTD. Many users failed to download videos or received error messages instead. This brought in the need for an alternative. You can also download a YouTube playlist from IDM as it multiplies your download speed up to 5 times. Although there are many options available online, most of them are paid and require a subscription to be used.

To download videos online you can use:

  • Software that requires downloading and installation.
  • YouTube to MP3 chrome extension or extension specific to your browser.
  • A Web-based downloader.

This article will help you find the best five YTD YouTube video Downloader alternatives that can be used for your Mac and Windows PC.

Top 6 Alternative Tools for YTD YouTube Downloader:

The options available for similar tools of YTD YouTube Video Downloader are listed below, you can select the one relevant to your Operating System and requirements.

1. ByClick Downloader

ByClick Downloader

ByClick allows you to download videos in 8K, 4K, 720p, and 1080p. Also, these high-quality videos are convertible into the desired format such as HD, MP3, AVI, MP4, etc. which makes it a preferable YouTube downloader for Mac and Windows.

It allows you to download videos from YouTube, Dailymotion, and more than 40 such websites. You can download the entire YouTube playlist, multiple videos, and the entire set of videos available on a channel. These downloads are available with just one click.

It also enables you to download Facebook videos for private users. An additional feature of ByClick is it allows users to download photos of Instagram users and their entire Instagram page.

Features:

  • It allows you to export YouTube videos to iTunes.
  • Enables High definition downloading for videos.
  • It can download private videos as well.
  • It enables you to download YouTube live videos.
  • It has a feature for automatic detection of links to download.
  • Supports Chrome, Edge, Firefox, and Internet Explorer.
  • Track your downloads.

download


2. 4K Video Downloader

4K Video Downloader

The working of software is defined by the name itself as it is more concerned about the high quality of videos. It allows downloading videos of 4K resolution. The simple interface of the software makes it user-friendly for both Windows and Mac users.

It allows users to download multiple videos simultaneously and download the entire playlist from video sharing sites in one go. This makes the software a trusted one amongst millions of online users.

Downloading a video requires manual copying of the link and pasting it to download. The website fetches all the details from the provided URL and downloads the video.

The only drawback for Mac users is that the number of free downloads available for a user is restricted to 25 videos or playlists. To continue downloading videos from the software requires a subscription plan.

Features:

  • It enables high-quality video downloads with subtitles for users.
  • Allows users to convert the video format to their desired format.
  • It enables users to download videos in 3D.
  • It is available free for Windows and free for the first 25 videos on Mac.

Download Now

Also Read: How to Recover Deleted or Private YouTube Videos: 3 Smart Solutions


3. Free Online Video Downloader

Free Online Video Downloader

It is a URL downloader for downloading videos from common streaming websites. The performance of the downloader remains the same despite changing platforms.

It has no limitations on the number of downloads and is available for free to users of both Windows and Mac. It can download videos from any browser such as Chrome, Opera, Safari, Firefox, etc.

Being a web-based downloader it does not require any additional installations or subscriptions and allows you to download YouTube videos for free.

To download any video you can follow these steps. Select and copy the URL of your video from the website. Now paste the URL to the address bar of the Free Online Video Downloader. Click on the Download button and save it in your desired location on your PC.

Features:

  • No limit on the number of downloads.
  • Requires no additional storage
  • Supports multiple websites
  • Available for free

Download Now

Also Read: How To Extract Audio From YouTube Videos? Check 5 Methods!


4. XYDownloader

XYDownloader

Another best YTD YouTube video downloader is XYDownloader.It is available for Mac. It automatically fetches the URL of the video streaming website and gives a pop-up message to download the video.

Using XYDownloader you can download videos from YouTube, Facebook, BBC, etc., and convert them into the required formats. Also, it allows you to download multiple videos simultaneously as well as schedule downloads.

An additional feature of this is it automatically enables the screen recording if the video fails to download. This feature enables users to even download embedded videos.

Features:

  • Enables conversion of video into 153 available formats.
  • It allows users to record videos streaming online.
  • Allows downloading videos from more than 1000 video streaming and sharing sites.
  • Maintains the quality of videos.
  • Enables easy transfer of videos from Mac to iPhone, etc.

5. iTube HD Video downloader

iTube HD Video downloader

Last in the list of best YTD YouTube Video Downloader Alternative iTube downloaders for Windows. It allows users to download videos from YouTube and more than 10,000 other websites.

It allows you to download videos in 4K and other formats with just a click. Also, it enables users to change the format of video to MP3 or any other as per the user’s desires.

Features:

  • Download videos from more than 10,000 sites.
  • Multiple video downloads simultaneously.
  • Auto schedule shutdown as soon as the download completes.
  • Allows conversions into the desired format.

Download Now


6. SaveFrom.net

SaveFrom.Net

SaveFrom.net is an online solution and the best YTD YouTube video downloader alternative. This tool is available online and offline. You can just paste the URL of any YouTube video, select the format for the media, and then download it.

Features:

  • Allows you to download audio or video
  • Supports multiple websites other than YouTube.
  • Options to download subtitles are also available

Download Now

Also Read: 8 Best Ways to Fix YouTube Black Screen Problem


Conclusion

The above article explains the best 6 YTD YouTube Video Downloader Alternatives available for Windows and Mac.

These downloaders come with different features and are available for free initially. While few of them require a subscription after certain downloads. You can select the one which fits within your budget and requirements.

Do let us know in the comments If we missed out on your favorite video downloader. For more such tech-related content don’t forget to subscribe to our Newsletter. Follow us for more info on Facebook, Instagram, Twitter, and Pinterest.

How to Fix Voicemail Not Working on iPhone

How to Fix Voicemail Not Working on iPhone [100% Working]

September 6, 2022
0

iPhone voicemail not working error is, no doubt, irritating. However, it is not unsolvable. You may fix it easily using the tried and tested fixes shared in this article.

Whenever you are not available to take a call, voicemail comes in handy. It saves you from having to miss opportunities because of a missed call. You can go through the message left on the voicemail and contact the caller accordingly. However, it becomes pretty frustrating if the voicemail is not working on the iPhone.

Many users have reported a voicemail error on iPhones. Hence, in this article, we will share some tried and tested fixes to get rid of this issue. You may continue reading this write-up if you are also struggling with the same problem.

Before beginning with troubleshooting, it is vital to understand why the iPhone voicemail is not working. You can fix the problem effortlessly if you know what may have caused it.

Therefore, the following section answers one of the most frequently asked questions, “why is my voicemail not working on my iPhone.”

Why Is Voicemail Not Working on iPhone

The following may be the top reasons you are not getting voicemails on your iPhone.

  • Random software glitches
  • Pending Carrier update
  • Call forwarding is active
  • Issues with the cellular settings
  • Conflicts between Bluetooth and cellular network

Above, we listed probable reasons your iPhone voicemail is not working. Now, let us walk you through the possible ways to fix it.

Fixes for Voicemail Not Working on iPhone Issue

Below we share the fixes you may use to solve the problems leading to the voicemail not working error on iPhone 11 and other iPhones.

Fix 1: Start your iPhone again

Restarting the iPhone may fix the random software issue that may be a reason voicemail is not working on the iPhone. Therefore, below is how to restart your iPhone to fix the issues.

  • Navigate to and tap Settings on your phone.
  • Select the General settings.General settings on your iPhone
  • Tap on the Shutdown option present at the bottom.
  • Slide to power off your iPhone.

Also Read: How to Enable Do Not Disturb on iPhone


Fix 2: Get the Carrier updates installed

Voicemail on iPhone may not be working as you have pending Carrier updates that need installation. Thus, installing these updates may fix the problem you are experiencing. Below is how to install them.

  • Go to your iPhone’s Settings. 
  • Select General from the available options.
  • Tap on the About option.iPhone -Click on About section
  • Tap on the Network setting.
  • Choose Update to complete the Carrier update installation on your phone.

Fix 3: Turn off call forwarding

Do you have the call forwarding setting enabled to forward unanswered calls to any phone? If yes, you should turn off call forwarding to fix the voicemail not working iPhone issue.

  • Open Settings and tap on Phone. 
  • Go to Call Forwarding. 
  • Turn off the Call Forwarding toggle.iPhone Call Forwarding
  • After disabling call forwarding, check if things have returned to normal or still voicemail is not working on the iPhone.

Also Read: Sync Contacts From iPhone to Mac


Fix 4: Switch off cellular service and turn it on again

Switching off the cellular service and then turning it on often fixes problems with the cellular settings. Hence, you may take these steps to perform this action to fix the voicemail not working on iPhone 11 issue.

  • Open your phone’s Settings. 
  • Go to the Cellular settings and toggle Off cellular data.
  • Keep the cellular data off for 30 seconds.
  • Now, toggle on the cellular data.Cellular Data

Fix 5: Toggle off Bluetooth

Bluetooth networks may often interfere with the cellular network, resulting in problems like the voicemail on the iPhone not working. Therefore, turning off Bluetooth is one thing you can do to fix the problem. Below are the directions to do it.

  • Go to your iPhone’s Settings and select the Bluetooth setting.
  • Tap on the Bluetooth toggle to turn it off.Toggle off Bluetooth in iPhone
  • See whether the iPhone voicemail is not working or if the issue is resolved.

Fix 6: Reset your phone’s network settings

Resetting the network settings to the original factory default settings is another way to fix the voicemail not working on iPhone 11 issue. Thus, below is the step-by-step process to do it.

  • Choose Settings. 
  • Tap on the General settings and Transfer or reset iPhone. 
  • Select Reset and then Reset Network Settings. Reset Network Settings
  • Enter your Lock Screen Password if asked to do it.
  • Complete the reset process and see if the problem is solved or if you are still not getting voicemails on your iPhone.

Also Read: Fix: Share My Location Not Working on iPhone


Fix 7: Correct the date and time

It may happen that you have incorrect data and time on your phone. Wrong date and time settings may sometimes cause problems such as the voicemail on the iPhone not working. Thus, below is how to set the correct date and time on the iPhone to solve the problem.

  • Go to Settings and open the General setting.
  • Choose Date & Time. 
  • Toggle on the Set Automatically option to set the date and time on your phone.Set Automatically date and time

Fix 8: Call your voicemail

You may also access and check the voicemail by calling it directly. Here are the directions to do it if the voicemail is not working on the iPhone.

  • Go to your iPhone’s keypad. 
  • Press 1 and hold it for a couple of seconds.Call your voicemail
  • Now, you may check the voicemail on your iPhone if it is not working.

Fix 9: Force close the phone app and open it again

You may close the phone app and reopen it to fix the voicemail on the iPhone not working problem. The following is the way to do it.

  • Swipe up to view all your open applications.
  • Swipe up once more.

If you are using iPhone 8 or earlier, you may press the home button twice and then swipe up again. Close the phone and relaunch it to check if the problem is gone or still the voicemail is not working on iPhone.


Fix 10: Get in touch with Apple Support

If none of the above fixes help you fix the iPhone voicemail not working error, the issue may require expert assistance. Hence, you may contact Apple Support to solve the problem. To get Apple Support’s help you may visit the official website or go to the nearest Apple Store.

Also Read: [FIXED] Last Line No Longer Available on iPhone


Voicemail Not Working on iPhone: Fixed

Through this article, we discussed the possible solutions to the iPhone voicemail not working problem. You may try them sequentially till the issue is resolved.

If you know any other better way to solve the issues due to which you are not getting voicemails on your iPhone, you may share it via the comments section. You may also drop us a comment in case of any doubt or confusion regarding this write-up.

Lastly, we hope you will remain in touch with us for more tech updates and information.

1 Comment
    Hamilton says: Reply
    May 28th 2020, 8:15 am

    Thanks for sharing the blog. I really like your article. Each & every point you mention clearly. Thanks.

Leave a Reply Cancel reply

Your email address will not be published. Required fields are marked *

Sidebar Image bit G ad1

Latest Posts

  • Best VirusTotal Alternatives for windows in 2026 
    by Dikshika Singh / April 30, 2026
  • Best Ways to Fix Facebook Session Expired Loop Error  (1)
    Best Ways to Fix Facebook Session Expired Loop Error 
    by Gunjita Sompura / April 28, 2026
  • React vs Vue
    React vs Vue Detailed Comparison in 2026
    by Gunjita Sompura / April 23, 2026
  • Top Image Resizing software for Windows PC 
    by Dikshika Singh / April 21, 2026
  • How-To-Download-and-Install-Windows-Fax-And-Scan-In-Windows-11
    How To Download and Install Windows Fax and Scan in Windows 11
    by Dikshika Singh / April 15, 2026

Categories

  • Cyber Security
  • Driver Updater
  • Entertainment
  • Fitness
  • Games
  • How To
  • laptop
  • OS
  • Reviews
  • Tech News
  • Tips & Tricks
  • Top 10
Sidebar Image bit G ad1
Instagram Introduces New Features to Reduce Online Bullying Instagram Introduces New Features to Reduce Online Bullyingby Prachi Dani / May 18, 2020
How to Use Google Authenticator For Your Facebook Accountby Prachi Dani / May 20, 2020How-to-Use-Google-Authenticator-For-Your-Facebook-Account
TechPout Footer Logo

We at TechPout promise to put forth stories that help people to learn and simplify their digital life. Our purpose is to share the true essence of technology with our tech-loving community.

Useful Links

  • About Us
  • Contact us
  • Privacy Policy

Popular Posts

  • Best PC Optimizer Software
  • Best Mac Cleaner Apps
  • Best Driver Updater
  • Duplicate Photo Finder and Cleaner Software
  • Best Free Movie Download Sites
  • Best IPTV Players

Follow us

Copyright © 2026 www.techpout.com. All rights reserved
DMCA.com Protection Status