How to Fix The Requested URL Was Rejected Error (FIXED)
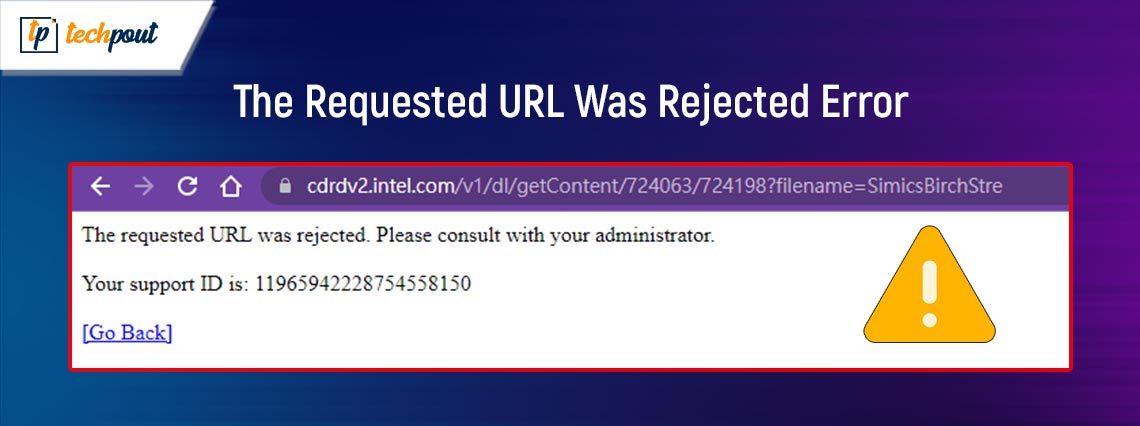
If you are also getting the error stating The Requested URL Was Rejected, repeatedly, and want to fix the same with ease, then follow the solutions provided in this simple guide and fix the error once and for all.
“There was a problem with the URL you requested. I would ask that you check with your system administrator.” When you attempt to visit a website, you will see this error. There are a variety of potential causes for this error to occur for you. The vast majority of these issues are amenable to simple solutions. Even if you go to a reputable website, you still could run into this problem for a variety of reasons that are going to be covered later on in this article.
If you keep coming across this error, our recommendation is that you go through the full tutorial and implement the suggested remedies in order to resolve the issue. Okay, let’s get down to business.
Ways to Fix The Requested URL Was Rejected
Here are some of the most trusted and tested ways to fix The Requested URL Was Rejected error on any browser. Just follow the guide closely, execute all the solutions, and fix the error with ease.
Method 1: Perform a Reset of the Router.
In the event that you see The Requested URL Was Rejected problem, a fundamental solution that you may use is to restart your router. If you do so, it will assist address the connection troubles that have been occurring between your computer, your router, and your internet connection. This may fix the issue, allowing you to once again access the sites you need.
By pushing the Power button located on the device, you can reset the majority of routers. One further method for achieving this goal is to first turn off the power switch on your router and then to turn the switch back on. You may be able to conduct the reboot operation on some routers by going to the settings page of the device using your web browser and selecting Restart The Router or an option that is functionally equivalent.
Also Read: Fixed: err_internet_disconnected Error in Google Chrome
Method 2: Keep Your Web Browser Up to Date.
If the problem you’re having does not go away and you are still wondering how to fix The Requested URL Was Rejected; the basic flaw in your web browser can be to blame. You won’t be able to address these difficulties on your own, but you can cure them by bringing the version of your browser up to date, which will also fix the flaws.
Bringing all of your web browsers up to date is not only simple but also completely hassle-free. Follow the steps below to know more:
Google Chrome
Follow the steps below to update the browser to its latest version:
- Choose Help > About Google Chrome from the menu that appears when you choose the three dots located in the upper-right corner of Chrome.
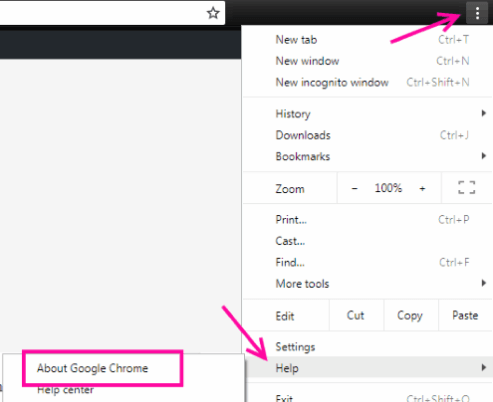
- Give Chrome permission to look for and install the most recent updates.
- Please restart your web browser.
Firefox from Mozilla
Follow the steps below to update the browser to its latest version:
- Click the hamburger menu with the three horizontal lines in the upper-right corner of Firefox, and then choose Help > About Firefox.
- Give Firefox permission to locate and install the most recent updates.
- You need to restart Firefox.
Microsoft Edge
Follow the steps below to update the browser to its latest version:
- Launch Edge, enter the following URL into the address box, and then hit the Enter key:
edge://settings/help - Wait for Microsoft Edge to locate the available updates and install them.
- Restart Microsoft Edge.
Also Read: How to Fix WiFi Connected But No Internet on Windows 10, 11 PC
Method 3: Take Your Website Off The Managed Sites List On Your Personal Computer.
Your Windows computer will preserve a list of websites that are unable to set cookies in your web browsers. You need to go over this list and make sure the website you’re attempting to get to isn’t on it if you want to access it. If your website is on the list, removing it will fix the issue for you and solve your problem. This is one of the most reliable ways to fix The Requested URL Was Rejected.
- Press the Win+S keys, search for Control Panel, and press Enter.
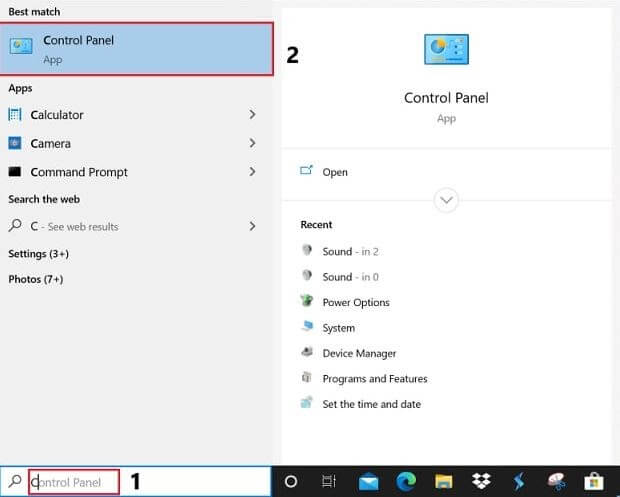
- Navigate to the Internet Options menu in the Control Panel by going to Network and Internet.
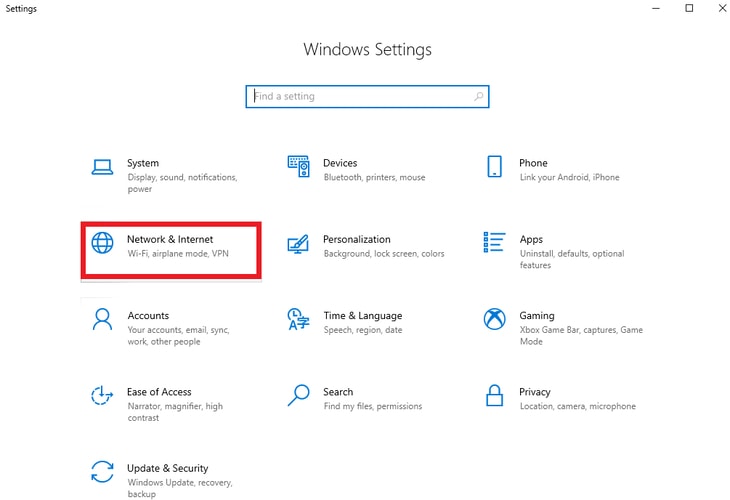
- Click the Privacy tab, then click Sites in the menu that appears.
- Select your website from the list, and then choose the Remove option.
- Click the OK button at the bottom.
Method 4: Include Your Website on the List of Trusted Sites on Your Personal Computer.
The fact that you are using a Windows computer may be one of the factors contributing to the fact that you are seeing The Requested URL Was Rejected error on your browser. Adding the URL of your site to the list of trustworthy sites on your operating system is one technique to get around this issue.
- Startup Control Panel, go to the Network and Internet menu and then click Internet Options.
- You may access the Sites tab by going to the Privacy menu, selecting Trusted sites, and then selecting Sites.
- After entering your website’s URL in the text area, click the Add button.
- Select Close, then Apply, and finally OK from the menu.
Also Read: How to Fix Slow Internet Windows 10 and 11
Method 5: Clear the Cache in Your Web Browser’s DNS settings.
Your web browser, just like your computer, saves the DNS cache in order to speed up the process of visiting websites. It is recommended that you remove this cache as well in order to fix the issue with “The Requested URL Was Rejected.” Error message in the browser that reads “Please Consult With Your Administrator.” Alternatively, you can also take the help of a PC cleaner software for this task.
Google Chrome
To clear the DNS on your browser, follow the steps provided below:
- Launch Google Chrome and go to the following page:
chrome://net-internals/#dns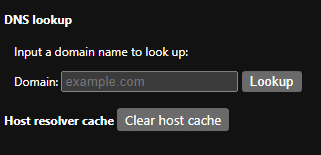
- To clear the cache for the host, click the button.
Mozilla Firefox
To clear the DNS on your browser, follow the steps provided below:
- Launch Mozilla Firefox and go to the following link:
about:networking#dns - Select “Clear DNS Cache” from the drop-down menu.
Microsoft Edge
To clear the DNS on your browser, follow the steps provided below:
- Launch Microsoft Edge and go to the following page
edge://net-internals/#dns - Choose to clear the cache for the host.
Method 6: Clear the DNS cache on your Windows Computer.
Your Windows computers both save a DNS cache, which assists your browsers and other applications in turning domain names into IP addresses as rapidly as possible. This cache may sometimes become faulty, which will prohibit your applications from connecting to websites. This is one of the main reasons why The Requested URL Was Rejected error appears.
Your computer may be experiencing issues due to DNS cache, but thankfully, there is a simple solution to these issues. You may address all of your problems by clearing the cache for your current DNS configuration. After that, while you visit other websites, your computer will restart the caching process.
- Open the Start menu on your Windows device, go to the Command Prompt entry, and then open the application.
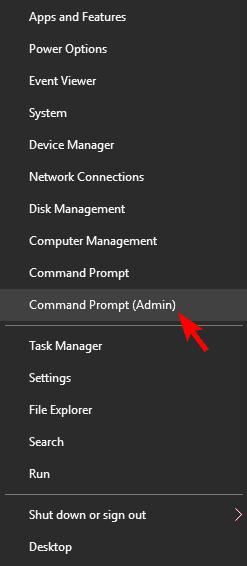
- In the CMD window, type the following command and then hit Enter
ipconfig /flushdns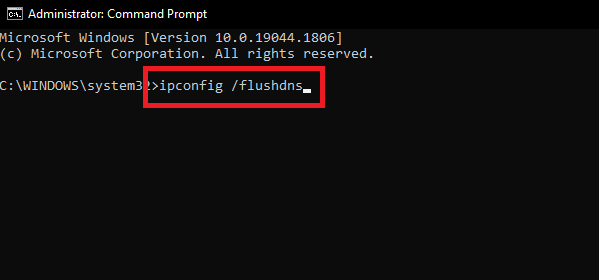
The Command Prompt has just finished clearing your DNS cache.
Method 7: Erase any Cookies and Cache Already Present in Your Web Browser.
You could get the message for a number of reasons. The reason you are seeing the message is that the cookie for your website in your browser is broken. There might be a number of causes for this. So, to answer how to fix The Requested URL Was Rejected, you may be able to remedy it by clearing off all of the cookies stored in your browser. When you do this, the website you’re using will generate a new cookie and store it in your browser.
Because using the following approach will destroy all of your previously saved cookies, you will need to remember to log in to any websites that need you to do so. All you need to do is close all the existing tabs on the browser and open a new one. Press the Ctrl+Shift+Del keys, select every item in the history, and Clear the history.
Also Read: How to Repair Internet Connection in Windows 10/8/7 PC
How to Fix The Requested URL Was Rejected: Explained
So, that’s all we had to share with you. With the help of the solutions provided above, you can easily get rid of the errors related to The Requested URL Was Rejected message. For queries and more, use the comments sections below and get back to us. Also, floor our social media pages and subscribe to our newsletter.


