Windows Couldn’t Automatically Bind The IP Protocol Stack To The Network Adapter (Fixed)
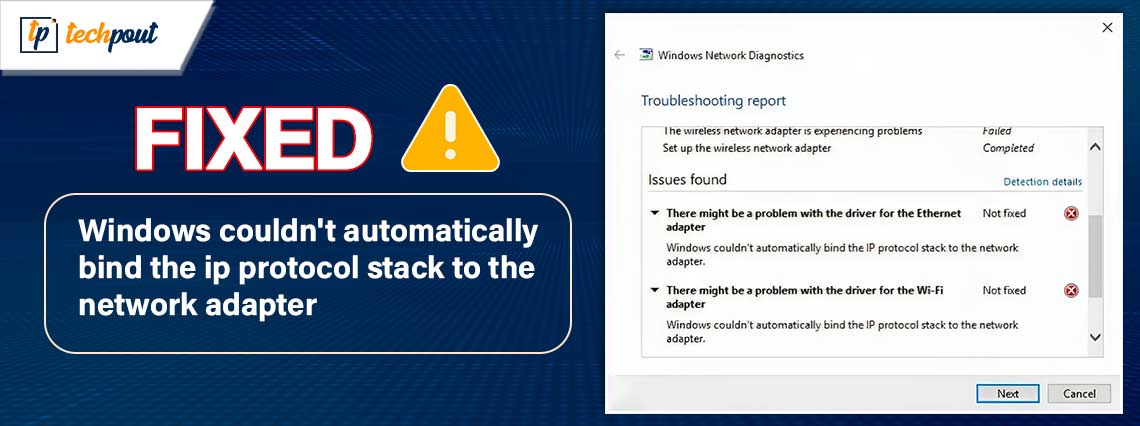
If the error message “Windows could not automatically bind the IP protocol stack to the network adapter” appears in the Network Diagnostics application of your Windows 10 computer, you should read this article in order to resolve the issue.
Windows 10 Troubleshooters are often capable of immediately fixing any issues that may arise. Nevertheless, they are only able to display mistakes and cannot correct them. If you are experiencing issues connecting to the Internet, a Windows troubleshooter may display an error message that reads as follows:
Windows couldn’t automatically bind the IP protocol stack to the network adapter.
Among the many potential reasons for this issue, an outdated network adapter driver is one of the potential factors that might be responsible for this error. Therefore, in order to resolve this issue, you need to update the network adapter drivers. In addition, restoring the network adapter properties to default, clearing the DNS cache, and resetting the IP address also do the trick for you. This tutorial provides several different solutions to the problem of the error message “Windows could not automatically bind the IP protocol stack to the network adapter.”
Fixes For Windows Couldn’t Automatically Bind the IP Protocol Stack To Network Adapter
Below are some tried and tested solutions that you can consider in order to fix Windows couldn’t automatically bind the IP protocol stack to network adapter error on Windows 10, 11.
Solution 1: Restoring the Properties of Network Adapter Settings to their Default State
First things first, let’s make sure that there are no additional network objects that are causing interference with the connection other than the ones that are considered to be typical. There is a good chance that you are experiencing this problem because a third-party network (a Virtual Private Network, a Virtual Machine Networking driver, or anything else) is the source of the malfunctioning wireless connection that you are experiencing.
In most cases, you will be able to address any form of interference of this type by making sure that the desired Wi-Fi connection is only utilizing the necessary components that it requires. In order to do this, here is a quick manual:
Step 1: To open the Run box, press the Windows + R key simultaneously. After that, input “ncpa.cpl” in the Run box and press the Enter key from your keyboard to launch the Network Connections.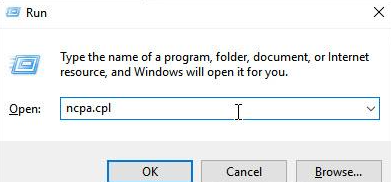
Step 2: To access the properties of Wi-Fi/ wireless network controller/ adapter that is not functioning properly, right-click on it inside the Network Connections tab and choose Properties.
Step 3: On the page that displays Wi-Fi Properties, check to see that you are now on Networking tab. The next step is to click the OK button once you have finished deactivating the checkbox that is linked with each item that’s not stated below.
Note: However, before you proceed with this approach, you should first take time to snap a picture of your current setup. This will allow you to determine which settings you should return to in the event that this method does not work.
File and Printer Sharing Software for Microsoft Networks
Quality of Service Packet Scheduler
The Link-Layer Topology Discovery Responder
Internet Protocol Version 4 (TCP/IPv4)
Link-Layer Topology Discovery Mapper I/O Driver
Internet Protocol Version 6 (TCP/IPv6)
Client software for Microsoft Networks
Step 4: Click on the OK option to save changes.
Step 5: Restart your computer and try to test the issue.
Please go to the next technique below if you continue to get the problem message “Windows could not automatically bind the IP protocol stack to the network adapter.”
Also Read: Windows Could Not Find Driver for Your Network Adapter (FIXED)
Solution 2: Clear the DNS Cache and Reset the IP Address
Another solution to fix Windows couldn’t automatically bind the IP protocol stack to the network adapter on Windows 10, 11 PC is to reset the IP address and clear the DNS cache. For this task, you need to follow the steps shared below:
Step 1: To launch the Run dialog, press the Windows + R key simultaneously.
Step 2: In order to launch Command Prompt as an administrator, type cmd and then hit Ctrl, Shift, and Enter, respectively.
Step 3: To begin, execute each of the commands that are listed below in sequential order.
netsh winsock reset
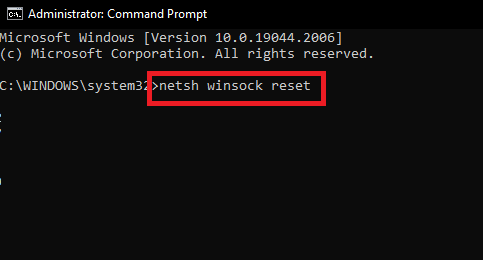
netsh int ip reset
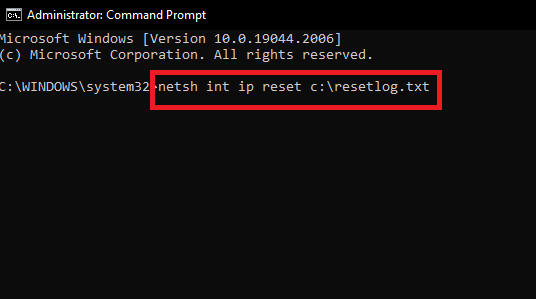
Step 4: Restart your computer device.
Step 5: Launch the Command Prompt once again while logged in as the administrator.
Step 6: Afterwards, type the commands that are listed below.
ipconfig /release
ipconfig /flushdns
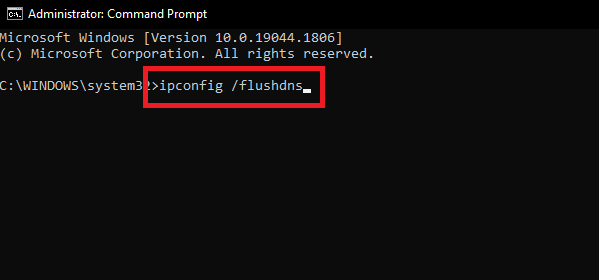
ipconfig /renew
Step 7: Restart your own computer. After the system has been restarted, check to see whether the problem has been resolved. If not, then try the next solution.
Also Read: Windows Could not Prepare the Computer to Boot into the Next Phase of Installation: FIXED
Solution 3: Adjust the Settings for the WLAN AutoConfig Service
Above solution didn’t work for you? Nothing to worry about, this might help you resolve Windows couldn’t automatically bind the IP protocol stack to the network adapter on the PC. By modifying the WLAN AutoConfig Service’s settings, you can get rid of this problem. Here is how to do that:
Step 1: On your keyboard, press Windows and R keys to launch the Run terminal.
Step 2: To access the Services application, type Services.msc and then click the OK button.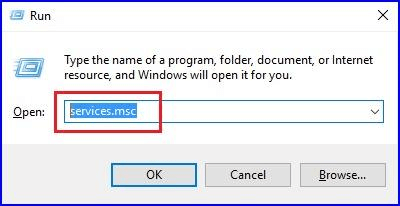
Step 3: To access the Properties of the WLAN AutoConfig, locate it and then double-click the same.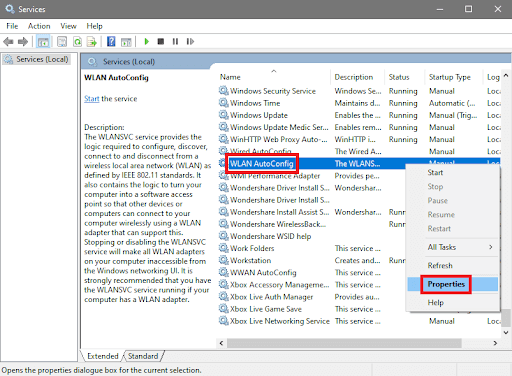
Step 4: You should choose the Automatic Startup type.
Step 5: To save the changes, click the OK button.
Also Read: Windows Could Not Automatically Detect This Network’s Proxy Settings
Solution 4: Update Your Network Adapter Driver
None of the above-provided suggestions worked? Don’t panic, by updating your outdated network adapter driver you can fix the problem. You can either update the network driver manually or automatically. For manual driver updates, you will have to visit the official website of your network adapter manufacturer and then download & manually install the driver. This is time-consuming and error prone especially for newbies. So we recommend Win Riser Driver Updater to automatically install all the available drivers.
Win Riser is the program that is both the quickest and most dependable when it comes to installing and upgrading Network Drivers. One button is all that is required to install the latest driver on a computer with Win Riser. The vast database that the application offers is the feature that attracts the most individuals.
The Win Riser software provides access to drivers for a wide variety of different devices. Because the updates are obtained directly from the manufacturer’s website, you do not need to be concerned about viruses or any other potential dangers.
Here is how to use Win Riser to install the latest Network Adapter driver for PC:
Step 1: Click on the Download button provided below to download the setup of Win Riser.
Step 2: Follow the on-screen instructions to finish the installation.
Step 3: Once installed, launch it on your device and let it perform a full system scan.
Step 4: Check the scan results and click on the Fix Issues Now option.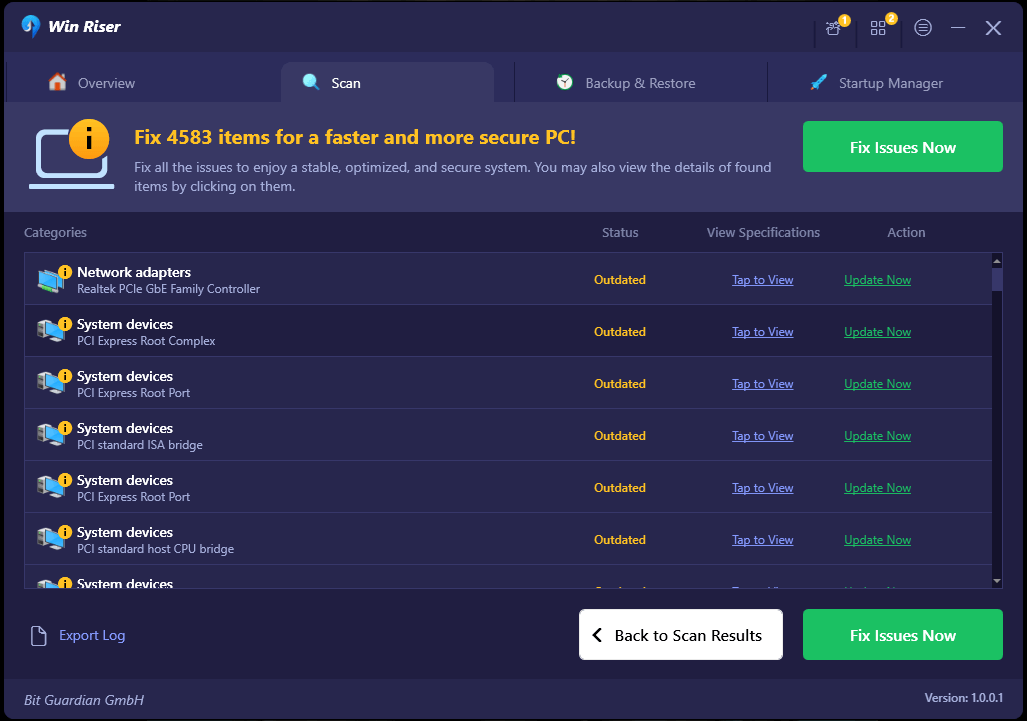
This will install all pending driver updates in one go including the network driver. To apply for new drivers, you need to restart your PC.
Also Read: [Fixed] SFC Scannow Windows Resource Protection Could Not Perform the Requested Operation
How to Fix Windows Couldn’t Automatically Bind the IP on Windows PC: Explained
Even if none of the options worked, you always have the option to execute a System Restore in order to restore the operating system to a prior, more stable state. Windows will restart your computer and restore it to the condition that you have chosen.
These are the several approaches that you may take in order to resolve the error saying Windows couldn’t automatically bind the IP protocol stack to the network adapter. If you have any questions or recommendations, please do not hesitate to write them down in the comments box below.
For more tech-related information, you can subscribe to our Newsletter and follow us on Social Media.

