The Local Device Name is Already in Use in Windows 10 (FIXED)
The network drive problem you are struggling with is easily solved with the help of the solutions given in this article.
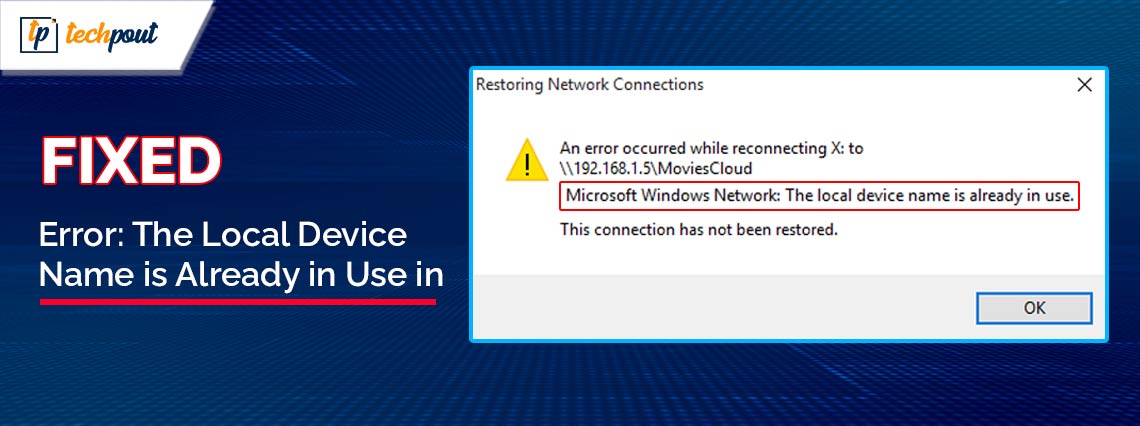
Are you experiencing the “The local device name is already in use” error in Windows 10/11? If yes, you are not alone in struggling with this issue. Many other users with network-based systems have reported this frustrating problem when trying to access a network drive.
However, let us be the bearer of the good news that this problem is effortlessly solved through the fixes shared in this article. Since it is always better to understand what may have caused an issue before trying to fix it to ensure smooth troubleshooting, let us first look at the possible causes of the error.
Causes of the “The Local Device Name is Already in Use” Error
The following factors may have caused the “This PC name is already being used in Windows 10” error you are experiencing when accessing a mapped drive on your computer.
- The network drive mapping process is not performed correctly
- No proper drive letter is assigned to the network drives or devices
- Network features, such as file and printer sharing are disabled in the network or firewall settings
- The network server does not have adequate space available
After going through the reasons you have bumped into the error, let us walk you through the best possible solutions.
Fixes for Windows 10/Windows 11 “The Local Device Name is Already in Use” Error
Below are the tried and true solutions you can apply if you are experiencing problems when using the mapped network drive.
Fix 1: Use the Command Prompt to perform the network drive mapping
Network drive mapping may not have gone well on your system. The assigned drive letters may have conflicted or gone missing completely, resulting in the “The local device name is already in use” Windows 10/11 error. However, remapping the drive with the Command Prompt can fix this issue. Hence, here are the steps to do this.
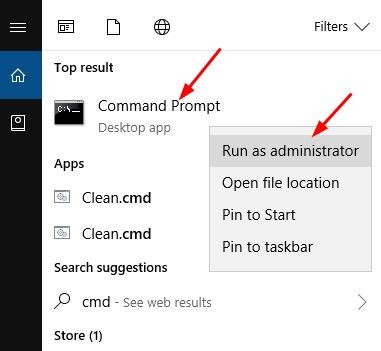
- Firstly, you are required to open the Command Prompt with administrative privileges. You can do this by typing cmd in the Windows search and choosing Run as administrator for the Command Prompt.
- After opening the Command Prompt, input net use D /delete in the command line and press Enter. Please remember to replace D with the drive letter you wish to remove.
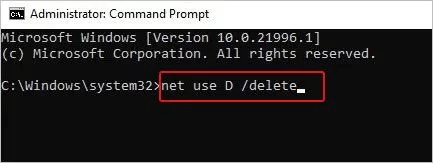
- The above command removed the existing drive letter. You can now remap your drive by entering the net use D: \\server\share /user:username password command in the Command Prompt utility. Please make sure to replace the drive letter with the desired network drive, along with the password and username when doing this.

- Lastly, exit the Command Prompt window and reboot the system.
Also Read: Local Security Authority Protection Is Off: Fixed
Fix 2: Enable the Firewall’s File and Printer Sharing settings
You may encounter annoying errors with shared drives if the File and Printer Sharing settings are disabled in your Firewall. Hence, you can follow these directions to enable this setting to solve the problem.
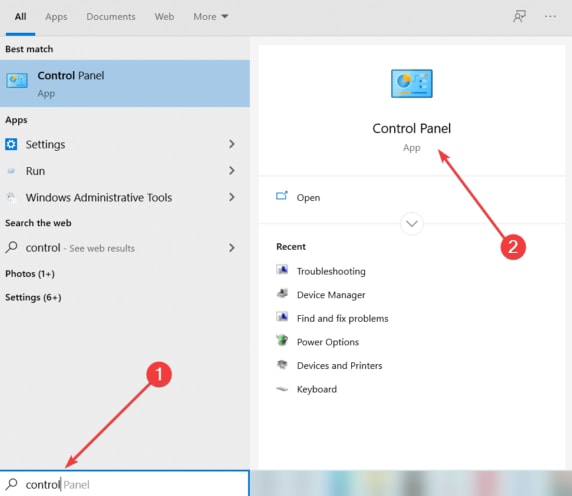
- The first step is to open the Control Panel on your computer. You can open it by entering the Control Panel in the Windows search bar and selecting the first search result.
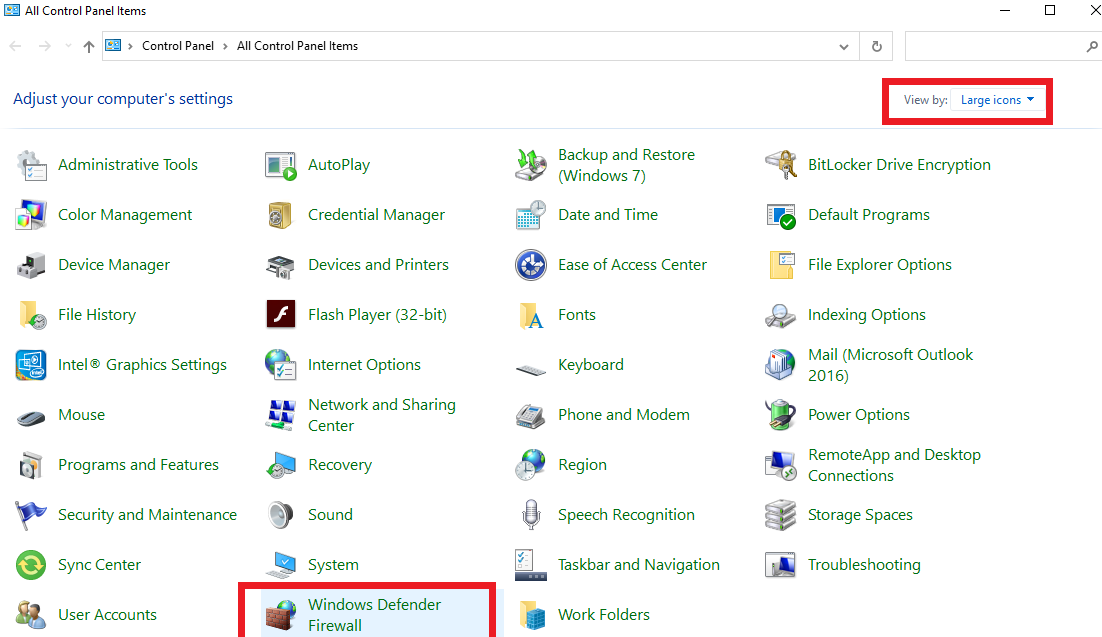
- After opening the Control Panel, change its view to large or small icons.
- Next, select Windows Defender Firewall from the options available on your screen.
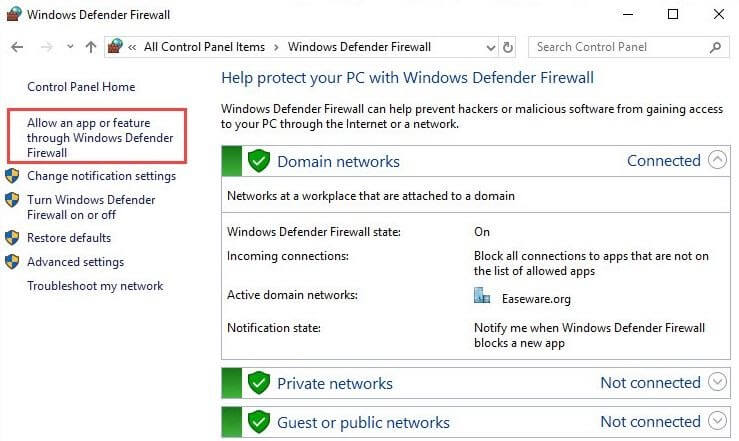
- The Windows Defender Firewall window will now appear on your screen. You can select the option to Allow an app or feature through Windows Defender Firewall from the left panel of the on-screen window.
- Select Change Settings from the upper-right corner of the on-screen Windows Defender Firewall window.
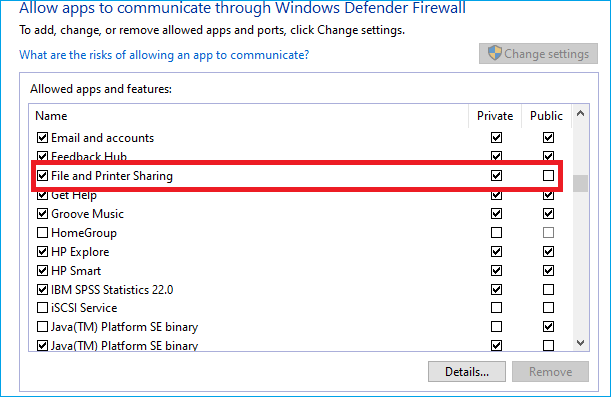
- Checkmark the File and Printer Sharing box and enable it for Public networks.
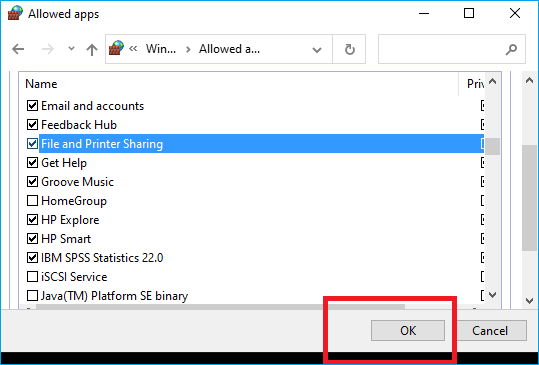
- Click OK to proceed to the next step.
- Lastly, reboot your computer to apply the changes.
Fix 3: Assign the drive letter correctly
Since an improperly assigned drive letter is also a reason the local device name is already in use and the connection has not been restored, you can re-assign the letter to fix the issue. Here are the step-by-step directions to perform this action.
- Firstly, use the Win+S keyboard shortcut to launch the Windows search and input Disk Management in the text box that appears.
- Secondly, select the first search result to open the Disk Management utility.
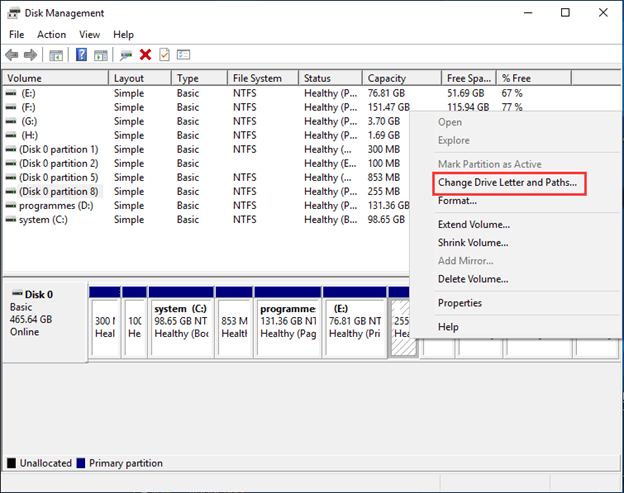
- In this step, you are required to right-click on the partition for which you want to change the letter.
- Next, select the Change Drive Letter and Paths option from the on-screen context menu.
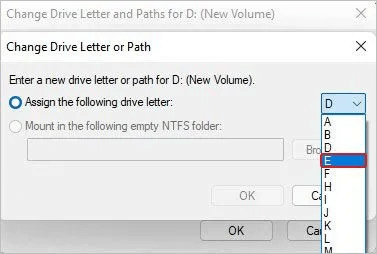
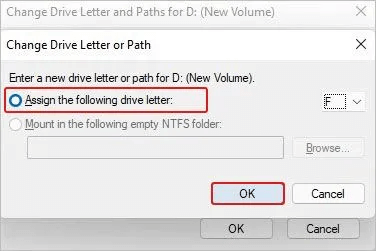
- A pop-up window will appear. Click on the Change button and choose a letter from the on-screen list of letters. Please remember to avoid selecting A or B as the drive letter, as older operating systems reserved these letters for floppy drives. Hence, choosing A or B may confuse older programs.
- Lastly, click OK to complete the drive letter assignment process.
Also Read: What is a BAK file and How to Open it on Windows
Fix 4: Reinitialize your browser
Your browser and network drive settings may conflict with each other, resulting in the Windows 10 “The local device name is already in use” problem. Hence, reinitializing the browser can solve your problem. You can follow these steps to perform the reinitialization.
- Firstly, input cmd in Windows search and select Run as administrator for Command Prompt.

- Next, input net stop “Computer Browser” in the command line and press your keyboard’s Enter key.
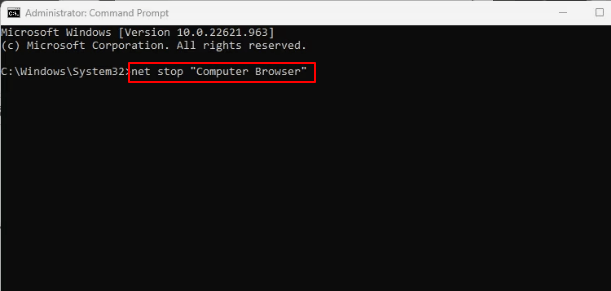
- After executing the command to stop the browser, input net start “Computer Browser” in the command line and press Enter.
- Lastly, close the Command Prompt window after performing the above steps.
Fix 5: Remove the MountPoints key from the registry
The MountPoints registry key is responsible for storing the data related to USB and other such devices. Deleting this key has fixed the problem for some users. Hence, you can remove this key to see if it does the trick by following these directions.
Note: Making changes to the registry can crash your system or cause data loss if performed incorrectly. Hence, remember to create a backup of your data before performing the below steps.
- Firstly, launch the Run tool using the Windows+R hotkey.
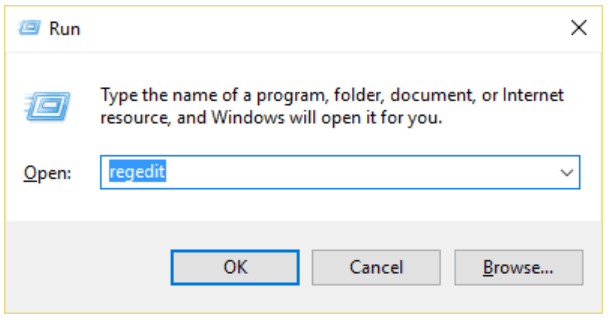
- Secondly, input regedit in the on-screen text box and press Enter/click OK to access the Registry Editor.
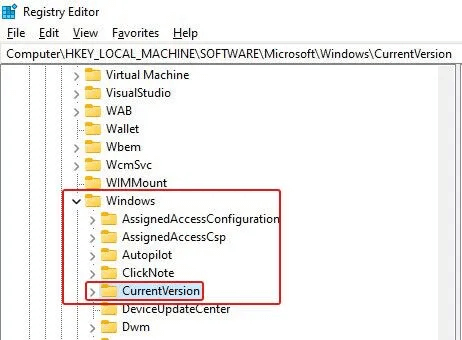
- After opening the Registry Editor, navigate to the HKEY_CURRENT_USER\Software\Microsoft\Windows path.
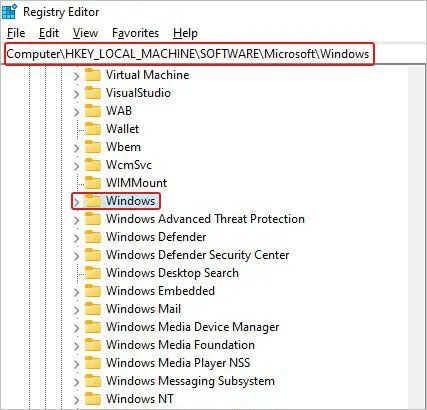
- You can now expand the Windows section and choose to access the CurrentVersion.
- In this step, expand the CurrentVersion, navigate to Explorer, and choose MountPoints2.
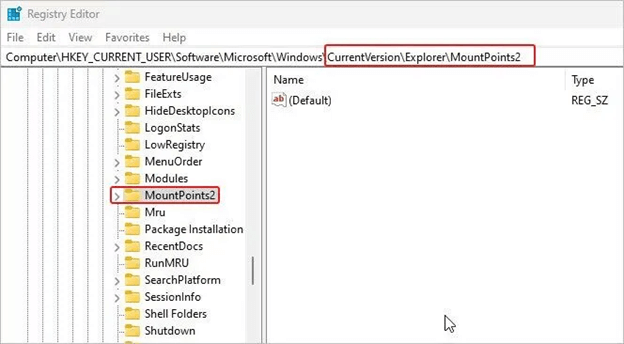
- You can now right-click MountPoints2 and choose Delete from the available options.
- Lastly, exit the Registry Editor and check whether or not the problem is solved. If you still get the local device name error, continue troubleshooting.
Also Read: How to Get Help in Windows 11 (Top 10 Steps)
Fix 6: Extend the drive partition
Not having enough network server space might have caused the problem you are trying to solve. Extending the network server computer’s root drive partition can fix the issue. If you have access to the server computer, you can use the best partition manager software to extend the partition.
The Local Device Name is Already in Use: Fixed
This article explained various tried and tested solutions to the Local device name or “This PC name is already being used” Windows 10/11 problem. You can start fixing the issue with the first solution and continue troubleshooting until the error disappears. In case of any questions or confusion, please use the comments section to leave a reply.
