Photo Viewer Not Enough Memory Error (FIXED)
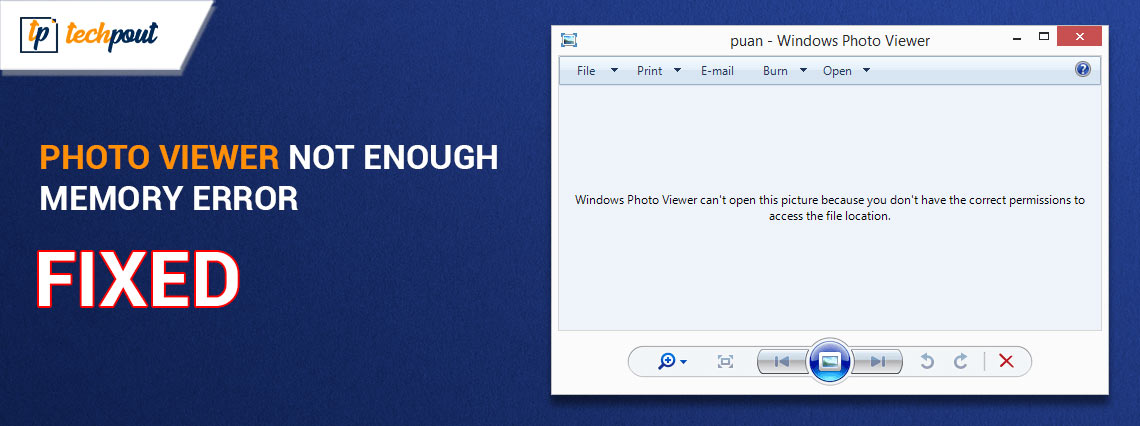
If your Windows device is also showing you the error stating Photo Viewer Not Enough Memory Error then you have come to the right place as this article lists and explains the best and proven methods to get rid of this issue with ease.
We all use the Photo Viewer to view different types of images. This integrated tool helps in viewing GIFs, JPGs, PNGs, and various other image formats with ease. However, there may be times when you are unable to view images as the tool shows a message reading-
This issue is quite annoying and may appear on your device repeatedly unless you do something about it. This entire thread of the blog is dedicated to fixing this issue.
In the coming sections of this guide, we will have a look at multiple solutions that can fix this issue and run the Photo Viewer with ease. So, without any further ado, let’s have a look at the solutions right away.
Solutions to Fix The Photo Viewer Not Enough Memory Error
Below are some of the best and tested solutions to fix the Photo Viewer Not Enough Memory Error with ease. Try to execute all the solutions one by one until the issue is resolved. So, let’s get solving.
Fix 1: Repair the Photo Viewer App
It’s possible that a missing or damaged file contributed to Microsoft Photo’s failure. This reason is quite frequent and may cause the Photo Viewer Not Enough Memory Error. Because Windows can inspect the app’s files and rectify the issue, you are able to make an attempt to repair the application. To do the same, take the help of the simple steps provided below:
- To launch the Settings window, press the Win key and the I key together.
- Choose Apps > Apps & Features from the upcoming menu.
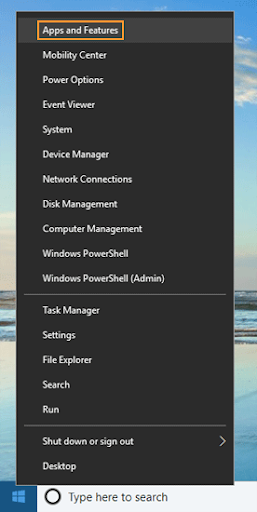
- Simply scroll down until you locate Microsoft Photos, then choose it.
- Select the Advanced Settings menu item.
- After clicking the “Repair” option, wait for the procedure to finish before continuing.
If, after completing all of the procedures, you discover that the issue is still there, you may reset the Microsoft Photo app by clicking the Reset button on the same interface. Resetting the application is another option for resolving issues that arise from limited memory. However, this action will reset it to its factory settings, so any changes you’ve made before to this point will be lost. Follow the next solution for a detailed procedure.
Also Read: Best Photo Recovery Apps
Fix 2: Reset the Photo Viewer App
Simply rebooting the ‘Photos’ app on the device will often fix the Photo Viewer Not Enough Memory Error Windows 10 if there is insufficient available capacity. By resetting the application, you may get it back to its original condition, which will remove any incorrect customizations and perhaps fix the memory problem. Let me walk you through the process of resetting everything step by step.
- Launch the Settings program by simultaneously tapping the Windows and I buttons on your keyboard.
- Locate the options labeled “Apps,” then choose one of them.
- Select the “Apps & Features” tab from the available tabs. The next step is to navigate down the list until you reach the Photos app, which should be located on the right panel.
- After clicking on the three dots, choose Advanced options from the drop-down menu that appears.
- Select all of the data associated with the app by clicking the Reset button.
The Photos app should, after being reset, return to the settings it had when it was first installed. After that, you may try opening photographs with Photo Viewer to check whether the error message “Photo Viewer can’t view this picture, not enough memory” goes away.
Fix 3: Make Some Modifications to the Color Management Palette
The first solution to fix the Photo Viewer Not Enough Memory Error in Windows 11 is to modify the Color Management tool. When you make adjustments to the Color Management tool, you ensure that the system uses the color palette that is compatible with the monitor. So, follow the below steps to make the required changes
- Press the Win+R keys to bring up the Run dialogue box.
- Type colorcpl.exe and press Enter thereafter.
- Under Devices, click the checkbox next to every ICC profile you want to delete and click Remove.
- Delete each and every profile that was found on the page.
- When you read “This color profile is the default profile for this device,” it means the device’s default color profile. In response to the “Are you sure you want to disconnect it from the device?,” click the Continue button.
- Next, choose the Advanced tab by clicking there.
- Under Device Profile’s dropdown list, choose the option that says “Agfa: Swops Standard.” This is the most crucial stage of the process! (The issue in Photo Viewer is due to the user selecting the system default option “System default (sRGB IEC61966-2.1),” which is the primary source of the problem.)
- Select the OK button.
Even after executing this solution, if you are facing the Photo Viewer error, then follow the next solution.
Fix 4: Close Unnecessary Apps on the Task Manager
Next, to fix the Photo Viewer Not Enough Memory Error Windows 10; ensure that your application has sufficient breathing space! Close the resource-intensive programs running in the background if you aren’t actively utilizing them. You may terminate these apps using the Task Manager on your computer. Please follow these instructions to exit programs using the task manager.
- To open the window for the task manager on your keyboard, press and hold the Control key, the Shift key, and the Escape key simultaneously.
- Find the apps that you wish to exit on the Processes tab of the window.
- To close one of the programs, right-click on it and then pick the End Task option. Microsoft Windows End-of-Task Task Manager
- It is necessary to repeat Step 3 for each of the programs that you want to quit. To leave the Task Manager, you must first pick the X symbol located in the corner of the window.
- Please restart the device.
Increase the size of your RAM storage if you find yourself using these programs on a regular basis.
If you still face the same error after executing the above solutions, follow the next solution.
Also Read: How to Store Your Photo Safely in a Windows PC
Fix 5: Update the Photo Viewer
If the Photo Viewer is outdated, then you are bound to face the Photo Viewer Not Enough Memory Error Windows 7. Hence, one of the best fixes to get rid of this error is to update the app. However, the procedure to update Photo Viewer is quite different from the one to update any other third-party app. Follow the below steps to know more:
- To launch the Settings window, press the Win key and the I key together.
- To access the Update and Security menu, you’ll need to scroll all the way down to the very bottom.
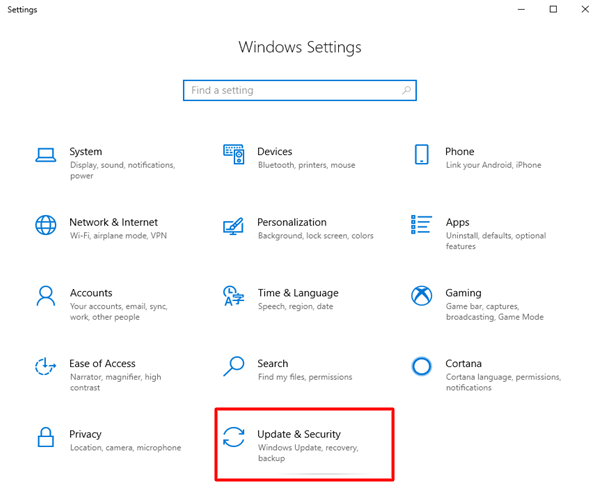
- Select Windows Update, and then on the right side of the screen, click the Check for Updates button.
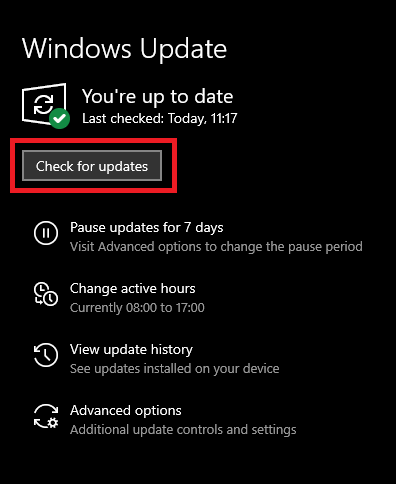
- After clicking the Install Updates button, you will need to wait for the procedure to finish.
- You may either choose to restart the computer using the prompt box that came after the update was complete, or you can manually choose Restart from the Start menu.
This method can readily fix the error for you. However, if the problem persists, follow the next solution.
Fix 6: Take the Help of the Windows Troubleshooter
Windows Troubleshooter is a Windows-integrated utility that helps you fix different kinds of errors appearing on the OS. Hence, the same can also help you fix the Photo Viewer Not Enough Memory Error in Windows 10. All you need to do is follow the series of steps provided below to fix the error:
- Combine the Windows key with the letter “I” on your keyboard. The “Settings” Window will afterward show up on the screen.
- As you scroll down, you will see a drop-down option. Select the Update and Security option from that menu.
- Choose Troubleshoot located in the sidebar on the left.
- Glance the sidebar that is located on the right. To get access, scroll down until you see the option that says “Additional troubleshooters.”
- Navigate your browser to the “Additional troubleshooters” area. To diagnose the problem, tap it.
- Please be patient as we bring this process to a successful conclusion. At the end of the process, you will be provided with the findings as well as some suggestions for ways to make the method better.
So, this is how you can update the app and fix the error. However, if the error still appears, you know what to do. Follow the next solution.
Fix 7: Use Another App to Open the Image
It’s possible that the Photo Viewer Not Enough Memory Error Windows 11 appears because the Photo Viewer is unable to open the image. In such a case, the only two options left with you are to either convert the extension of the image or use another app to open the same. The internet is loaded with multiple tools and programs that allow you to run various image extensions. You can either look for the image viewers for Windows on the internet or search for the specific image viewer for the specific extension.
If you wish to run the Windows Photo Player itself, then change the format or extension of the image using the next solution.
Fix 8: Convert the Image’s Extension to a Compatible One
The Photo Viewer Not Enough Memory Error in Windows 10 may be fixed by converting the picture to a format that is supported. This will ensure that the image is compatible with the viewer that is set as the default. It’s possible that the picture file you’re trying to open is in a format that the Photo Viewer can’t read, which is what’s producing the issue. In this instance, try converting the picture to a format that Photo Viewer is compatible with, such as GIF, TIFF, JPEG, PNG, BMP, WDP, or DIB. If this does not work, try using another image viewer. What you can do is as follows:
- Launch File Explorer, then go to the picture you want to convert and double-click it.
- Select “Open with” and “Paint” under the drop-down section that appears when you right-click the picture. The picture will load into the Paint program automatically, and the file size may be seen at the very bottom of your screen.
- To save the image as a PNG or JPEG file, go to the “File” menu and then click the “Save as” drop-down arrow.
- A new dialogue box will pop up, enabling you to pick a folder, change the file’s name, and choose the “Save as type” option. You should make sure that “PNG” or “JPEG” is selected as the “Save as type,” and then go to a folder that you will remember for later use.
Also Read: How to Fix Photos App Not Working in Windows 10, 11
Photo Viewer Not Enough Memory Error Windows 10: Solved
Regarding the matter of the accident at Photo Viewer Not Enough Memory Error Point, this concludes our communication with you on the subject. In the parts that came before, we went through some of the most incredible solutions to the problem of the Photo Viewer. Now, you will be able to open any image without any problems after implementing all of the methods presented above.
We are here to assist you in any way possible if you have any queries about this guide. You may ask us questions and get in touch with us by writing them in the comments box that has been given below. We will get back to you in a snap. If necessary, you may also submit your comments and recommendations pertaining to this Photo Viewer Not Enough Memory Error blog or the whole blog page. Please subscribe to our website in order to get further blogs of similar interest.
