How to Restore Missing Power Plans Options on Windows 10, 11
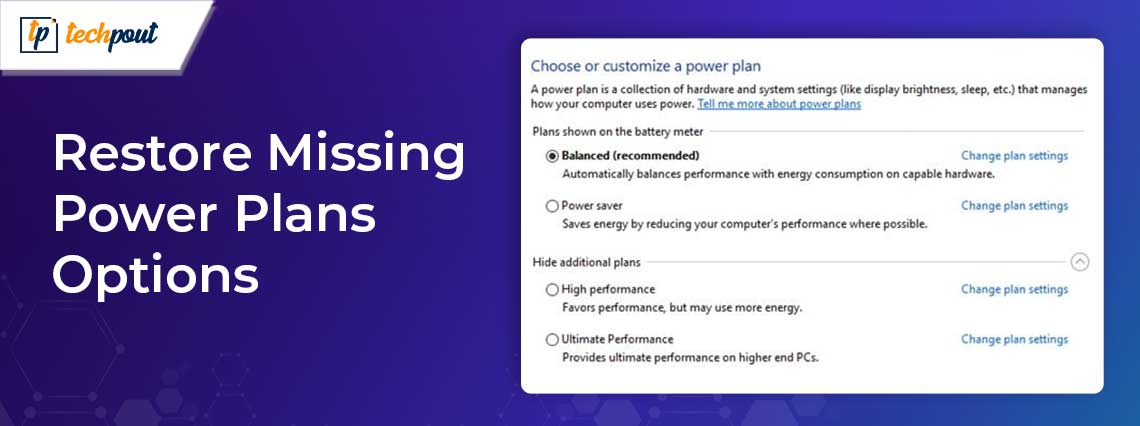
You can go through this guide to learn the effortless ways of restoring the Windows 10/11 power plan options to optimize your computer’s performance.
Windows computers boast configurations or a package of settings called power plans to determine and help customize your PC’s power consumption. These power plans go a long way toward saving energy and improving your system’s performance. However, you may need to restore the missing power plan options on Windows if any power plan is unavailable on your computer.
There are four in-built plans to manage power on Windows. These plans include a Balanced plan (saves power when you do not need full performance and offers it completely when needed), Power saver (reduces your screen brightness and device performance to save power), High performance (maximizes screen brightness and increases power), and the Ultimate performance plan (offers the best performance on higher end computers).
Though the ultimate performance plan is available only on Windows 11/10 Pro workstation editions, you can add it to any computer. Having all these plans on your device helps make the most of your PC.
Hence, this article guides you through the best possible methods to restore missing power plans on Windows 10 and 11.
Methods to Restore Missing Power Plans Options on Windows
You can apply the following ways to restore your missing Windows 10/Windows 11 power plans.
Method 1: Use the Command Prompt to restore missing power plan options
You can bring back the missing power plans through Command Prompt. Here are the steps to do it.
- To begin with, search Command Prompt on your computer using the search utility present on the taskbar.
- Secondly, right-click Command Prompt and select the Run as administrator option.
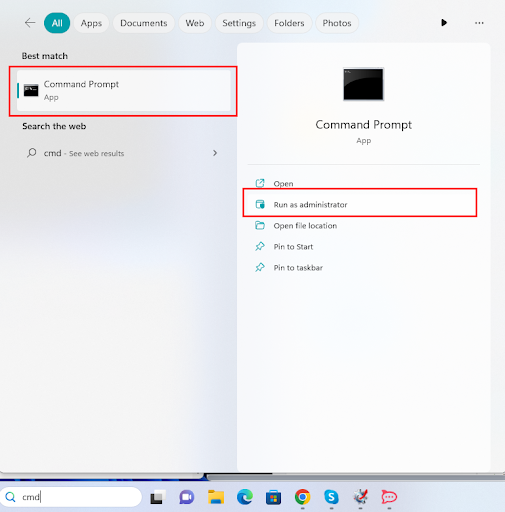
- After opening the Command Prompt as an administrator, input the following commands one after the other (press Enter after inputting each command).
powercfg -duplicatescheme a1841308-3541-4fab-bc81-f71556f20b4a
powercfg -duplicatescheme 381b4222-f694-41f0-9685-ff5bb260df2e
powercfg -duplicatescheme 8c5e7fda-e8bf-4a96-9a85-a6e23a8c635c
powercfg -duplicatescheme e9a42b02-d5df-448d-aa00-03f14749eb61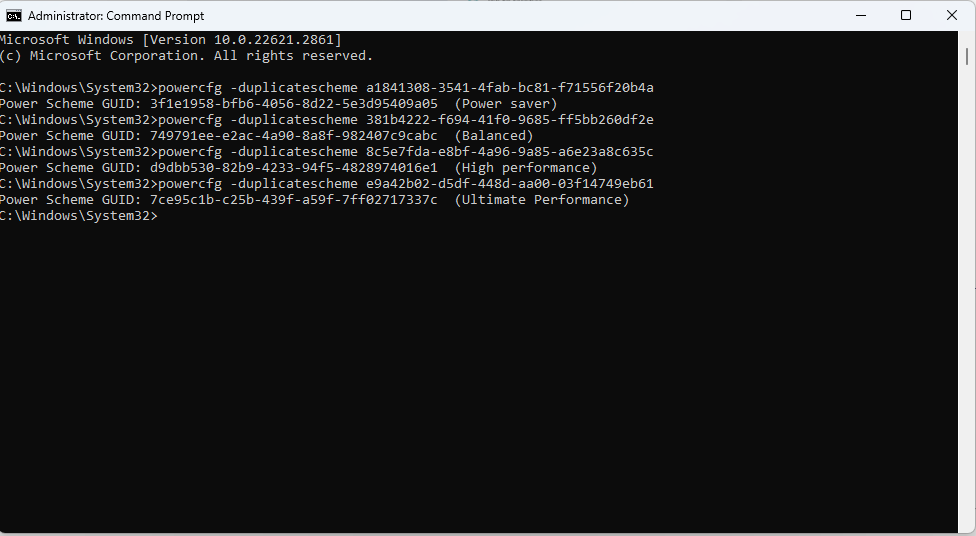
Note: The last command works only on Windows 10 versions released later than the 17101 build to restore the ultimate performance power plans.
- Lastly, get your computer restarted to complete the process.
Also Read: How to Fix Driver Power State Failure on Windows 10
Method 2: Use configuration files to bring back the missing power plans
You can import .pow files and then use them through Command Prompt to restore the missing power plans options on Windows 11/10. Here is the step-by-step process to do it.
- Firstly, get the ZIP file containing the power plans downloaded.
- Secondly, right-click the downloaded file to select Extract from the available options, and extract the files to any folder (remember to note the folder’s path).
- Now, open the folder where you extracted the file and navigate to the address bar present in the File Explorer.
- Select the path and use the Win+C shortcut to copy the selected path.
- Now, search for the Command Prompt and open it as an administrator.

- After opening the Command Prompt, input the powercfg -import “<Folder Location>\<power plan filename>.pow” command and press the Enter key.
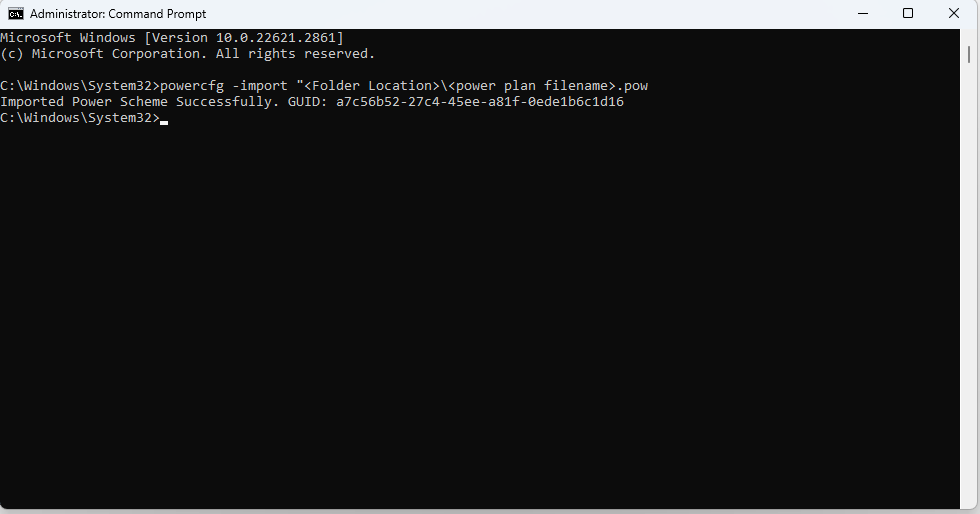
Note: Remember to replace the <Folder Location> with the folder’s path and <power plan filename> with the power plan file’s name. You can see the following screenshot as an example.
- You can now repeat the above steps for other power plans.
Method 3: Try tweaking the Windows registry
A cluttered registry can be a reason your power plans are missing. Hence, you can use the best registry cleaner software for Windows 10/11 to declutter your registry and follow these steps to restore the missing power plan options on Windows.
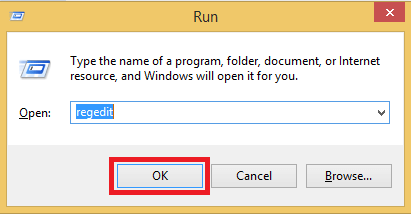
- Firstly, right-click the Windows icon on your taskbar and choose Run from the on-screen options.
- Now, type regedit in the on-screen text box and select OK.
- After opening the Registry Editor, navigate to the path HKEY_LOCAL_MACHINE\SYSTEM\CurrentControlSet\Control\Power.
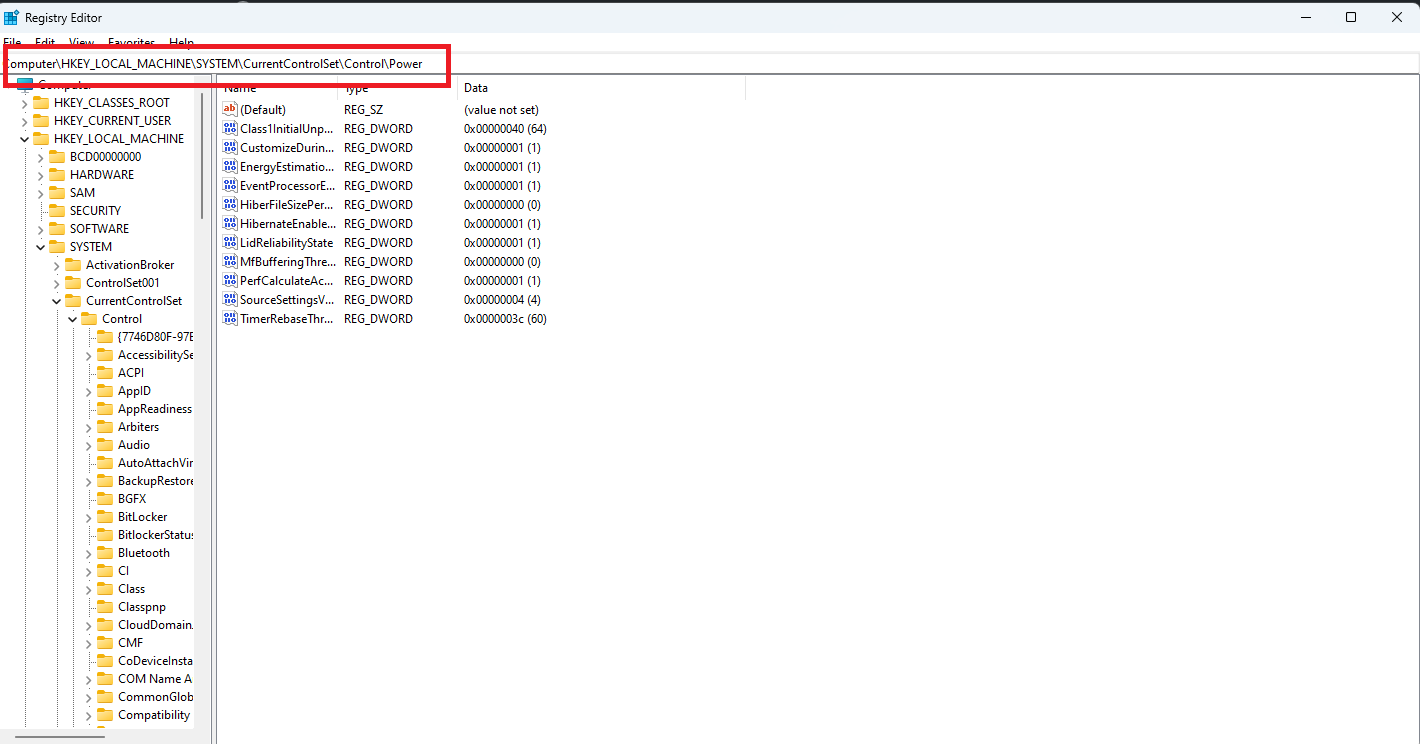
- Now, navigate to the Power folder.
- Double-click on the CsEnabled option.
- Input 0 in the on-screen Value data.
- Now, set the Base to Hexadecimal.
- Lastly, click OK to restore your power options.
Method 4: Use PowerShell to reset the default settings of your power plan
Since incorrect configurations may be a reason power plan options went missing on your computer, you can reset the power plan settings to restore them. Here are the steps to do it through Windows PowerShell.
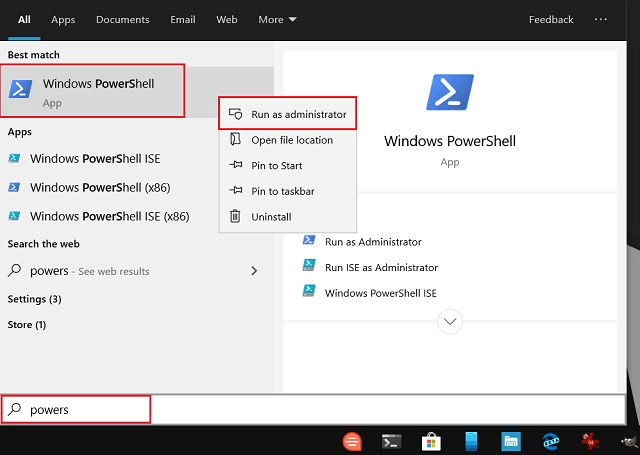
- To begin with, right-click the Windows icon.
- Secondly, choose the Windows PowerShell (Admin) from the on-screen options.
- Now, input the powercfg -restoredefaultschemes command in the PowerShell window and press the Enter key.
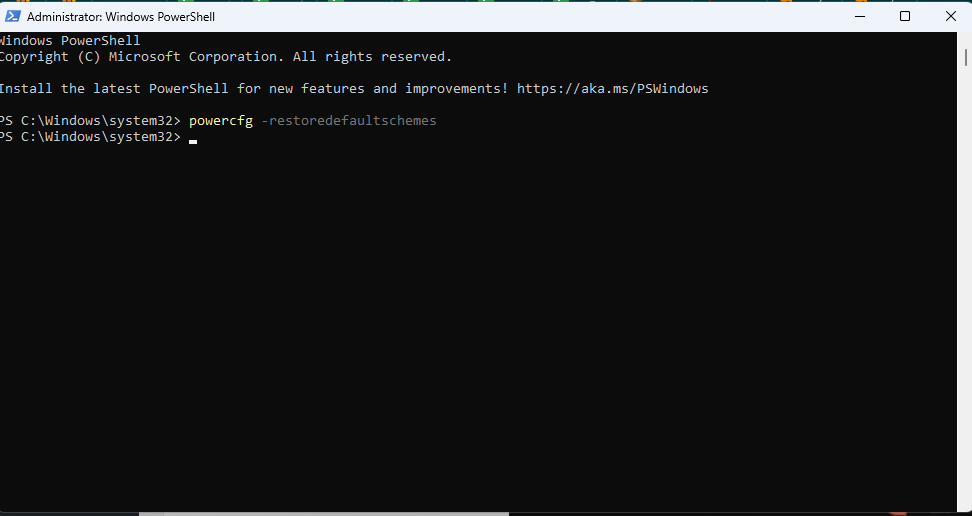
- Lastly, exit the PowerShell window after executing the above command.
Also Read: Best Laptop Battery Testing Software for Windows 10
Method 5: Try disabling the Modern Standby (SO)
If your system boasts Modern Standby (SO) compatibility, you should ensure the sleep state is not enabled. When enabled, the sleep state disables the default power plans to keep away the conflicts when your computer is in a low-power/idle position. Thus, disabling the Modern Standby (SO) can restore the missing power plans option on Windows. You can follow these steps to disable it.
- Firstly, search for Command Prompt and run it as an administrator.
- Secondly, input the reg add HKLM\System\CurrentControlSet\Control\Power /v PlatformAoAcOverride /t REG_DWORD /d 0 command in the Command Prompt window and press the Enter key.
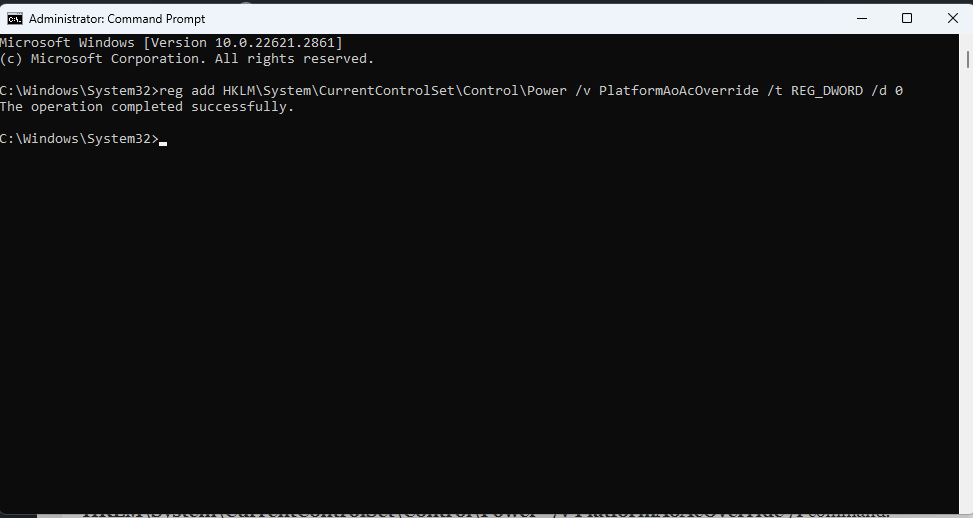
- Exit the Command Prompt window after executing the above command.
- Lastly, reboot your PC to complete the process.
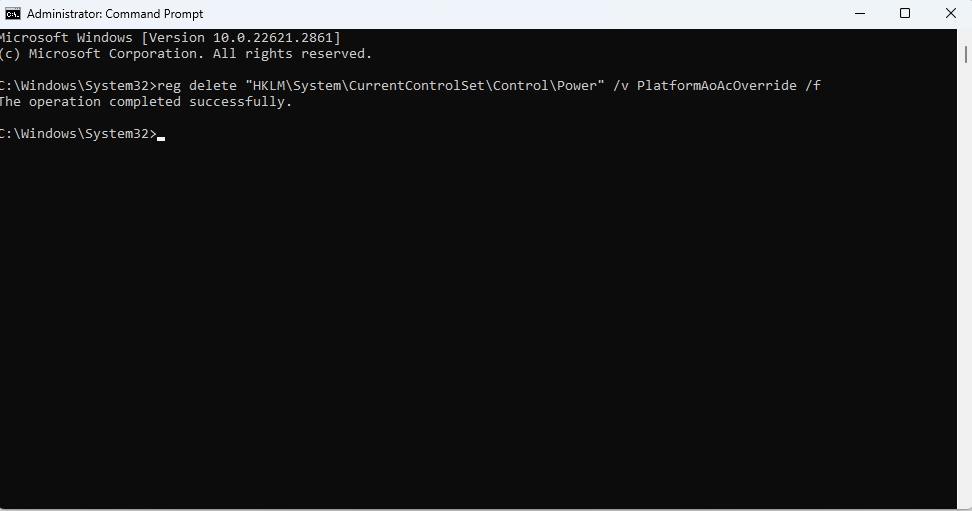
Note: If you experience Blue Screen of Death (BSOD) or other problems after disabling the Modern Standby (SO), you can re-enable it by executing the reg delete “HKLM\System\CurrentControlSet\Control\Power” /v PlatformAoAcOverride /f command.
Method 6: Try creating a custom power plan
Windows allows you to create a power plan to restore the power saver, high performance, or power saver option. Hence, you can follow these steps to get your desired power plan restored on Windows.
- Firstly, type Control Panel in the search box present on the taskbar.
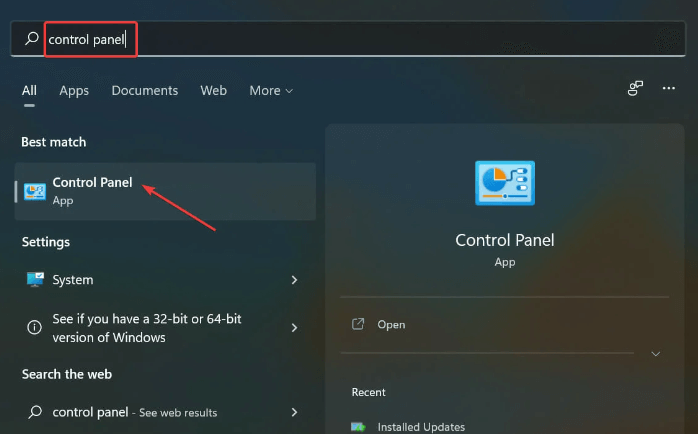
- Now, select the Control Panel from the search results to open it.
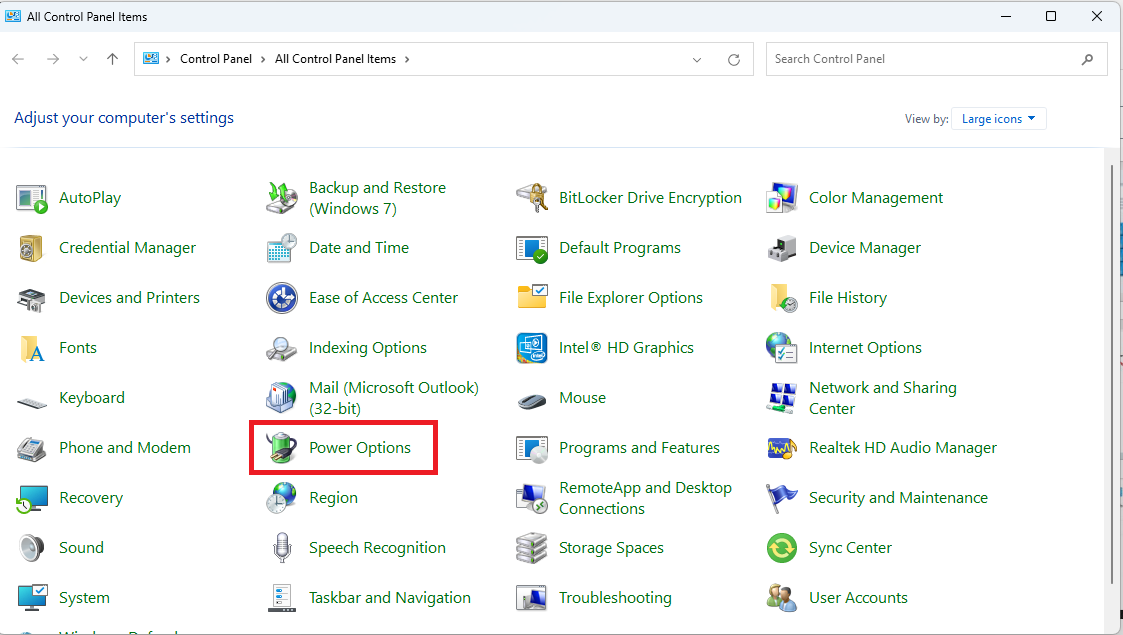
- Change the view to Large icons.
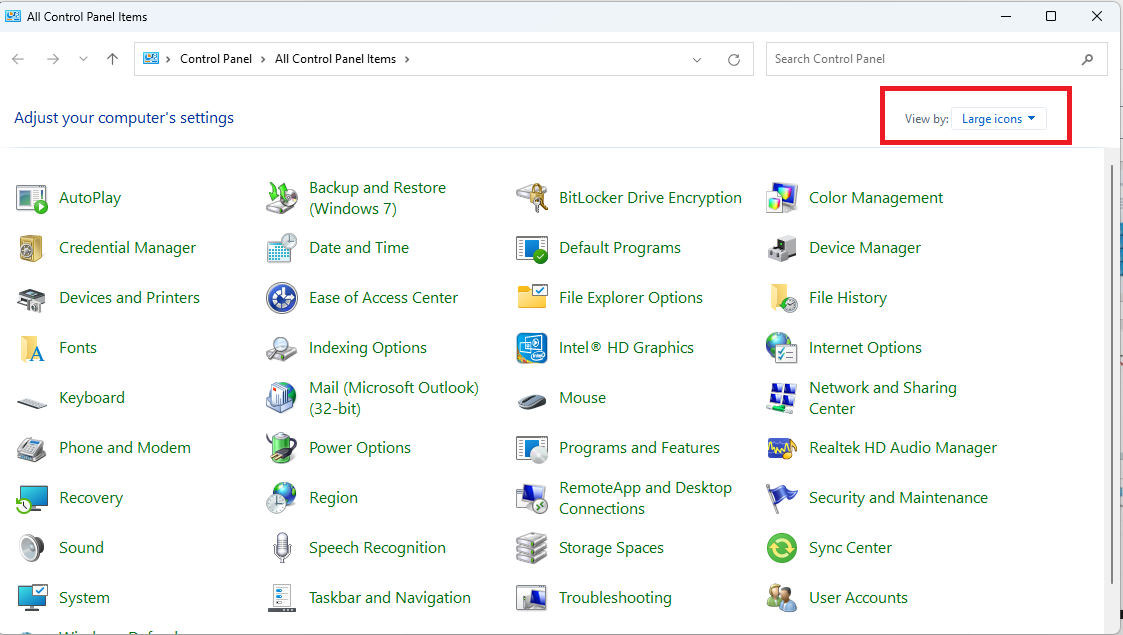
- Now, select Power Options from the Control Panel menu.
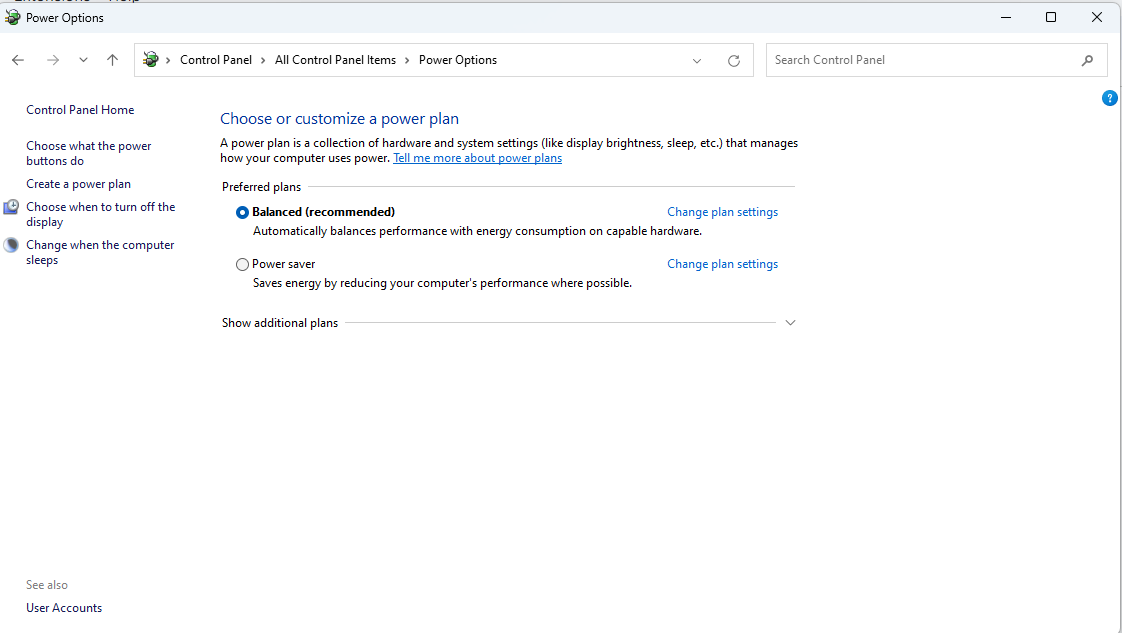
- Choose the option to create a power plan from the left panel of the power options window.
- Now, choose a power option, and input its name. For instance, name your power plan Power-Saving if you are selecting the Power saver plan.
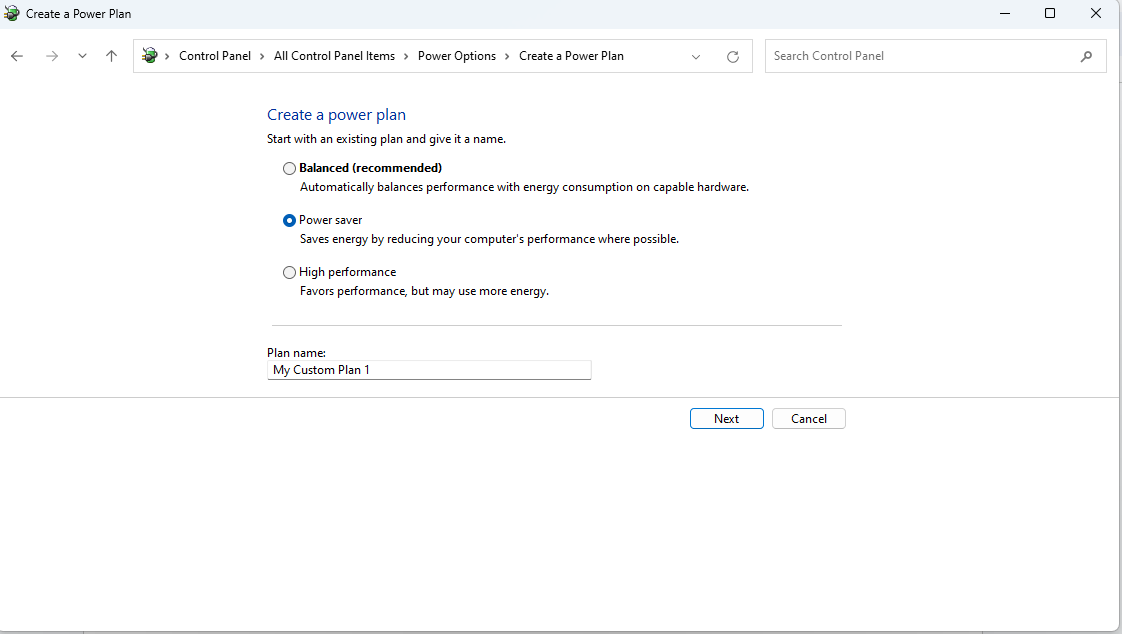
- Select Next to proceed further.
- Choose the time duration after which Windows should put your device to sleep and turn off the display.
- Lastly, click Create to complete the plan creation process.
Method 7: Perform power troubleshooting to restore missing power plans on Windows
You can try the power troubleshooter to restore the missing power plan options on your PC. Here are the directions to do it.
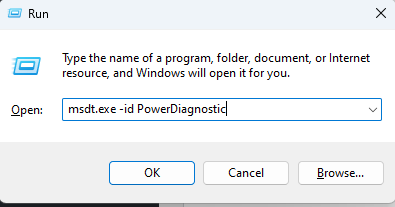
- To begin with, access the Run tool using the Windows+R shortcut command.
- Now, input msdt.exe -id PowerDiagnostic in the on-screen text box and select OK.
- Lastly, follow the on-screen directions to complete the troubleshooting and implement the suggested changes.
Also Read: Battery Drivers Download & Update For Windows 10, 8, 7
Missing Power Plans Options on Windows Restored
This article guided you through easy methods to restore missing power plans on your Windows 10 or Windows 11 computer. You can bring back your desired power options to manage the resource consumption and optimize your computer’s performance using the above methods.
In case of any questions, confusion, or suggestions about this article, leave us a comment without any hesitation. Also, do not forget to bookmark this blog and subscribe and follow us on social networks to stay updated with the tech world.


