How to Fix Resident Evil 5 Not Working on Windows 10, 8, 7 PC
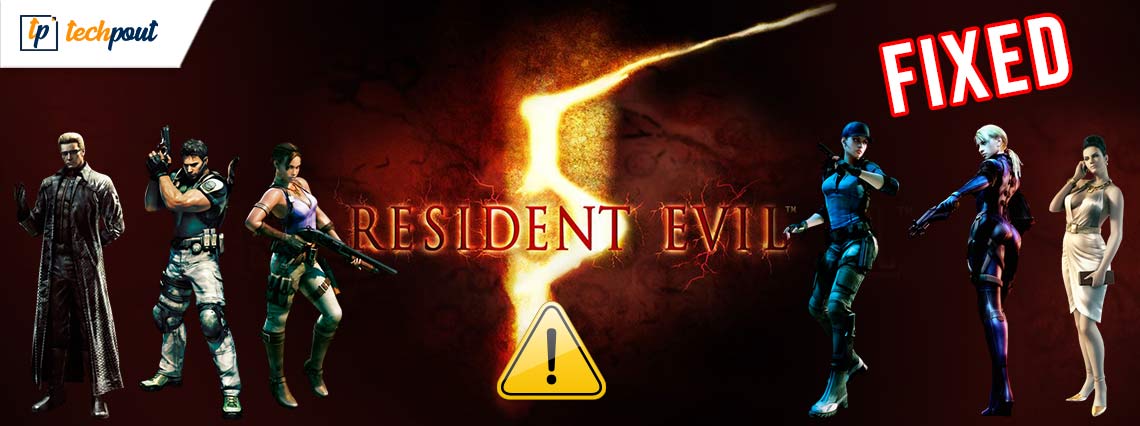
A quick tutorial to fix Resident Evil 5 not working on Windows 10, 8, 7 PC. Read on the entire article to know the easiest approaches to overcome this inconvenience.
Are you a big fan of third-person shooting video games? If yes, then Resident Evil 5 must be your most favorite game of the same genre. Isn’t it? It is the major installment of the leading shooting video game series, Resident Evil. The game can be run on all platforms available including Android, Windows, Nvidia Shield TV, PlayStation 4 or 3, Xbox One or 360, and Nintendo Switch.
Resident Evil 5, a multiplayer shooting game and is a standard game too, but what is unavoidable, it’s an old game. And, that sometimes doesn’t get along with your Windows operating system. Quite lately, numerous Windows PC users have complained that Resident Evil 5 is not working properly or not launching at all. Is this same troubling you? If yes, then don’t need to panic as the issue can be solved, easily & quickly.
In this write-up, we are going to discuss some of the easiest yet effective tactics to deal with the frequent game crashing or launching issues.
Solutions to Fix Resident Evil 5 Not Launching Issue on Windows 10, 8, 7 PC
Have a look at the below-mentioned handiest tips to troubleshoot and fix Resident Evil 5 not launching for Windows PC. However, you do not need to run all of them, just take a walk through each and then execute the one that works best for you.
Solution 1: Updating Graphics Drivers
Outdated graphics drivers are mainly responsible for the random crashes issues while playing the game on Windows PC. Sometimes, faulty drivers prevent the game from working or launching the game at all. So, if your Resident Evil 5 doesn’t work accordingly, then you should check your graphics drivers as well as other device drivers.
And, if your graphics card drivers aren’t associated with their latest versions then you need to update them. For updating the drivers, you have two options either do it manually or automatically.
Manual Driver Update: If you have good technical skills, especially about the drivers, then you can search for the correct drivers online. To do so, you need to visit the official website of the manufacturer. However, finding the suitable driver manually can be error-prone and time-consuming, particularly for the ones who are new to this.
Automatic Driver Update: It is one of the safest and easiest ways to get all the latest driver information and updates installed on your PC. Bit Driver Updater is a complete automatic solution to get rid of all driver-related glitches or errors. The software has an in-built system optimizer for increasing the overall performance of the PC by up to 50%. Not only that, but the utility also provides you with resolutions to fix several issues related to Windows.
Follow the steps shared below to update outdated graphics drivers via Bit Driver Updater:
Step 1: To get started, click on the button below to download Bit Driver Updater for Free.
Step 2: After that, run the executable file and follow the on-screen instructions to finish the software installation.
Step 3: Once done, launch Bit Driver Updater on your computer and let it scan your machine for outdated, broken, or faulty drivers.
Step 4: Go through the entire list and locate the problematic drivers.
Step 5: Click on the Update Now button presented next to it.
Step 6: Alternatively, you can update other device drivers as well along with graphics drivers. For this, click on Update All instead.

It is recommended to use the pro version of Bit Driver Updater in order to take advantage of all its features. What’s more, Bit Driver Updater automatically creates a backup of currently installed drivers on your PC before updating them to the newest ones. So, they can easily be restored whenever required. Apart from this, Bit Driver Updater also offers 24/7 technical support, a 60-days complete money-back guarantee, WHQL authentic drivers, and more.
Also Read: Why Do My Games Keep Crashing in Windows 10 {FIXED}
Solution 2: Repair Corrupted Game Files
If the issue persists even after updating the graphics drivers, then there are any faulty or corrupted game files on your PC that are interfering with your game. Therefore, check and repair if there aren’t any missing files on your PC in order to fix Resident Evil 5 not working on Windows 10, 8, 7 PC. Here is how to do that:
Step 1: Launch Steam and head to your Steam library.
Step 2: Next, on the left pane, click right on the Resident Evil 5 and choose Properties from the quick access menu list.
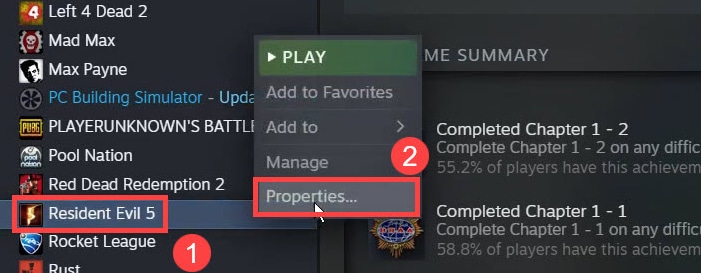
Step 3: Then, choose LOCAL FILES from the left pane menu.
Step 4: After that, make a click on the Verify Integrity of Game Files.
Step 5: Wait until the verification finishes.
Once done, then reboot your PC, and try to play the game again just to check whether this solves the problem or persists.
Also Read: VAC was Unable to Verify the Game Session: Problem Solved
Solution 3: Run Windows Update
Updating the Windows 10 version helps you keep your machine functioning properly and efficiently.
Generally, Windows automatically finds and installs the latest updates frequently, but still, you can try to do it manually just to ensure you are working on the latest version. Follow these simple steps to install all the latest Windows updates:
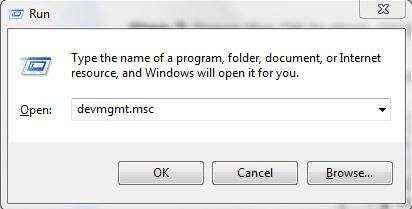
Step 1: To head to the Windows Settings, you need to first open the Run dialog box. To do so, altogether press the Windows logo + R keyboard buttons at the same time.
Step 2: Now, type devmgmt.msc inside the Run dialog box and hit the Enter key from your keyboard.
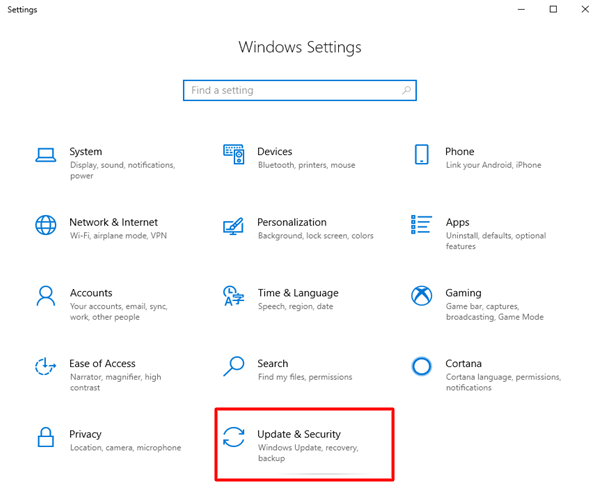
Step 3: This will take you to the Windows Settings, wherein you need to click on the Update & Security option to proceed further.
Step 4: Then, on the left pane menu, click on Windows Update.
Step 5: Lastly, make a click on Check For Updates from the right.
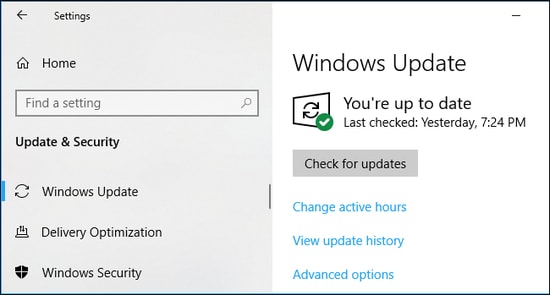
Now, Windows will start installing the latest updates, once the installation is complete, then don’t forget to reboot your computer to save the recently made changes. And, thereafter, start Resident Evil 5 to ensure it works fine now. If in case, it isn’t then move on to another solution.
Also Read: How to Fix Overwatch Stuttering Issue on Windows
Solution 4: Installing the Latest Version of GFWL
GFWL, Games for Windows LIVE a platform on Microsoft which has previously been gradually closed down on Windows 10. That may be preventing Resident Evil 5 from running accurately on Windows 10. So, in order to make Resident Evil 5 function again on Windows 10, you have to install the latest version of GFWL.
After installing the most recent version of GFWL, start your machine again and test if Resident Evil 5 not working fixed or not.
Important: Before downloading and installing the GFWL on your PC be sure to check the source, and then proceed further at your own risk.
Solution 5: Reinstalling the Game
If nothing has worked for you, then you should try to reinstall the game as a final resort. Reinstalling the Resident Evil 5 will surely help you fix the gaming glitches. But before doing so, just be sure to uninstall the currently installed version of the game and associated files from your PC. Once the uninstallation is completed, then go to Steam and install the latest version of the game.
Also Read: How to Fix Monitor Ghosting – 2021 Step by Step Guide
Resident Evil 5 Not Working on Windows 10, 8, 7: FIXED
Hopefully, now the frequent game crashes or launch issues aren’t bothering you anymore while playing the top-notch shooting game Resident Evil 5 on Windows PC. Through this troubleshooting guide, we have tried our best to make you understand how to fix Resident Evil 5 not working or launching in Windows 10, 8, 7.
Do let us know in the comments below, which solution worked best for you in order to get back the smooth playing experience. Also, drop a comment below if you have any doubts, queries, or further suggestions regarding this.
Lastly, before you go, do subscribe to our Newsletter to read more troubleshooting tips to get rid of other technical issues. Furthermore, get connected with us on social media: Facebook, Twitter, Instagram, and Pinterest.

