You can effortlessly uninstall graphics drivers through the Display Driver Uninstaller (DDU). This article explains the process to use it.
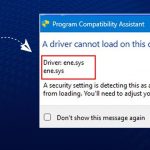
Drivers are the driver force of a computer. They help the operating system communicate with various peripherals, such as the graphics card for the correct execution of your commands. However, in certain circumstances, such as if the driver is incompatible or corrupted, it becomes essential to uninstall it. Since manual driver uninstallation is a lengthy process, you can use a Display Driver Uninstaller to uninstall the graphic card drivers from your computer.
The DDU uninstaller is an application tool to entirely remove the Nvidia and AMD graphics card drivers from your PC. It leaves no trace of the driver and wipes out all its folders, files, and registry keys.
You can use the Windows 10/Windows 11 Display Driver Uninstaller in any situation where you are experiencing problems with the standard driver uninstallation via Windows Control Panel. However, if you are confused about how to use this utility, this article is here to help you.
Through this article, we guide you through the complete process of using the DDU Display Driver Uninstaller on your device. Let us begin with some crucial points you should keep in mind when using it.
Points to Remember When Using the Display Driver Uninstaller
Here is what you should know while using the DDU uninstaller on your computer to uninstall the AMD and Nvidia graphics drivers.
- Always create a backup or system restore point before making any changes to your PC
- Exclude the Display Driver Uninstaller completely from all security programs to avoid problems
- Safe mode is always recommended when using the uninstaller
Now that you are quite familiar with the uninstaller for your display driver, let us understand how to use it in the following section.
Also Read: Best Uninstaller Software For Windows 10, 11
Steps to Use the Display Driver Uninstaller
Here are the steps you can follow to uninstall your computer’s display driver using the DDU uninstaller.
- Firstly, download the Display Driver Uninstaller’s latest version for your Windows 10/11 computer.
- Now, locate and double-click the downloaded zip file.

- Now, select the location where you want to extract the file and click the Extract button.

- You can now double-click the Display Driver Uninstaller to run it on your PC.

- Now, it is recommended that you run the application in Safe Mode. Hence, select the Safe Mode from the Launch Options. Alternatively, you can follow the path Settings>Update & Security>Recovery>Advanced Startup>Restart Now>Troubleshoot>Advanced Options>Startup Settings>Restart>key number 4 to enable safe mode without internet.
- Choose the Reboot option after selecting the safe mode.
- After opening the Display Driver Uninstaller (DDU), you can view the details about the graphic cards installed on your computer.
- If the uninstaller application does not detect the graphics card driver automatically, select it from the menu present on the right of the application window.
- Three options will become available to you on the left side. You can choose to clean and restart if you want to install a new graphics card driver.
- If you wish to install a new graphics card, remove the driver using the clean and shutdown option.
- After selecting the appropriate option, wait until DDU gets the driver removed.
- Lastly, you can restart your computer and install a new driver for your graphics card.
After installing the graphics driver, it is recommended you keep it updated to avoid performance issues. You can update the driver effortlessly through a program like Win Riser.
The Win Riser is an excellent driver update and PC optimization software. It updates all drivers instantly with one click and offers a lot of interesting features, such as driver backup and restoration, malware detection, junk removal, scheduled scanning, and more.
All you have to do is download and install the Win Riser software from the following link, run the program, scan your computer, review the results, and select the option to Fix Issues Now.

Also Read: How to Fix Program won’t Uninstall in Windows 10, 11 PC
Concluding the Display Driver Uninstaller Guide
This article guided you through the process of reinstalling the graphics drivers on your computer through Windows 10/Windows 11 Display Driver Uninstaller. You can follow the above guide to use this utility and fix the problems you may be experiencing. If you have any questions or concerns about this article or wish to share something, leave a comment in the comments section.
We will be back shortly after a while with another useful tech guide. Until then, stay connected to this blog, and if you wish, you can explore our other articles to gain more insight into the world of technology.
![How to Fix HP Laptop Running Slow [2021 Complete Guide]](https://wpcontent.techpout.com/techpout/wp-content/uploads/2021/07/02154723/How-to-Fix-HP-Laptop-Running-Slow-2021-Complete-Guide.jpg)