To enhance the gaming experience you need to set up a gaming steering wheel. The controls which you use on the keyboard and the control used in the gaming wheel is way different. They both cannot be compared, every gamer has a joystick that is specially designed for specific games. The gaming steering wheel is specially designed for car games.
You would definitely love the experience of gaming with the steering wheel. All you need to do is just set up the gaming wheel with the PC. Now some of you might have faced issues with the setup and you must be wondering how to set up a gaming steering wheel on Windows PC. So worry not as we have mentioned the steps which you can follow to set up the gaming wheel.
However, before we head over to the solutions, let’s have a look at the most promising one to fix the error right away.
Recommended: Update All the Driver on Windows for Better Performance
If you want to have the best and lag-free gaming experience while playing games using the steering wheel, you should update the drivers first. Doing this will allow your system and its devices to work and communicate with the system and with each other and offer an amazing experience to you. You will not face any glitches, BSOD, or any other type of error after you update the driver. For the same task, you can take the help of the Bit Driver Updater. Just download the updater from the button below for ease.

How to Set Up Gaming Steering Wheel on Windows PC
Follow the steps mentioned below to easily connect the gaming steering wheel to a PC.
Step 1. Install Gaming Steering Wheel
The first and foremost important step is installing the steering wheel. If you don’t install the steering wheel as stated then you might observe some issues while using it. So follow the steps as mentioned for an error-free installation of the Gaming Steering Wheel.
- Attach Pedals and other attachments to the Steering wheel.

- Now, attach the power adapter to the wheel.

- Next, you need to connect the attachments to the USB port of the PC.
- After you have connected the wheel and other attachments, place them at their desired position.
- Select the mode of the steering wheel and you are good to go.
- Now turn on the computer and plug the wheel into the power output.
These are the steps that you can follow to install the gaming steering wheel. The steps can be different for devices from different brands. Most of the devices will connect with this procedure only.
Also Read: Logitech Gaming Software For Windows | Download Latest Version
Step 2. Install the Drivers
Drivers are an integral part of establishing a smooth connection. If you have outdated drivers in the system then you can face issues while connecting the device to the computer. You should always keep the drivers updated or install the drivers as per the device requirements. Now in this case you need to have the driver of the steering wheel.
You can install the drivers using two methods, either you can use the manual method or you can use the automatic method. We have listed both the methods, you can follow anyone out of them which suits your needs and requirements.
1. Install Drivers Using Manual Method
Using the manual method you need to manually check the manufacturer’s website for the driver and then install them. Supposedly if you have the gaming steering wheel of Logitech then you need to visit the official website of Logitech and check for the model number of your steering wheel and then search for its drivers. After finding the correct drivers you need to download and install them on your computer.
While performing the manual method we have observed that the user who is performing this method for the first time makes mistakes and downloads wrong drivers which are not compatible with the system. For all the newbies, we would recommend you to use the next method.
2. Install Drivers Using Automatic Method
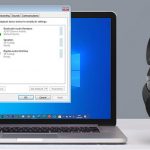
We consider this as the best method to use as in this method you don’t have to do a lot of work. You just have to download the driver updater software and the rest software will do. The software after being installed in the system scans the whole system and checks for the faulty and outdated drivers in the system. After the scan, the software will present a list of all the drivers which need to be repaired. From the list of the faulty drivers, you can either one by one or select all for updating. The part about this driver updater tool is that it downloads the drivers from official websites only.
Now if you are wondering which software should you install then let us help you with that too. Bit Driver Updater is by far the best driver updater software that you can download. This software not only keeps the drivers updated but also optimizes the performance of the system, which makes your system function fast and smooth. Using this software you can update all the drivers in a few minutes only. In our recommendation, you should use this software, or else there are many on the internet from which you can choose to download.

Also Read: List of 23 Best Cloud Gaming Services Available in 2021
Step 3. Configure your Device
Now after you have installed the wheel and installed the driver, next you need to configure the device and check whether it is working or not. To check it, you need to run the programs and follow the steps mentioned below. We have mentioned steps for the Logitech G27 racing wheel. If you have any other steering wheel then you can have a look at the steps and perform similarly with your respective device.
- Open the program

- Click on the ‘Profile’ option and then the ‘New’ option.

- Now add the game which you wish to play with the gaming steering wheel.

Also Read: Cloud Gaming: Stadia, Boosteroid or GeForce NOW
- Next, you need to click on the ‘Edit’ option and then select the ‘Specific Game Settings’ option.

- Screenshot the settings as mentioned on the screen and then click on the Ok button.

- Now click on the Options button from the taskbar menu.
- From the menu select the ‘Global Device Settings’ option.

- Now change the settings as per the screenshot and then click on the Ok button.

Also Read: 22 Best Free Driver Updater for Windows 10, 8, 7 in 2021 [Updated]
How to Set Up Gaming Steering Wheel on Windows PC {Solved}
The above-mentioned methods will help you to set up a gaming steering wheel easily. The steps are mentioned taking the Logitech racing wheel. The steps can differ from device to device. You can still take an idea of how to proceed with the setup. We hope that you will find this article helpful. If we have answered your question of how to set up a gaming steering wheel on a Windows PC, then tell us by writing it down.