How to Fix BIOS Not Detecting SSD in Computer PC
BIOS not detecting SSD in Windows 10, 11? Nothing to worry about, the post includes 6 most workable solutions to quickly resolve the problem.
The BIOS is associated with the PC’s boot mechanism, which is the component of the machine that helps enable the system so that it can perform its functions. In the event that the BIOS does not identify the solid-state drive (SSD), this might perhaps shed light on underlying problems associated with the SSD or the associated connection with device. Drives that aren’t working properly might sometimes result in an error message, such as “solid-state drive (SSD) not detected.”
The Solid State Drive (SSD) has repeatedly shown itself to be a dependable and effective computer storage choice. Users depend on solid-state drives (SSD) for greater performance since functionality & speed are what SSDs excel at providing. In comparison, conventional drives (HDD) are not as common. It has a quick read & write speed, is noiseless, and has a low power consumption, all of which make it convenient for users. Despite the fact that the Windows operating system is compatible with the device, there is still a possibility that the device would display an error, such as solid-state drive not being detected, or SSD not showing up in BIOS.
After you have connected the SSD to your system, you will get an error notice, and you will be unable to locate the drive using any of the available tools, including File Explorer, Disk Management, or, My Computer. There is a chance that the BIOS is not detecting SSD on Windows 10, 11. The reasons why the solid-state drive is not being recognized are outlined below, along with some remedies that may be put into practice. Continue reading!
Why Does the BIOS Not Detect Solid-State Drive?
The problem of an unrecognized SSD is a frequent one. Generally, this occurs as a result of fundamental issues with SSD. Either via the use of connections or technological means. When boot system is unable to identify the solid-state drive (SSD), it indicates that your system is not switched on in a functioning state, and you will be unable to do any tasks. So, since the BIOS is not detecting SSD Windows 11, 10, let’s explore some other possibilities for why this is happening.
- Problems with the settings of BIOS.
- Issues with the SATA driver.
- Hardware failure.
Solutions To Fix BIOS Not Detecting SSD In Windows PC
After determining the factors that led to the mistake, such as the absence of a solid-state drive (SSD) or the failure of the operating system’s BIOS to recognize an SSD, the subsequent action is to hunt for suitable solutions to deal with the issue. This section presents a few potential solutions to resolve BIOS not detecting SSD in Windows 10, 11. Let us get this party started!
Solution 1: Troubleshooting Hardware Failure
A problem with the hardware might prevent the BIOS from recognizing your SSD. Therefore, you’ll need to verify the hardware of your SSD as well as the ports that relate to it to ensure that they are operating correctly.
In addition to this, you may move the SSD to a different port on the computer and check to see whether the BIOS can recognize it.
Don’t be concerned if in case, hardware is functioning well but you’re still experiencing issues. Proceed to the other available option to solve BIOS not detecting SSD in Windows 11, 10.
Also Read: How to Replace Hard Disk with SSD without data loss
Solution 2: Update Outdated Drivers
It is possible for your computer’s BIOS to fail to recognize your solid-state drive (SSD), particularly if your SSD driver or motherboard driver is out of date. Therefore, it is essential that you regularly update the drivers for all of your devices.
There are two major methods available to update the device drivers on your computer: manually and automatically.
Manual Driver Update: Manually updating the driver requires going to the website of the device manufacturer, where you will search for the driver for your hardware device, and then downloading the most recent version. After that, you will need to install it on your computer manually. Ensure you get the version that is compatible with the Windows OS you are using. This takes both time and the ability to use a computer.
Automatic driver update: If you don’t have the time or patience to manually update your outdated, missing, or broken drivers, you may use Bit Driver Updater to do it automatically.
Bit Driver Updater will automatically identify your computer’s configuration and search for the appropriate drivers for it. You are not required to have a precise understanding of the operating system that your computer utilizes, you are not required to take the chance of downloading & installing the incorrect driver, plus, you are not required to worry about making mistakes during the entire installation process.
You are able to automatically update your drivers by using either the free version or the paid Pro version. However, with the Pro version, you just need to make two clicks (and you’ll receive full support as well as a guarantee that you may get your money back within 60 days):
Step 1: Download and install Bit Driver Updater from the button below.
Step 2: Launch Bit Driver Updater on your PC, then choose Scan from the menu presented on the left. After that, Bit Driver Updater will scan your PC to identify any problematic drivers.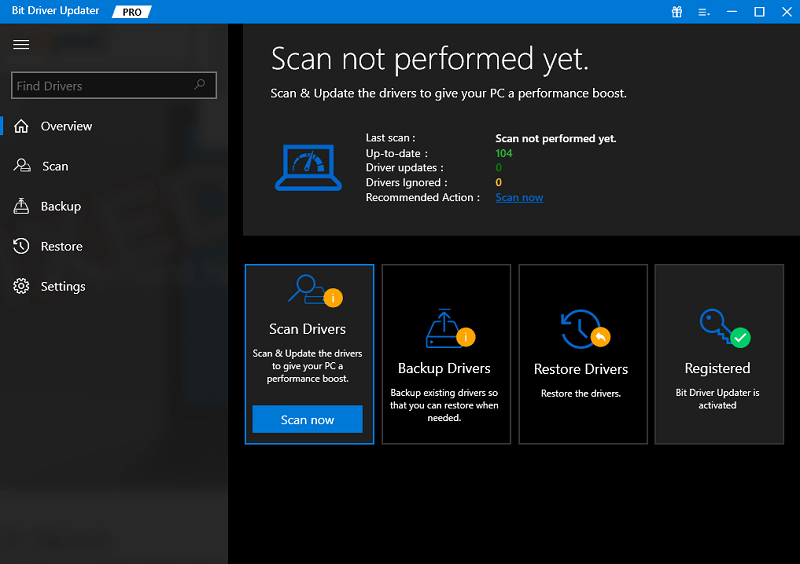
Step 3: Wait for the scanning to be finished. If you are using the Free version, then you can click on the Update Now button available next to the driver you wish to update. And, if you are using the Pro version, then you may also click on the Update All button to automatically download and install the most recent versions of all the drivers on your system that are either missing or no longer supported.
Step 4: Once done, reboot your computer to apply new drivers.
Thereafter, go into the BIOS and check to see whether it recognizes your SSD. If you still run into SSD not showing up in BIOS, then try another solution.
Solution 3: Change the SSD Settings in the System’s BIOS
Another solution to the problem of the BIOS not detecting SSD is to configure the settings for the SSD in the BIOS. This problem often arises when the drive itself does not configure the settings for the SATA controller. Every model has its own unique configuration options. For instance, we are using Lenovo here. Follow these procedures to configure the controller drive:
Step 1: Rebooting your system is the first step in commencing the procedure. When you see the screen that says “start,” hit the F2 key on your keyboard.
Step 2: Once you have pressed the F2 key, hit the Enter key to start the setup process in config.
Step 3: After that, choose the serial ATA option, and press Enter key to go on to the next step.
Step 4: You should now be able to locate the SATA controller mode selection inside the serial ATA window. Choose the compatibility mode for the IDE.
Step 5: Once you have finished making modifications, save them and then restart the PC once again so that you may enter the BIOS and start the boot process.
Since the issue has been resolved, the BIOS should now be able to identify the SSD.
Also Read: Best SSD Health Check Software for Windows and Mac
Solution 4: Replacing the Data Cable
The data connection that links the solid-state drive (SSD) to the motherboard is prone to wear and strain over time, which may lead to a typical issue including SSD not showing up in BIOS. You should make an effort to get a different one and attach it to determine whether or not the problematic item is this one. Proceed with the other solutions mentioned below if this doesn’t work.
Solution 5: Use the Hardware and Devices Troubleshooter
Utilizing the native or inbuilt Hardware and Devices Troubleshooter utility tool, you will be able to instantly fix any faults relating to your SSD. To do so, you need to follow the steps below:
Step 1: Altogether press Windows + I keys to run Windows Settings.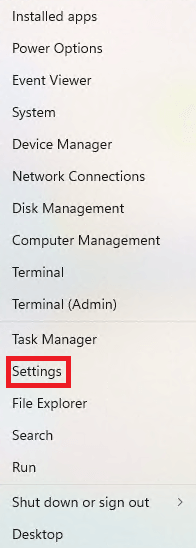
Step 2: Click on the “Update & Security” button.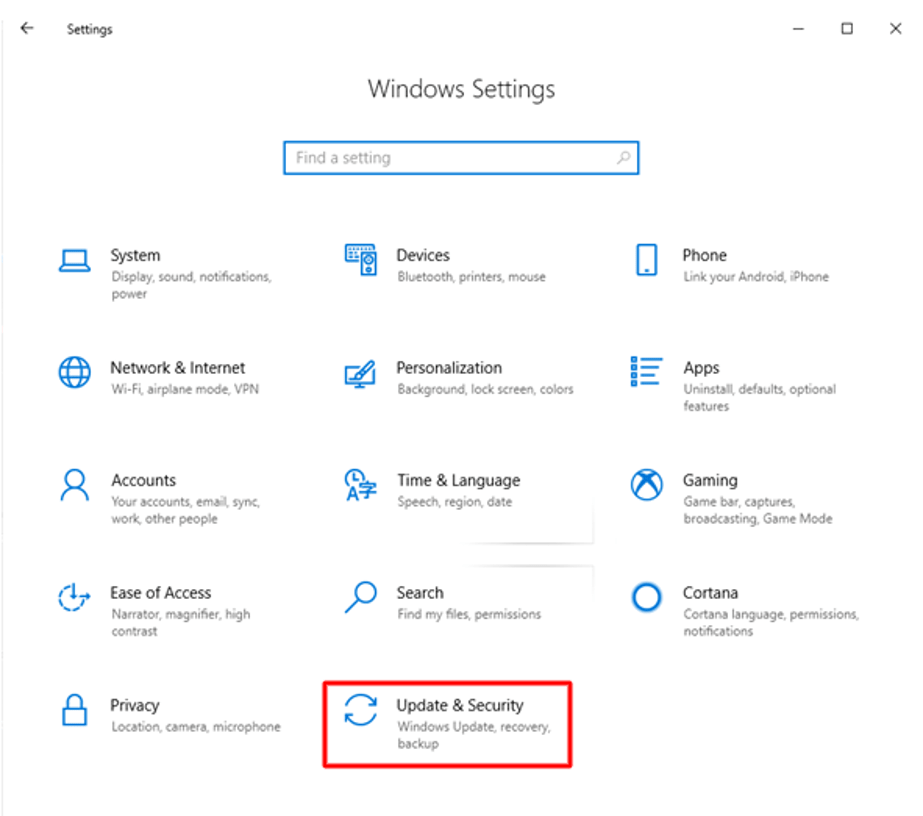
Step 3: Click “Troubleshoot” from the list on the left, then pick “Hardware and Devices,” and then click on “Run the troubleshooter” in order to launch the diagnostic tool. It’s possible that this will fix the problems with your SSD disk.
Solution 6: Create a Backup of your Solid-State Drive
From this point forward, you may use this knowledge to both foresee and find solutions to numerous problems. Keep in mind that your solid-state drive (SSD) is a gadget, and as such, although it’s likely to function normally for a number of years, there is always the possibility that it might develop issues at any time owing to a variety of causes such as power outages, strikes, or viruses. It is essential that you create backups of all your crucial information in order to reduce the likelihood of experiencing any problems. There are a lot of different methods to do this, additionally, there are third-party software available that can perform it on an ongoing and automated basis.
Also Read: Fixed: Unmountable Boot Volume on Windows 10, 11
How to Fix BIOS Not Detecting SSD in PC: Explained
So, that’s all! We hope this article helps you solve the BIOS not detecting SSD on Windows 10, 11. Please don’t hesitate to ask any questions or make any comments below if you have any ideas or thoughts.
For more technical information, you can subscribe to our Newsletter and follow us on Social Media – Facebook, Instagram, Twitter, or Pinterest.

