Running into Discord Mic not working in Windows 11, 10? If yes, then you have come to the right place. Here you will find different tried and tested solutions that help you resolve the issue. Read more!
Discord is a platform that is popular not just among gamers, but also among those who are wanting to engage with others who have similar interests. However, some users have claimed that the microphone in Discord is inoperable with Windows 11, 10.
You are able to communicate with other users on Discord using text, voice, and video in either one-on-one or group settings. Although the former operates normally, problems with the microphone could make your audio and video interactions less satisfying.
However, the solutions to these problems are rather straightforward, and you should have no trouble resolving the Discord mic not working on Windows 10, 11. Proceed through the next parts to get as much information as possible on the issue.
Why is My Mic Not Working on Discord?
Misconfigured settings or problems with the microphone driver are often to fault if you have problems with the microphone in Windows 11/10, whether it be with particular applications like Discord or throughout the whole operating system. This might be due to the fact that the microphone driver has become obsolete.
Aside from that, if Discord is unable to access your microphone, you won’t be able to make use of it when you’re communicating with other users on the site. In addition, it’s possible that the issue is related to a defect in the currently existing version of the application or the operating system that’s installed on your PC.
Make sure that you give the Discord application a fresh start before moving on to more involved troubleshooting methods to resolve the Discord mic not working in Windows 11, 10. In addition, if you are using a wired microphone, try reconnecting the cord to your microphone, and if you are utilizing a wireless microphone, try repairing the Bluetooth connection to your microphone.
A List of Solutions to Fix Discord Microphone Not Working in Windows 10, 11
In this tutorial, you’ll discover three simple solutions to solve the Discord mic not working in Windows 11/10. Start at the top of the list and work your way down until you discover the solution that works.
Solution 1: Reboot the Computer
It might sound like a basic hack, but sometimes it works wonders. To restart the computer, go to the desktop, press the Alt + the F4 key simultaneously to bring up the Shut Down Windows box, and then choose Restart from the dropdown menu. Now, in order to restart the computer, click the OK button.
Check to see whether the problem of the mic not working on Discord has been resolved or not. If the cause of the issue was anything as simple as a bug, the microphone should be functioning normally again immediately. In the event that the problem still exists, you should go on to the following technique.
Also Read: Best Discord Music Bot in 2023 (That Still Works)
Solution 2: Reset Discord Voice Settings
Resetting the voice settings on Discord is another potential solution to this issue. Here is how to do that:
Step 1: From the main page of Discord, choose the gear symbol to access the Settings menu.
Step 2: Navigate to the Voice & Video menu, and then choose the Reset Voice Settings option.
Step 3: Click on Okay to proceed.
Step 4: Once done, then reconnect your mic and simply try to send an audio/ voice message on the Discord application to test the issue. In case, the issue persists, then move on to another solution to fix the Discord mic not working in Windows 11, 10.
Solution 3: Set your Microphone as the Default Input Device
Another workable solution to fix the headset mic not working is to set your desired microphone as your default input device. Follow the steps below:
Step 1: Launch the Discord app, and then choose the User Settings icon located in the app’s lower-left corner.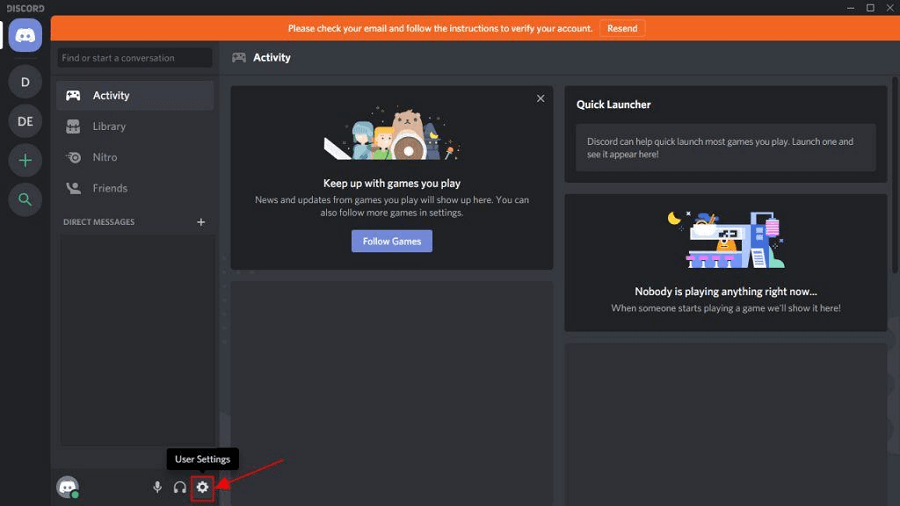
Step 2: Choose the Voice & Video option from the Settings menu of the app.
Step 3: Next, pick the microphone you want to use by clicking the Input Device dropdown menu and choosing it from the list of available choices that appears.
Step 4: If you want the changes to take full effect, you will need to restart the computer once you have made your option.
Also Read: How to Fix Discord Crashing Issue on Windows PC
Solution 4: Close Discord and Relaunch it with Administrative Privileges
Quitting and restarting the game would likely fix the Discord mic not working problem. This is how you can do it:
Step 1: Navigate to the Discord icon located on your Windows taskbar and right-click on it. Clicking the “Show hidden icons” button will reveal it for you when necessary. After that, choose the Quit Discord option.
Step 2: On your desktop, locate the Discord shortcut icon, right-click on it, and pick the option to “Run as administrator.”
Step 3: When asked by User Account Control, choose Yes from the drop-down menu.
Step 4: Test the functionality of your microphone by attempting to send an audio message using Discord.
Also Read: How to Fix Discord Screen Share Audio Not Working
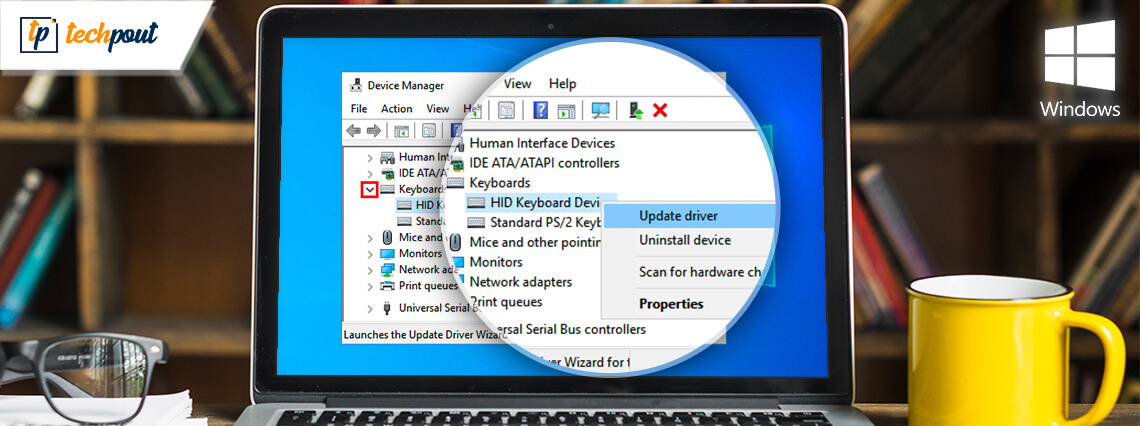
Solution 5: Update your Audio Driver
An outdated, corrupt, or missing audio driver may be the root of this issue. Simply upgrading the driver for your audio device should fix the issue. You may manually download the appropriate audio driver for your computer, or you can let the computer do it for you automatically.
Manual driver update: If you want to manually update your audio driver, you may do so by visiting the website of the manufacturer of both your audio card and your computer, and looking for the most current version of the right driver. Make sure that the driver you pick is the only one that is compatible with the version of Windows that you are using.
Automatic driver update: If you do not have the time, patience, or computer skills necessary to manually update your video and monitor drivers, you may instead use Bit Driver Updater to do this task automatically. Bit Driver Updater is the free driver updater software and it will automatically detect your computer and search for the appropriate driver for your specific audio card as well as the Windows operating system type you are using. It will then download and properly install the drivers. To use this method, follow the procedure below:
Step 1: Download and install the Bit Driver Updater.

Step 2: Run Bit Driver Updater on your PC and choose the Scan option from the menu available on the left. After that, Bit Driver Updater will scan your computer to look for any problematic drivers.
Step 3: You may accomplish this with the free version if you click the Update Now button that is located next to the audio driver that is being flagged. This will install the latest audio driver update automatically on your computer. 
Alternatively, you may click the Update All button to have your system automatically download and install the most recent and up-to-date version of any driver that is either missing or not functioning properly on your system. (You’ll need to upgrade to the Pro edition for this, which includes lifetime free technical support and a 60-day full money-back guarantee.
Solution 6: Reinstall Discord
If none of the solutions presented above worked for you, the issue is most likely related to the program installation, which is what’s preventing the Discord mic from functioning properly on Windows 11/10. In this particular scenario, the only viable solution is to reinstall the Discord client. Here is how:
Step 1: To open the Settings menu, press Windows + I, and then pick Apps from the list of tabs in the navigation bar on the left.
Step 2: After that, go to the right side of the screen and choose Apps & Features.
Step 3: Find Discord among the programs that are shown here, click on the ellipsis button that is located next to it, and then pick Uninstall from the selection that appears.
Step 4: Once again, choose Uninstall from the menu that appears in the confirmation box that appears.
After you have completed the process of uninstalling, restart the computer and then download the Discord application. This will definitely fix the mic not working on Discord.
Also Read: How to Fix Discord Stuck on ‘RTC Connecting’
Discord Microphone Not Working in Windows 11, 10: FIXED
If you are encountering problems with the Discord application, one of these techniques should assist to address the problem of your mic not working on Discord. If none of the above methods worked, you may try reinstalling the Discord client on your Windows computer.
Was this guide helpful? Please drop your suggestions or further questions in the comments box below. For more tech-related tips & tricks, you can subscribe to our Newsletter and follow us on Social Media: Facebook, Instagram, Twitter, or Pinterest


1 Comment
[…] Read Also: How To Fix Discord Mic Not Working Issue […]