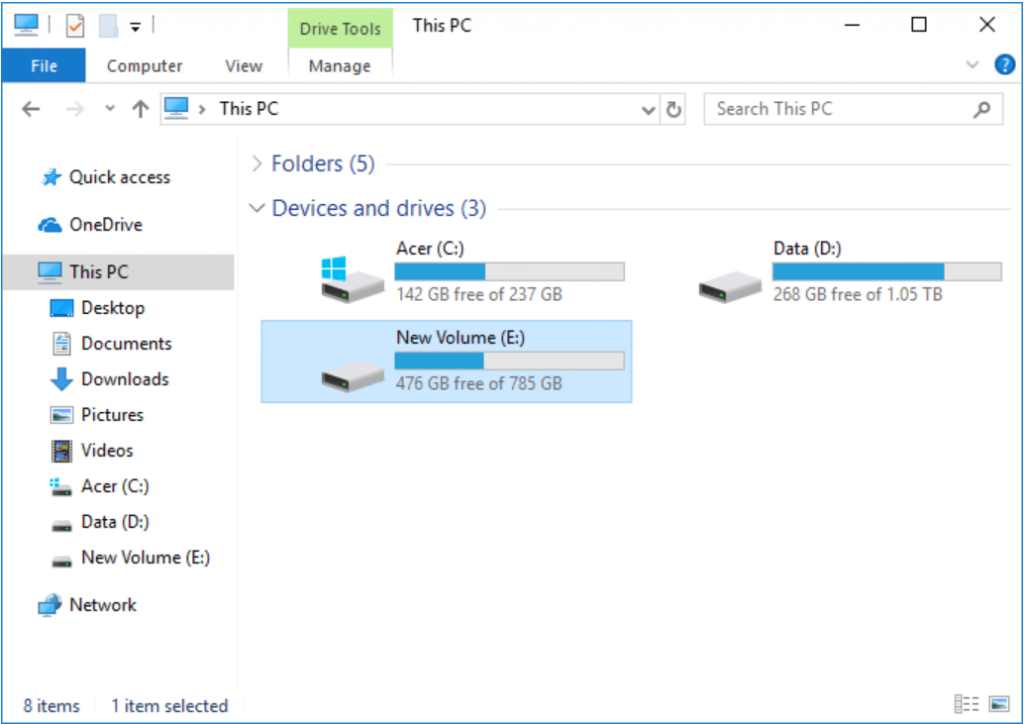
A drive icon is the graphical representation of the removable drive. By default, Windows uses an icon for a particular drive based on what type of drive it is. Some types of drives are:
- USB Flash drive
- Windows drive
- Local drive
- RAM disk
- Solid-State drives (SSD)
- Network drive
A lot of Windows users have been asking this question lately, ‘How to change the drive icon on Windows 10?‘. Most of the users are interested to dig out the hidden secrets of Windows 10. This made us carry out some research and compile a short post on how you can change the drive icon.
In this article, we are going to discuss different methods by which you can change the removable drive icon.
3 Simple Methods to Change Drive Icon in Windows 10:
It is really nice to see the system detect a removable drive and change the icon depending on the type of drive. But it is really hard to tweak the settings for the system to do so. Even if you know the tips and tricks, the entire procedure is risky.
One wrong click could corrupt the data and the system may crash. These are some methods by which you can change the drive icon.
Method #1. Change Single Drive Icon Using Registry Editor
It is possible to change the drive icon using the Registry Editor. There are two important ways by which you can change the removable drive icon in using the Registry Editor.
These are the step you can follow:
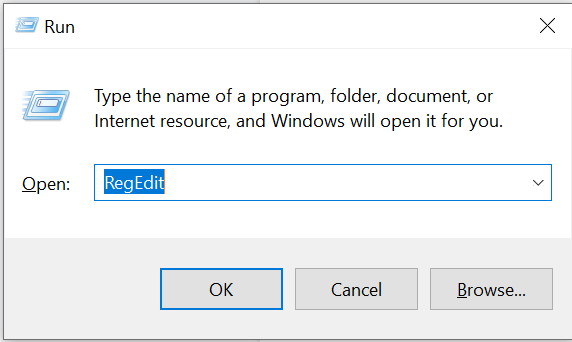
Step 1: Use the Win Key + R to launch the RUN box.
Step 2: Type the command ‘RegEdit’ in the RUN box and hit the Enter key.
Step 3: Now navigate to the registry key:
HKey_Local_Machine\Software\Microsoft\Windows\CurrentVersion\Explorer\Drive Icons
Point To Note: If the Drive icon key is not present, you can create.
Step 4: Select the Drives key and right-click on it.
Step 5: Click on the “New” button and then select “key” from the drop down menu.
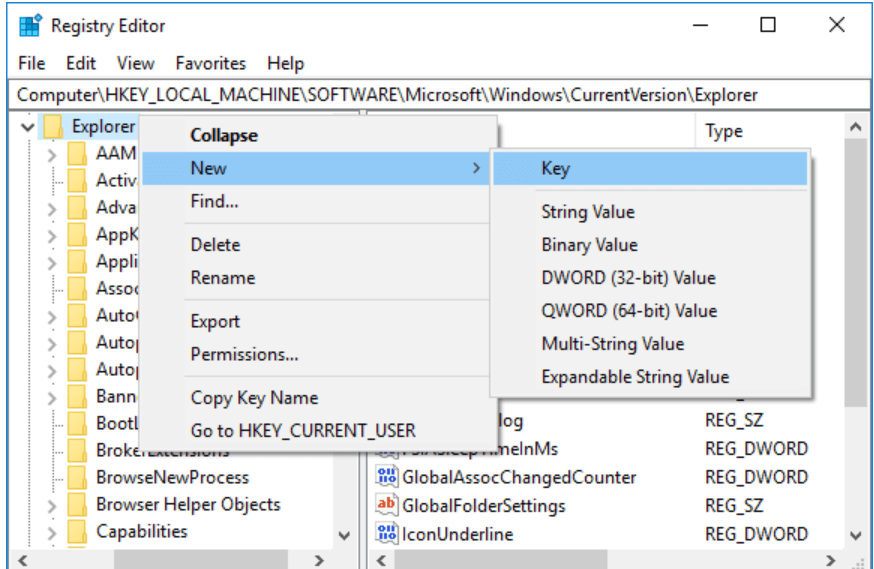
Step 6: Type the particular letter of the drive you want to change. (Ex: ‘E’ or ‘F’).
Step 7: Press the Enter key.
Step 8: Under the drives key, right-click on the subkey (E or F).
Step 9: Click on the New option.
Step 10: Now name the subkey as ‘DefaultIcon’.
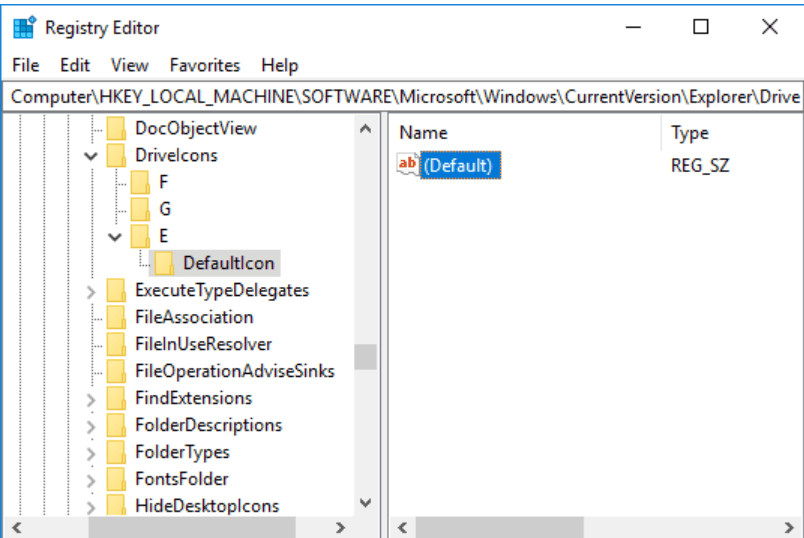
Step 11: Go to the DefaultIcon key and change the default string value by double-clicking on it.
Step 12: Now you need to type the complete path of the .ico file that you want to use as the icon of this drive.
Step 13: Click on OK.
Step 14: If the File Explorer utility is already open, close it and open it again to apply the settings.
Step 15: Close the Registry Editor.
Read More: How to Extend C Drive Space in Windows 10 Without Formatting
Method #2. Change the Icons For All Drives in Windows 10
Step 1: Open the Registry Editor by typing Regedit in theRun box.

Step 2: In the next step navigate to the below path:
HKey_Local_Machine\Software\Microsoft\Windows\CurrentVersion\Explorer\Shell Icons
Step 3: If you don’t see a Shell icon in the final window, create a new tab by right clicking on the Explorer tab followed by the New and Key buttons.
Step 4: Give the name to the new folder as Shell Icons.
Step 5: In the next step right click on the icon and press New button followed by pressing the Expandable String Value, Rename the newly created string as 8 and press the Enter button.
Step 6: Now double click on the freshly created string and enter D:\icons\Drive.ico as its value.
Step 7: In the next step, replace the actual location of your icon file with the above value.
Step 9: Now close the Registry editor and restart your device to confirm the changes.
Read More: How To Recover Deleted Files From Google Drive
Method #3. Change Drive Icon Using autorun.inf File
Step 1: Open ‘This PC’ in File Explorer. Click on the View tab.
Step 2: Turn ON the File name extensions in the ribbon options.
Step 3: Open the drive whose icon you want to change. Suppose you choose Drive “E:”.
Step 4: If you don’t have autorun.inf files, right-click on the empty space in the root directory of the drive and press New>Text Document to create a new autorun.inf file.
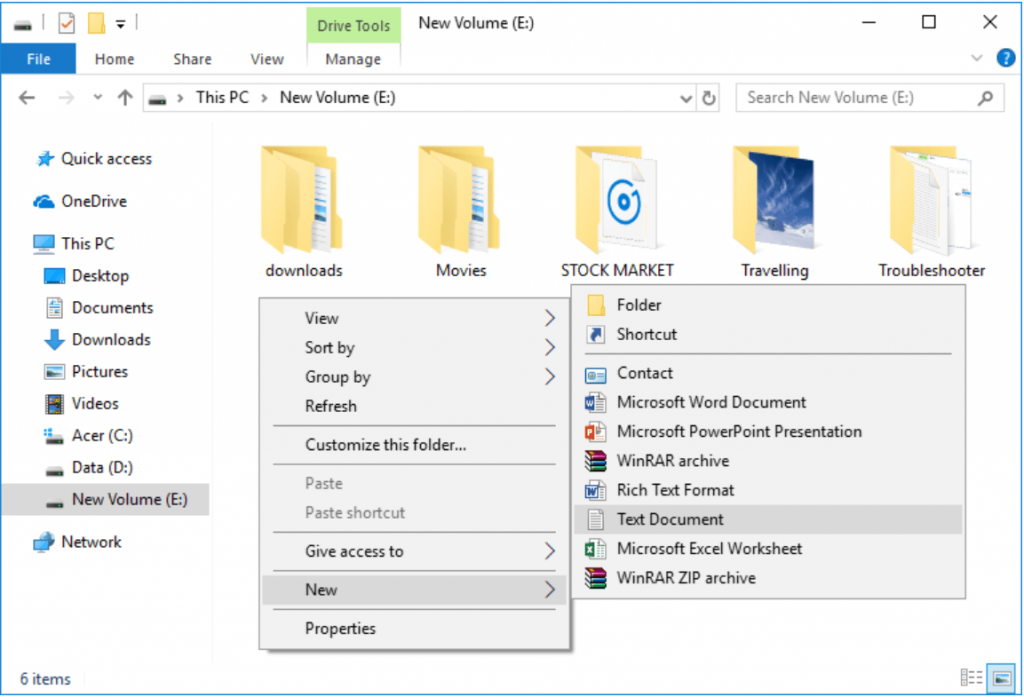
Step 5: Modify and update the name of the New Text Document.txt file to autorun.inf.
Step 6: In the next step, copy the .ico that you want to use as the root directory of this particular drive.
Step 7: Click on the autorun.inf file in the root directory of the particular drive and open it.
Step 8: Click on the ‘filename’ line and replace it with the following command.
[autorun]
icon=”filename.ico”
Step 9: Now click on the File menu and click on the Save option.
Step 10: Restart the system to apply the changes.
Easily Change the Default Drive Icon Using Above Methods
The aforementioned ways are the easiest solutions by which you can change the drive icon in Windows 10.
We have compiled these drive icon changer methods to help you change the default icons of the removable drives.
Although the steps in the above methods look simple and easy, it is not advised to change the drive icon using the Registry Editor since it is the most crucial part of Windows.