In this article, you will learn about the necessary changes that you can make to your video playback settings in Windows 10. Follow the article to know more in detail.
Video is one of the most common functions which is offered by the gadget whether it is your computer or mobile device. Whether you are a videographer or not you must have watched videos for learning new things or for entertainment purposes. But what if you watch a video and you don’t get the output as expected, then the efforts and time are wasted.
The article is created to offer you the best video settings in Windows 10 and older versions of your computer. By following the video setting you will witness, better output than your expectation. So without any further delay, let’s take a look at all changes you need to make in video settings in Windows 10 to get the best video output.
Update Your Device Drivers to Increase Computer Performance
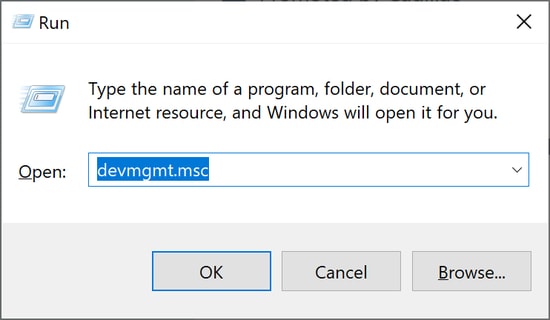
It’s a common knowledge that outdated or faulty device drivers can affect the hardware functioning and cause some serious performance-related problems in your Windows. Hence, keeping your drivers updated is crucial to maintain and tune up your Windows PC for peak performance.
To update all your Windows drivers automatically in one click, you can use a dedicated program such as Bit Driver Updater. The good thing about this program is that it’s free to download and try.

How to Change Video Playback Settings in Windows 10 Easily
Below we have mentioned two methods that you can use to enhance the video output by changing the video playback settings.
1. Change Video Playback Settings using Windows Settings App
Here we have listed all the changes that you can make through the settings app and get the best output. But before we jump onto the changes, we have mentioned the steps which you can follow to navigate the video playback section.
- Right-click on the Start menu or the Windows icon from the bottom left corner of the screen.

- A new menu will appear, from the menu select the ‘Settings’ option.
- Now in the settings window select the ‘Apps’ section.

- Next, select the Video Playback option in the app’s window.

That’s how easily you can visit the Video Playback section from settings. Now you have completed 50% of the task. The rest is changing the default setting, so without wasting time let’s take a look at the changes in video playback settings in Windows 10, 8, 7.
Also Read: 16 Best Video Converter Software For Windows In 2021
A. HDR Settings
HDR can help in enhancing the video quality, but some of the devices might not have this settings option on their laptop or computer. If you are unable to locate this option then your PC is not compatible with HDR. so if your system is compatible with HDR then follow the steps mentioned below.
- Click on the ‘Windows HD Color settings’ option.

- Under the choose display section, you can choose according to your requirements.
- Below the option, a separate section of ‘Display Capabilities’ is also present which shows the capabilities of your system.

This is how you can simply change the settings of HDR and adjust according to the system capabilities.
Also Read: 9 Best Free Video Editing Software With No Watermark
B. Better Video Quality at Lower Resolution Setting
For better video quality you need to change video playback settings, you need to enable ‘Automatically process to enhance it’. This option will help in enhancing the video quality according to the hardware capabilities. It uses the GPU to process the video and enhance it.
If you wish to save network bandwidth by playing videos on lower resolution then tick the check box of ‘I prefer video to play at a lower resolution’. There is no compulsion for this option, if you wish you can leave it the way it was and just enable the ‘Automatically process video to enhance it’ option.
C. Battery Optimization
While using a laptop you always worry about the battery. Some of your programs or actions result in quick battery drainage. To stop battery drainage while watching the video you need to change the video playback setting. By changing the setting you will not only save the battery but it will also affect the life of the battery and can increase the life.
To change the video setting in Windows 10, 8, 7 for battery optimization you need to enable the enhance video option. You can choose whether you want it to be on battery power or not. The features totally rely on the GPU which is why it consumes more battery.
You can even enhance the battery life by checking the last option which is ‘I prefer video to play at a lower resolution’.

Also Read: 10 Best Laptop Battery Testing Software for Windows 10
2. Power Option to Change Video Playback Settings
The last thing which you can change in video settings is battery optimization in ‘Power Option’. Here is how you can change video playback settings in Windows 10 and older versions.
- Click on the search tab, can type ‘Edit Power Plan’. From the list select the first option.

- In the new window will appear, in the window click on ‘Change advanced power settings’.

- A new dialog box will appear on the screen, double click on the ‘Multimedia settings’ which will open further options.
- Now click on the Video playback quality bias option and select the option according to your need and requirements.

- Similarly, you can even customize the setting for the system when plugged in.
- After you have changed the settings, click on the ‘Apply’ button and then ‘Ok’ from the bottom options.

This is how you can edit power and change the video playback setting in Windows 10/8/7 for better output. If you want to change the setting back to default then you can also do that, in the change advanced setting window ‘click on the Restore plan defaults’. The option is present at the bottom of the window.
Also Read: How To Update Video Card Drivers In Windows 10? Check 4 Best Ways!
Successfully Changed Video Playback Settings in Windows 10 and Older Versions
The above-mentioned changes in the video settings can help you in getting the best output, not only better output from videos but will also save battery. You can follow the steps and change the settings. If you don’t want to change some setting you can definitely go with it. We hope that we have helped you in identifying the relevant changes of video settings in Windows 10.


![[Fixed] Minecraft Won’t Launch On Windows 10 {Quick Methods}](https://wpcontent.techpout.com/techpout/wp-content/uploads/2020/12/08175317/Fix-Minecraft-Wont-Launch-on-Windows-10-150x150.jpg)