ScanSnap iX500 Driver Download and Update for Windows 10, 11
The FUJITSU ScanSnap iX500 driver for Windows 10/11 helps get error-free performance from the iX500 scanner. Hence, this article shares the best ways to download, install, and update it.
Despite being a discontinued product, ScanSnap iX500 continues to be the favorite scanner of many users worldwide. It is best known for its fast double-sided scanning with a scan speed of up to 25 pages per minute, built-in GI microprocessor for intelligent image enhancement, and other incredible features. However, it may not deliver the desirable performance without the compatible ScanSnap iX500 driver.
The ScanSnap iX500 scanner driver communicates your instructions to the computer for their perfect execution. Without the driver, your PC cannot understand and execute your commands correctly.
Hence, this article guides you through the best approaches to downloading, installing, and updating the FUJITSU ScanSnap iX500 driver for Windows 11 or 10. Let us get started with them without further ado.
How to Download, Install, and Update the ScanSnap iX500 Driver (100% Working)
You can apply the methods shared below to get the updated driver for FUJITSU ScanSnap iX500 downloaded and installed on your Windows 10 or 11 computer.
Method 1: Download the ScanSnap iX500 driver through Windows update
Windows updates bring with them bug fixes and new/updated drivers. Below are the steps you can follow to download and install the ScanSnap iX500 scanner driver for Windows 10/11 by performing an operating system update.
- Firstly, navigate to Settings on your PC using the Windows+I keyboard shortcut.
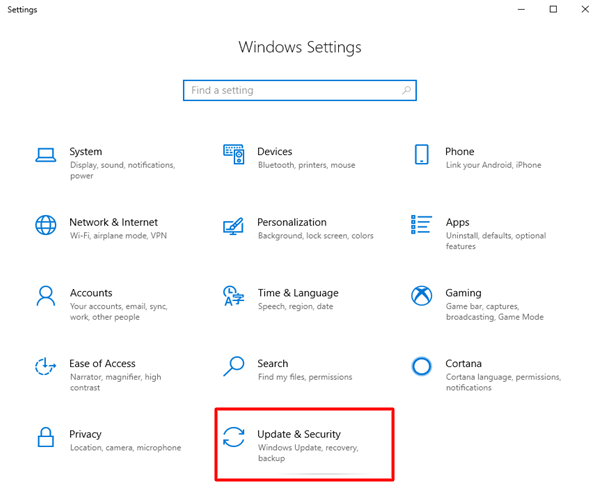
- Now, select Update & Security from the panel on your screen.
- With Windows Update selected in the left pane of the Update & Security screen, click Check for updates.
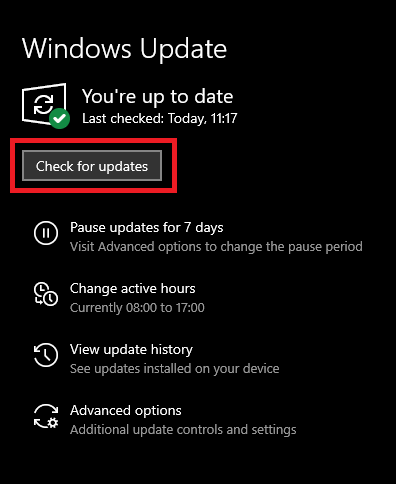
- Download and install the latest updates.
- Lastly, restart your PC after completing the above steps to install the FUJITSU ScanSnap iX500 driver for Windows 11/10.
Also Read: Scansnap S1500 Driver Download And Update For Windows 10/11
Method 2: Use Device Manager to download the driver for FUJITSU ScanSnap iX500 scanner
Device Manager is a Windows tool to download and install drivers, update existing drivers, and solve related issues. Below is how to use it to download and install the Windows 10/Windows 11 FUJITSU ScanSnap iX500 driver.
- Firstly, right-click the Windows icon on your taskbar and choose Device Manager to open it.

- Now, click and expand the category of Printers or Print queues.
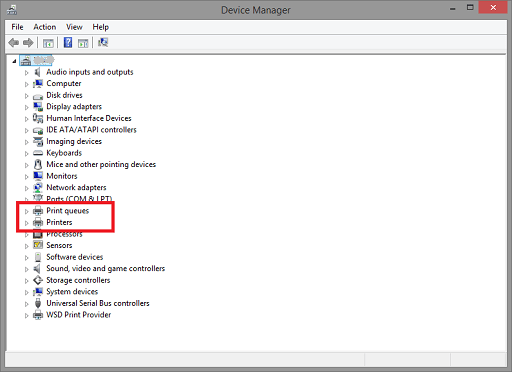
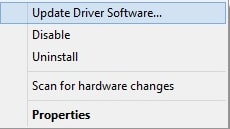
- Right-click your ScanSnap iX500 device and choose Update driver software from the available list of options.
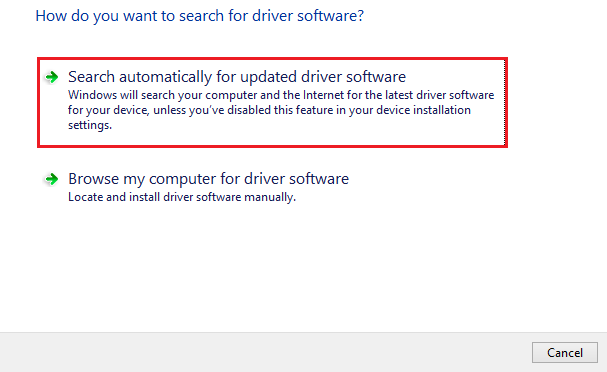
- Now, Search automatically for updated driver software.
- Lastly, restart your computer after Windows finds, downloads, and installs the FUJITSU ScanSnap iX500 scanner driver for Windows 10 or 11.
Also Read: ScanSnap S1300i Drivers Download & Update For Windows 10
Method 3: Download the ScanSnap iX500 driver update automatically (Recommended)
As many users (including computer experts) agree, manual driver downloads, installs, and updates are extremely tiring and time-consuming. Moreover, mistakenly installing an incompatible driver can lead to serious issues like system crashes. Hence, we always recommend updating drivers automatically through a program like Win Riser.
The Win Riser software is a renowned driver updater and PC optimization tool. It boasts a lot of useful features, such as system restore point creation, driver backup and restoration, in-depth and scheduled scanning, driver ignore list, malware detection, junk removal, and more.
You can use the following link to download Win Riser and install it on your system.
After completing the installation of Win Riser, you can simply scan your PC using the software, review the results available on the screen, and get rid of all the problems instantly by clicking on the Fix Issues Now button.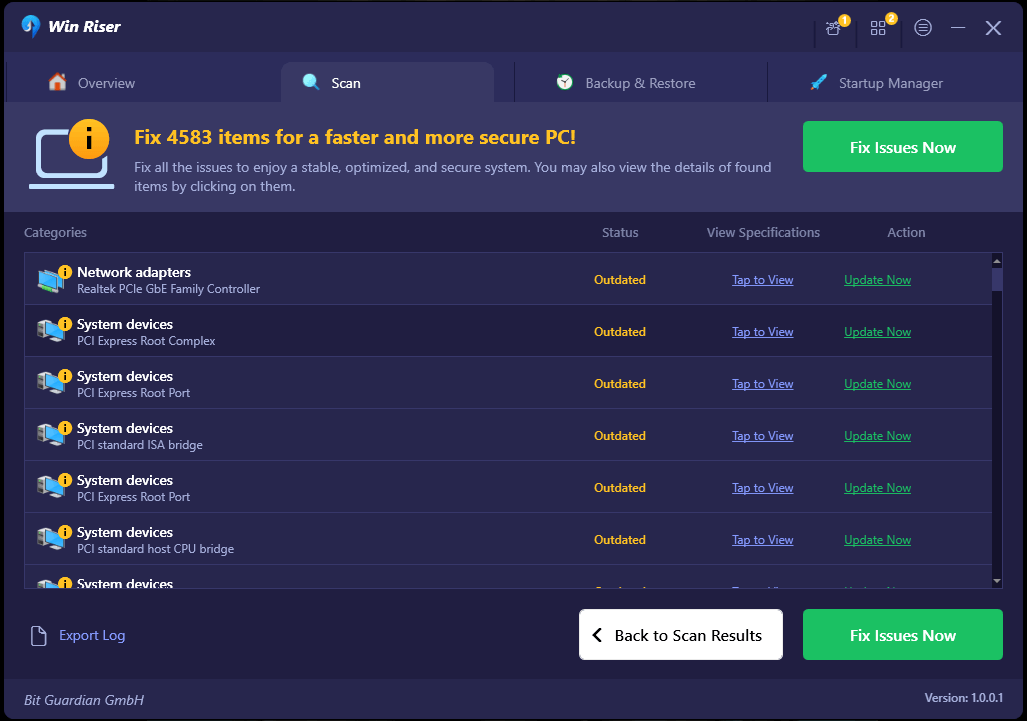
Also Read: Fujitsu FI-6130 Driver Download and Update for Windows 10, 11
Method 4: Download the driver for the ScanSnap iX500 scanner from the official website
Though ScanSnap iX500 is a discontinued product, its drivers are available on the official website to support those who have this scanner. Here are the steps you can follow to get the driver for your ScanSnap iX500 scanner via the official website.
- Firstly, navigate to the ScanSnap Software Downloads page.
- Now, scroll down to the Discontinued scanners and select ScanSnap iX500.
- Choose your target OS.
- Click the Display Software list button.
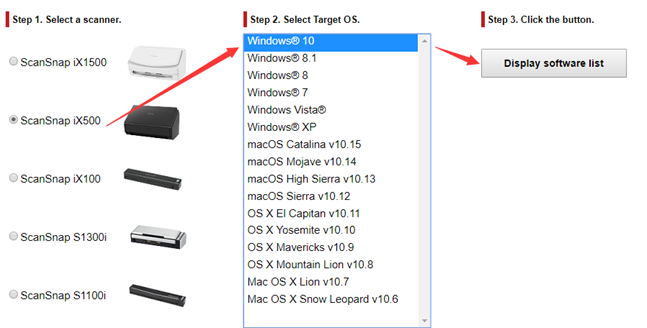
- You can now choose to Download the latest driver package for your ScanSnap iX500 device.
- Lastly, double-click the downloaded file and follow the on-screen directions to install the driver.
Also Read: Fuji Xerox Printer Driver Download and Update For Windows 10, 11
FUJITSU ScanSnap iX500 Driver Downloaded and Updated
This article highlighted various methods to download, install, and update the FUJITSU ScanSnap iX500 scanner driver for Windows 10 and 11. You can follow any method from this guide to do the needful. However, Win Riser helps you update drivers and elevate the PC performance most conveniently.
If you have any questions or suggestions regarding this write-up, please leave us a comment. We will be back with another tech guide soon. Until then, you can explore our other article to boost your tech knowledge.

