How to See Clipboard History on Windows 10, 11
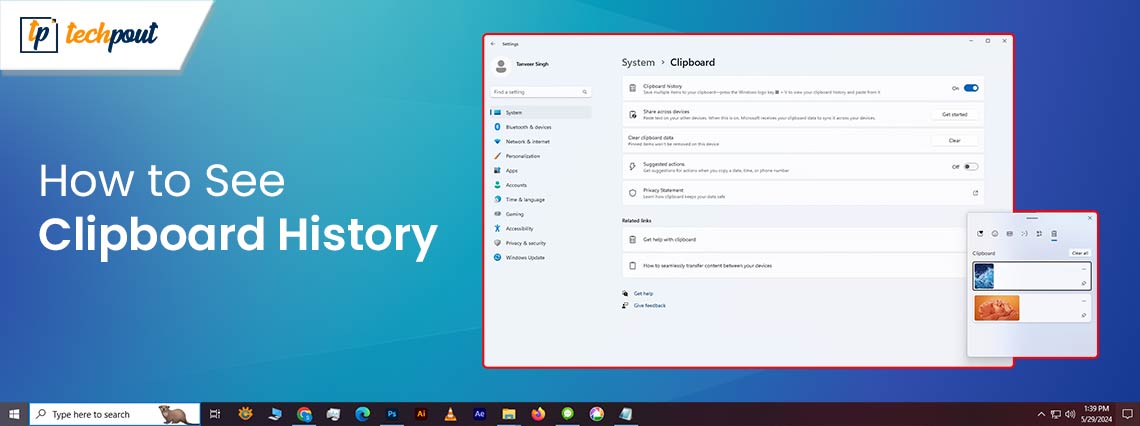
Clipboards make it possible for you to easily retrieve anything that you have copied and pasted into your emails, email messages, and text messages. There are Windows devices that provide you access to the history of the clipboard, but there are other devices that simply show the most recent thing that was copied. Even on Windows computers and laptops that do not have this capability, there are a few other methods to see the history of the clipboard (also known as the clipboard history).
At the moment, the Clipboard history feature allows for the storage of text, HTML, and pictures that are less than 4 megabytes in size. History will not be able to hold objects that are larger. A maximum of 25 entries may be stored in the clipboard history, with the oldest items being removed when newer ones are added one after the other. Additionally, the history list of the Clipboard will be reset whenever you restart your computer or device, unless there is an item that is temporarily pinned to the Clipboard. Beginning with the October 2018 Update (Version 1809), the clipboard history function was included for the first time in Windows 10.
The ability to see the history of the clipboard is dependent on the Windows NT device that you are using. The keyboard is one of the numerous aspects that differentiate Windows devices from one another, despite the fact that they all use the same or very similar operating systems (with certain modifications made by the makers). Integrated clipboards are available on every Windows device. On the other hand, just a handful of them allow you to examine its archives.
Utilizing the Clipboard Shortcut in Windows 10: See the History of the Clipboard
- You may access the clipboard by using the shortcut for the clipboard, which is Windows+V.
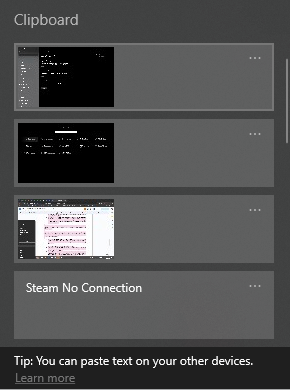
- Suddenly, a little window will appear. The things that you have copied the most recently are located at the very top of the list.
- You may paste any item from the Clipboard history list into an application that is currently open by clicking on any of the items in the list.
- On Windows 10, it is possible to paste an object into a document by clicking on it in the Clipboard history.
- Make sure to click on the ellipses (three dots) that are located next to the item that you want to erase in order to remove it from the Clipboard history. Choose the “Delete” option from the menu that appears on the screen.
- You may delete everything from the history of the clipboard by selecting “Clear All” from the menu that appears when you click the ellipses.
- Additionally, it is possible to “pin” an item on the list of history on the clipboard. In this manner, it will continue to be included on the list even if you restart the computer or use the “Clear All” option. Click on the menu that looks like three dots, and then pick “Pin.” The item may be unpinned at a later time by choosing “Unpin” from the menu associated with the ellipses.
In early versions of Windows, the interface for the Clipboard history has a somewhat different appearance than it does more recently. Those who are operating a structure constructed earlier to 1909 may find the instructions here.
Also Read: How to Clear Search History From Any Browser
Bonus Tip: Learn How To Enable The History Of The Clipboard In Windows 10
In the event that you are unable to complete the procedure described above, it indicates that the clipboard in question is not active. To make use of a Windows clipboard in such a scenario, you will need to activate the same feature on the Windows personal computer. When you want to learn how to achieve something, follow the directions that are below:
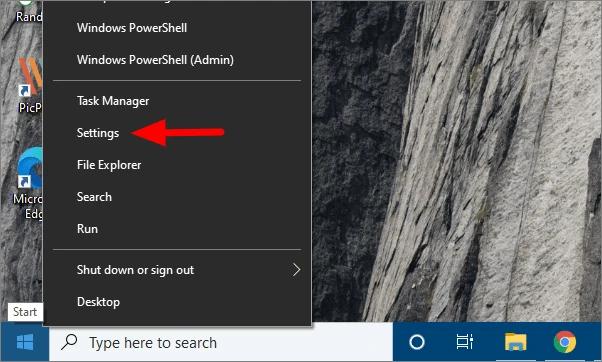
- The “Windows Settings” menu may be accessed by first clicking the “Start” button, and then clicking the “Gear” symbol that is located on the left side of the Start menu of the Start menu. On top of that, you may reach there by pressing Windows+i.
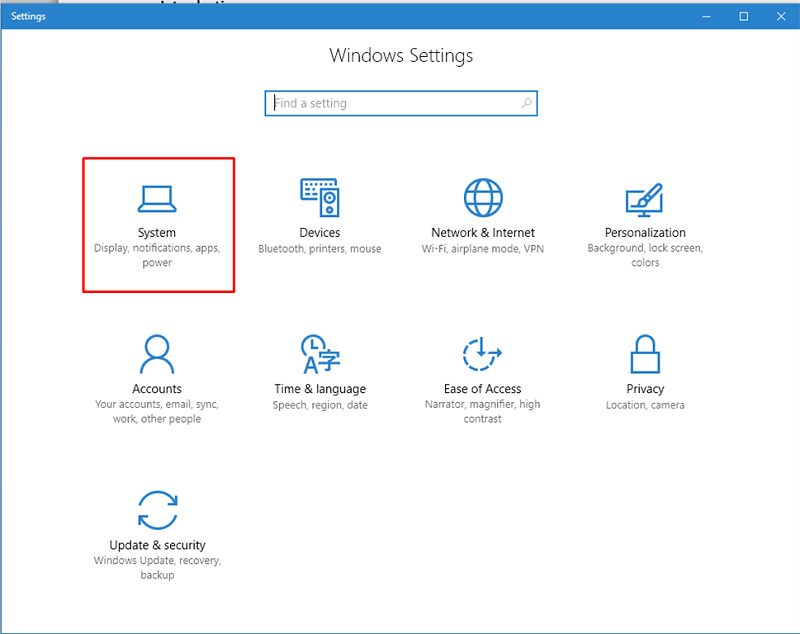
- While in the Windows Settings menu, choose “System.”
- In the sidebar of the Settings menu, choose “Clipboard.” In the settings for the clipboard, look for the section that is labeled “Clipboard history,” and then turn the switch to the “On” position.
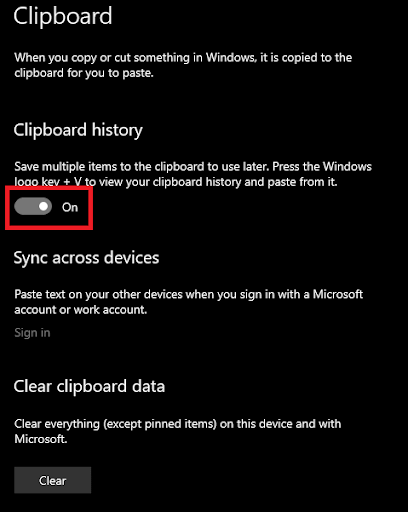
- The history of the clipboard has been activated. In addition, you have the option to activate Sync here if you are currently logged in with a Microsoft account. After that, the history of your clipboard will be available regardless of the device you are using. After closing Settings, you are now able to utilize the functionality in any program you want.
Also Read: How to Fix PR_CONNECT_RESET_Error on Firefox
Bonus Tip: Learn How To Disable The History Of Your Clipboard In Windows 10
If you are of the opinion that you do not need the clipboard on a regular basis, then you may deactivate it by following the methods that are provided below. In order to enable the setting, the following are pretty comparable to those that were offered before. As a result, continue as follows:
- The “Windows Settings” menu may be accessed by first clicking the “Start” button, and then clicking the “Gear” symbol that is located on the left side of the Start menu of the Start menu. On top of that, you may reach there by pressing Windows+i.

- While in the Windows Settings menu, choose “System.”

- In the sidebar of the Settings menu, choose “Clipboard.” Within the settings for the Clipboard, select the section that is titled “Clipboard history,” and then turn the switch to the “Off” position.

- Now, the history of the clipboard has been disabled. Additionally, you have the option to deactivate Sync in this section if you are logged in with a Microsoft account. If you do this, the history of your clipboard contents will not be available across all of your devices. It is now possible to close Settings.
Also Read: How to Clear Chrome Net Internals DNS Error (Fixed)
How to See Clipboard History: Summing Up
Trying to locate one of the last items that you copied may be a frustrating experience, particularly if you have moved on from the source from whence you obtained it and closed a window. The exact last item that you copied is the only thing that you will receive when you just paste using the Ctrl and V keys on your computer.
You won’t have to worry about that as much thanks to Clipboard History, and you’ll have a lot simpler time navigating through the stuff that you’ve copied in the most recent past. In both Windows 10 and Windows 11, you have the ability to activate Clipboard History. Additionally, you have the ability to pin objects so that you can quickly bring them up in Clipboard History and keep them from deleting.

