How To Fix Power Surge On USB Port in Windows 10, 11

Running into Power Surge on USB Port in Windows 10, 11? Try these effective solutions to solve the problem, easily & quickly.
USB port power surge is an unusual error that Windows PC users experience. Additionally, the error itself indicates that an unrecognized USB device demands a greater amount of power than a USB port is able to provide.
Now, you must be wondering why this issue occurs. In most cases, the reason why Windows shows an error message that reads “Power surge on USB port” as the power requirements of a USB accessory that is connected to the computer have surpassed the full power of USB ports that you are using. The error is frustrating but it is not challenging to fix this issue. In this tutorial, you will get the best practices to resolve this problem.
Solutions to Fix Power Surge on USB Port Error in Windows 10/11
If you are attempting to connect hardware to your computer and you encounter the problem of a power surge on the USB port, then it might be an annoying problem for you. However, you need not be concerned about this circumstance. We can assist you in resolving this problem as quickly as possible on Windows 11, 10.
Solution 1: Initial Workarounds
Before trying more advanced tactics, you should first perform basic fixes.
- Unplug all USB peripheral devices connected to your Dell, Lenovo, or other device. Find the Reset option and click on it.
- It is suggested that you reboot your machine and try to reconnect your peripheral device to your computer once you have reset it. This will allow you to determine whether or not the power surge on the USB port problem continues to occur.
Additionally, if the problem persists, proceed with the other solutions mentioned below.
Solution 2: Update USB Controller Drivers
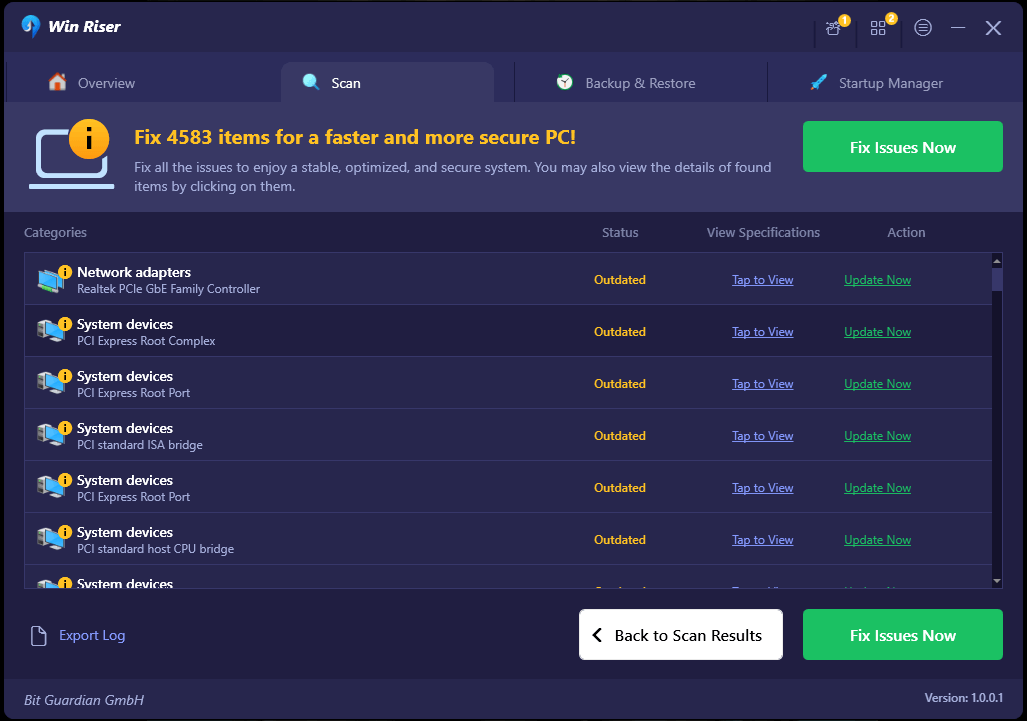
It is recommended to keep all USB controller drivers updated to avoid issues. This is one of the effective solutions to the power surge on the USB port problem. It is highly recommended that you make use of a driver updating application such as Win Riser Driver Updater in order to simplify the overall process. This program can swiftly scan your device for missing or outdated drivers and automatically replace them with the most recent version in a single click.
It comes with an automatic driver update functionality and the utility also can solve any driver problems as well as other issues in your computers’ different components. Win Riser only provides WHQL-tested and genuine drivers. With Win Riser, you can perform bulk driver downloads at once. Not only that, but Win Riser also comes with a built-in auto backup & restore wizard, which lets you create a backup of existing drivers before updating, so the older version of drivers can be restored if needed.
Now, follow the steps below to automatically update USB controller drivers with Win Riser in order to fix the Windows 10 power surge on the USB port issue.
- Download and install the Win Riser Driver Updater program.

- After installing, launch the utility on your device and let it scan your device for missing or obsolete drivers.
- Wait for the scanning to be finished. Once done, check the scan results and click the Fix Issues Now option. This will install the latest version of all PC drivers in one click.

- To apply these drivers, restart your PC.
See how easy and quick it is to perform driver downloads with Win Riser Driver Updater. After installing the new drivers, check to see if the power surge on the USB port is resolved. If this fix doesn’t work, then proceed with another solution.
Solution 3: Use the Command Prompt
It is also possible to resolve this problem (power surge on the USB port) by using the Command Prompt. Use the procedure provided below to fix the problem.
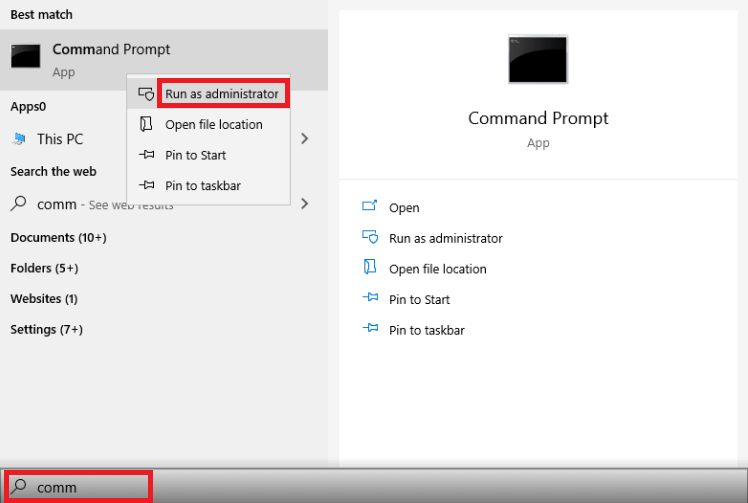
- Look for “Comm” using the search box that is located on the taskbar. Right-click Command Prompt and select “Run as administrator” from the context menu to open it.

- In the “Command Prompt” window, type the command “msdt.exe/id devicediagnostic” and then click the “Enter” button on your keyboard.
- Click the “Next” button in the popup window that appears in order to identify and fix any problems.
- To finish the troubleshooting procedure, follow the instructions on your screen.
Once done, check if the Power Surge on the USB Port on Windows 11, 10 is resolved. If not, try another method.
Solution 4: Use USB Hub
In case, the problem occurs on a certain device, that means the device may require a higher voltage than the USB port that is currently being used. It is possible to try utilizing a USB hub that comes with the power supply of the device if you are seeing the same issue while using the same device on another computer.
It is equipped with high-speed charging ports, which will provide your device with the appropriate amount of power. All that is required is to connect the device to the USB hub, and then connect the USB hub to the USB port.
Closing Words
In this tutorial, we explained to you numerous solutions in order to address the power surge on USB port error on Windows 10, 11. Hopefully, using either of the following solutions will help you resolve the error. If you have any queries, doubts, or additional information regarding this, please feel free to drop us a comment in the box below.
And, before you go, do subscribe to our Newsletter for more such pieces of information. In addition to this, you can also follow us on Facebook, Twitter, Instagram & Pinterest.


