Fix: nvlddmkm.sys Failed Error on Windows 11/10/7

Running into VIDEO_TDR_FAILURE nvlddmkm.sys failed error on Windows PC? Don’t worry, you are not alone. Recently, we have seen a lot of Windows PC users complaining about the same error. This is quite frustrating but it is also easy to get rid of this error. After reading this article, you will be able to resolve the blue screen nvlddmkm.sys error on your own.
What Causes nvlddmkm.sys Error on Windows PC?
Talking about the causes of this blue screen error, then it can be caused due to outdated or corrupted drivers installed, inaccurate memory timings, driver conflicts, an old version of the Windows operating system, or voltages overheating. Well, whatever the reason is, as said, luckily the error is solvable.
In this write-up, we are going to share a few potential solutions to fix nvlddmkm.sys failed error on Windows PC. However, before you try them, you should try to reboot your computer as a basic fix. This might help you bypass the error. If in case, it didn’t work for you, then you can move on to other tactics.
Easy Solutions to Fix VIDEO_TDR_FAILURE nvlddmkm.sys Error on Windows PC
This section highlights the 4 best ways to fix NVIDIA nvlddmkm.sys failed blue screen error on Windows 11, 10, or older versions. However, you may not need to try all of them, just walk through each and find the best one for you.
Solution 1: Update NVIDIA Graphics Driver
If your NVIDIA graphics card is not working as expected, an outdated graphics driver is likely responsible for VIDEO_TDR_FAILURE nvlddmkm.sys on Windows 10, 11, 7. Therefore, it is important to update the graphics drivers from time to time in order to avoid such problems or errors.
You can update NVIDIA graphics drivers by going to its official website and searching for the correct driver for the same. Just make sure to download and install the driver which is compatible with the Windows OS version that you are using currently.
This process requires a lot of time, patience, and good technical knowledge. So, if you don’t fit the bill, then you can use Bit Driver Updater to automatically find and install the most required drivers for your device. Bit Driver Updater is one of the best solutions that automatically identifies your system and finds out the most suitable drivers for it.
Not only that, but the software comes with an in-built scan scheduler that allows you to schedule the driver scans at your convenience and time being. To use the software, follow the simple steps below:
- From the button provided below, download Bit Driver Updater.

- Run the downloaded file and comply with the instructions that appear on your screen to complete the installation.
- After installing the software, launch it on your PC and click on Scan.
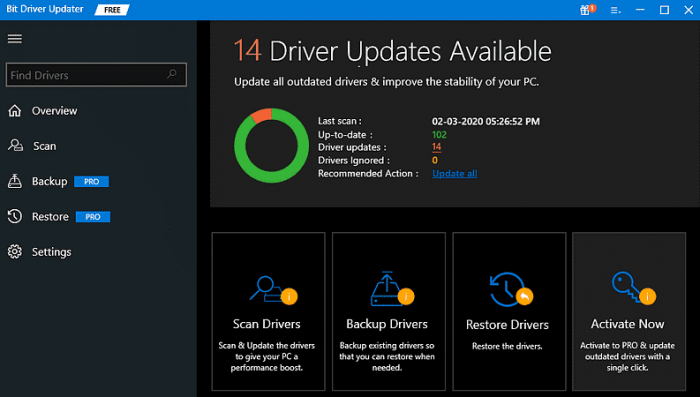
- Wait for it to complete. Check the scan results and locate your GPU drivers, then click on the Update Now button next to it. Moreover, you can also choose the Update All button instead of Update Now.

By using this button, users can update all their faulty drivers in one click. However, for this, users have to acquire the full version of Bit Driver Updater. Its full version comes with plenty of advanced features like auto backup & restore tool, performance optimizer, 24*7 technical support, 60-days complete money-back guarantee, and more.
After updating the NVIDIA graphics drivers, check to see if the nvlddmkm.sys failed Windows 10/11 blue screen error is fixed. If it didn’t work, proceed with the other resolutions.
Also Read: How to Fix Data Error (Cyclic Redundancy Check) [SOLVED]
Solution 2: Install Latest System Updates
Sometimes, the old or buggy Windows version triggers the nvlddmkm.sys failed BSOD error. So, you need to check if you are using the latest version of the Windows operating system. Here is how to do that:
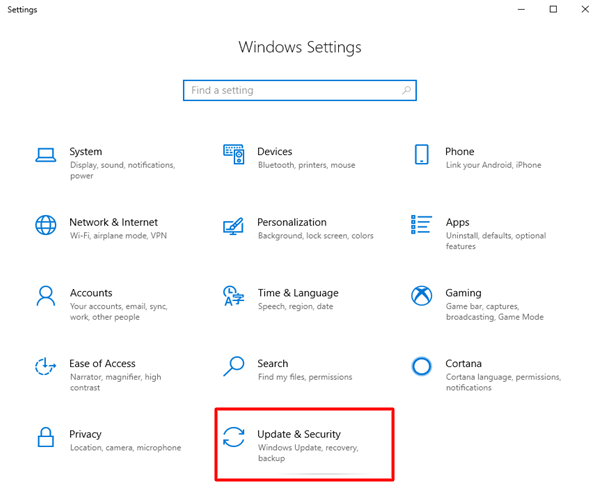
- Altogether press Windows + I keyboard keys to invoke Windows Settings.
- Find and click Update & Security.
- Be sure that Windows Update is selected from the left pane of the next window. After that, click on Check For Updates.
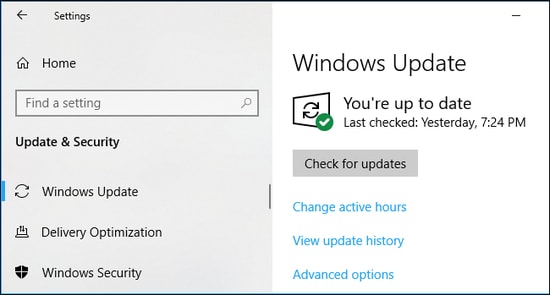
Now, wait and let Windows search for the latest system updates and patches. If Windows finds any recent updates available, then they will be downloaded and installed automatically. Once done, reboot your PC to save the recent changes, then try to check if the VIDEO_TDR_FAILURE nvlddmkm sys BSOD error is fixed. If not, try another solution.
Solution 3: Perform a Disk and Memory Test
BSOD (Blue Screen of Death) errors are generally related to faulty, damaged, or corrupted hard drive or RAM. So, in order to fix the issue, you can run a disk and memory test. Here’s how:
Steps to Run Disk Check
- Launch Command Prompt as Administrator.
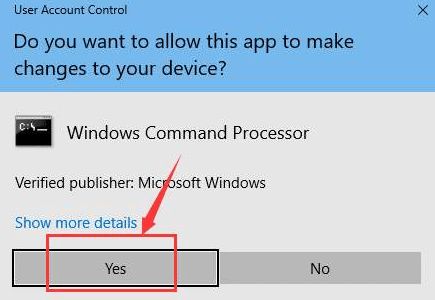
- Click Yes, if a confirmation box prompts.
- Write the following command in the command prompt window and hit Enter.
chkdsk /f c: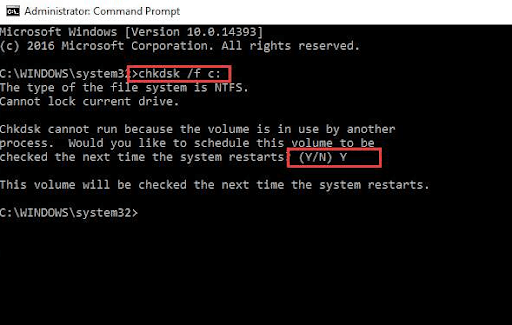
- After that, input Y and reboot your PC for the disk check to begin.
Steps to Run Memory Test
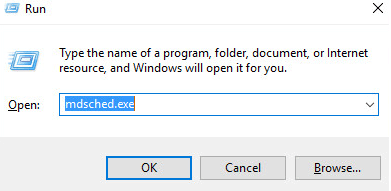
- Open the Run dialog box by hitting Windows + R keys at the same time.
- Write mdsched.exe in the run box and click on the OK option.
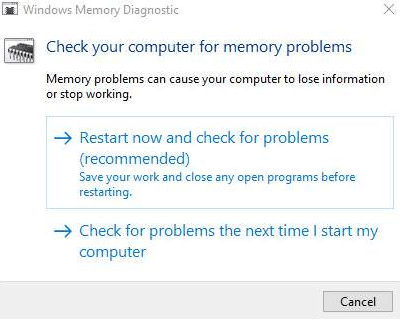
- Now, click on Restart now and check for problems (recommended) in order to see the status of your Memory card.
- The next page will show the progress of the check and the number of passes it will perform on memory.
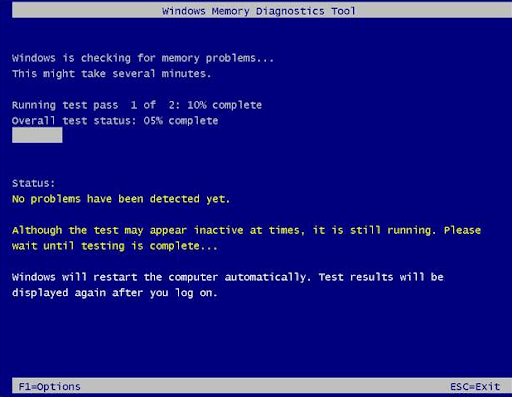
If you don’t notice any issue or error here, then it is likely that your memory card isn’t causing any problems.
Solution 4: Reinstalling NVIDIA Graphics Driver
Don’t panic, if nothing has worked from the above suggestions, you can try to reinstall the NVIDIA graphics driver to fix nvlddmkm.sys BSOD error on Windows 7 or higher versions. For reinstalling the drivers, you need to first uninstall the currently existing drivers from your PC. To do so easily, you can follow the steps below:
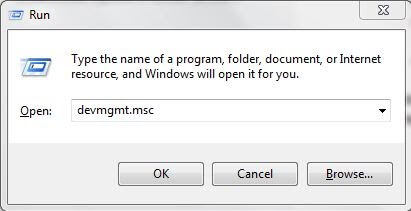
- On your keyboard, press Win + R keys at a time.
- This will open the Run Dialog box. Here you need to type devmgmt.msc and click on the OK option.
- Once Device Manager opens, then locate and double click on the Display Adapters.
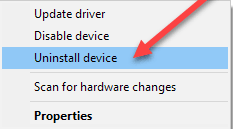
- Click right on your GPU and choose Uninstall device from the context menu list.
- After that, a confirmation window will appear, make sure to check the box next to the Delete the driver software for this device.
- Next, click on Uninstall and then OK.
Wait for the process to be finished. Once drivers are uninstalled, then you can find a genuine driver file on the official website of NVIDIA and download it. After downloading, run the executable file and follow the on-screen instructions to install the drivers again. Installing the latest and most compatible drivers will surely help you deal with this BSOD nvlddmkm.sys error.
Also Read: How to Fix Critical Process Died BSOD Error in Windows
Nvlddmkm.sys Failed Blue Screen Error on Windows 10, 11, 7 PC: DONE
Using the above-shared resolutions, Windows PC users can hassle-free fix nvlddmkm.sys failed error. Hopefully, you find this write-up informative and helpful. Drop your queries or doubts in the comments box below. Plus, you can also share your suggestions or feedback with us through the comments.
Lastly, do subscribe to our Newsletter for more tech-related stuff. Along with this, you can also follow us on our Social Media handles Facebook, Twitter, Instagram, or Pinterest.
