Read this step-by-step tutorial on how to fix Minecraft Realms Internet Server Error 500 on Windows PC.
Minecraft lets their players organize their own multiplayer servers, where they can have a complete realm for themselves and the other players as well they want to play with across the globe. Well, this is basically a server-based error that pops up while attempting to log in to the Minecraft realm.
Are you also shouting, “why am I getting Internal Server Error 500 in Minecraft Realms?” Don’t worry, you are not alone, there are numerous users out there, who have lately reported the same issue while trying to play Minecraft in different realms. To be more specific, this guide explains to you “how to fix realms 500 could not connect?”
Quick Solutions to Fix Minecraft Realm Internal Server Error 500 on Windows 10, 8, 7
There are numerous ways available to fix Minecraft Realms error 500 on Windows PC. In this section, we are going to discuss some effective tactics that you can consider in order to get rid of this issue. Without further ado, let’s get started:
Solution 1: Basic Hacks
Before trying the more complicated or advanced solutions, try these preliminary workarounds to fix Minecraft realms internal server error 500 on PC.
- Whenever you run into any kind of issue, be it a game crash or other errors, performing a simple reboot of your PC is always suggested. This seems to be a more simple solution but this did a miracle for many Minecraft players.
- Check to see if you are using an outdated or buggy Windows OS version. If yes, then be sure to find and install the latest available updates. After installing the latest system updates or patches, try to run the game.
- It’s too obvious to make sure that you are running an up-to-date version of Minecraft. Keep installing the latest game updates or patches not only makes your game more consistent but also helps you resolve various common errors and glitches of the game.
- Another reason to face Minecraft realms not working on Windows PC is the changed game settings. Tweaking some of the game settings might be one of the main reasons for this problem. Hence, configuring the settings to their default is suggested.
Luckily, the following basic hacks should fix the problem for you. But if not, then be patient and follow the other advanced solutions.
Also See: 13 Best Minecraft Seeds for Players to Explore in 2022
Solution 2: Check your Internet Connection
If your internet connection is not working actively or it stops you from using the Minecraft servers, then you may run into Minecraft realms internal server error 500. So, before heading towards the other troubleshooting tips, you need to first ensure that you are using an active and stable internet connection.
Besides, if you are utilizing Wi-Fi, then we urge you to prefer ethernet over Wi-Fi as it helps you get a more stable network.
Solution 3: Close Background Running Applications & Programs
After checking your internet connection and switching to the ethernet from Wi-Fi, if you are still experiencing the problem with Minecraft realms, then it’s likely to happen due to the apps or programs running in the background. Running too many programs in the background causes a set limit to your internet bandwidth which can be responsible for the problem. Hence, it is advisable to disable background apps or processes that you no longer need. Here is how to fix Minecraft realms internal server error 500 using this method:
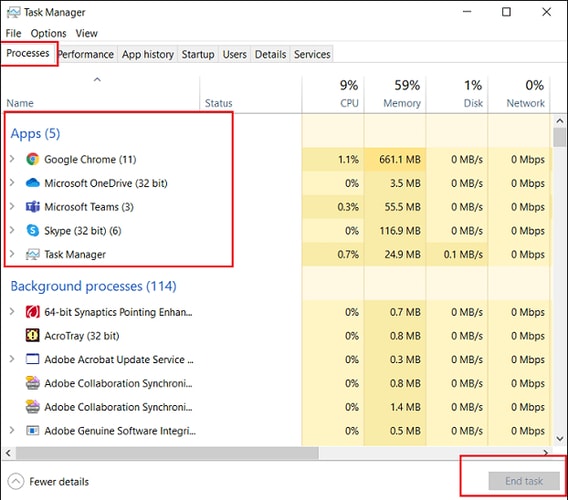
Step 1: On your keyboard, altogether press CTRL + SHIFT + ESC to launch Task Manager.
Step 2: Next, switch to the Processes tab and locate the useless applications that are running in the background.
Step 3: After that, right-click on the particular application and click on End Task.
Once done, try to launch Minecraft and check to see if the internal server error 500 is fixed or still persisting.
Solution 4: Update your Graphics Drivers
If you are using an outdated, faulty, or broken graphics driver then you may encounter this problem. Keeping GPU drivers is crucial to getting the most out of the game. The users can look for the correct drivers on the official website of the graphics card manufacturer. Then, download and manually install the relevant drivers. However, finding and downloading the drivers manually is pretty much time-consuming and error-prone, especially for novices.
So, if you also don’t have time and patience to update drivers manually, then you can use Bit Driver Updater to automatically find, download and install the latest driver updates.
Bit Driver Updater is one of the best globally recognized driver updater utilities that automatically detects your system and later on finds the most suitable driver updates for you. To use this amazing solution, all you need to follow the easy steps shared below:
Step 1: First of all, download the Bit Driver Updater from the button shared below.
Step 2: Once the software file is downloaded, then double-click it and follow the on-screen installation instructions to get the Bit Driver Updater installed on your PC.
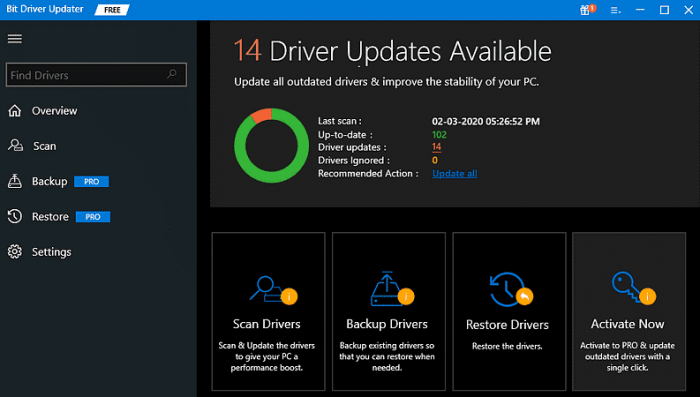
Step 3: After that, launch the driver updater on your PC and click Scan from the left pane. Now, wait until the utility scans your system for faulty drivers and provides you with a list of required drivers that need to be installed for better performance of your system.
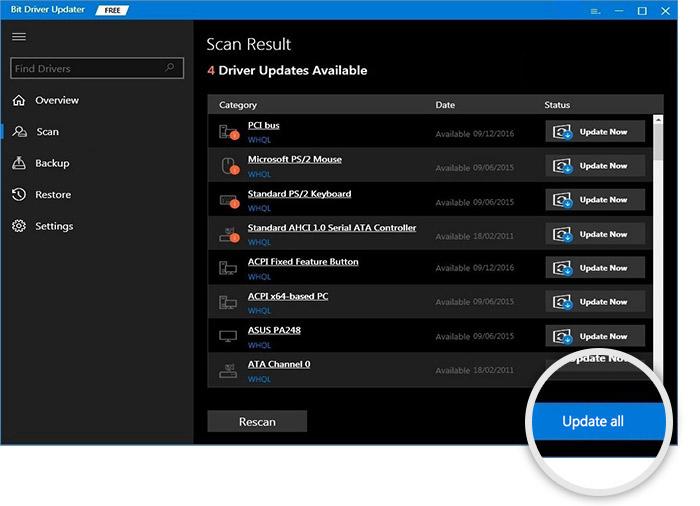
Step 4: Next, free version users can click on the Update Now button presented beside the driver that needs an update. Whereas, pro version users can click on the Update All button to update all outdated or broken drivers within a click.
See how amazingly the software works. To make the use of Bit Driver Updater to its full potential, relying on its pro version is strongly recommended. Bit Driver Updater’s pro version comes with complete 24/7 technical support and a 60-days 100% money-back guarantee.
Also See: Unable to Connect to World Minecraft On Windows 10 [Solved]
Solution 5: Uninstalling & Reinstalling the Minecraft
Nothing has resolved the problem for you? Don’t worry, we have another solution. Uninstalling and then reinstalling Minecraft would resolve all the glitches. Follow the steps mentioned below to use this method in order to fix Minecraft realms internal server error 500.
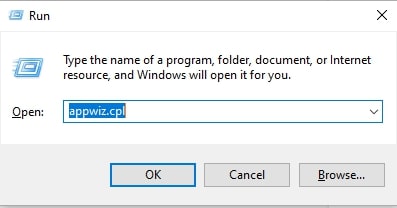
Step 1: On your keyboard, altogether press Windows + R keys to invoke the Run dialog box.
Step 2: Then, write the text appwiz.cpl and press the Enter keyboard button.
Step 3: In the application manager window, navigate to the Minecraft application and click right on it to select Uninstall.
Wait for the game and associated files to get uninstalled. Once it’s done, either visit the official website of the game or from the Steam download and reinstall the game. Hopefully, the issue with the game should be resolved, but if in case, the issue still remains the same, then contacting the Minecraft customer official support center is recommended.
Solution 6: Try deleting the UUID folders
UUID or Universally Unique Identifier are codes individually assigned to your realm’s players, just like the online gamertags. Deleting the UUID of players who are not active anymore ensures no cache data remains, preventing the internal server error. Hence, you can delete the UUID files by following these steps.
Step 1: Firstly, locate Minecraft’s main directory and go to the .minecraft folder.
Step 2: Now, select the Saves folder and then choose the World folder to find its overall data.
Step 3: Select the Players folder to find the UUID data.
Step 4: Now, delete the UUID files if they are present.
Step 5: Return to the game, realm servers, and the World setting.
Step 6: If you see any UUID or player usernames, erase them.
Step 7: Now, you can run your game.
Solution 7: Enable Windows Defender Firewall Permission
Minecraft Realms may not have the necessary Windows Defender Firewall permissions on your computer, resulting in Internet Server Error 500. Hence, granting the required authorization can fix the issue. You may follow these steps to enable the needed permissions.
Step 1: Firstly, search for the Control Panel and open it.
Step 2: Now, change the view to small icons and choose Windows Defender Firewall from the Control Panel menu.
Step 3: Select the option to Allow an app or feature through Windows Firewall Defender.
Step 4: Follow the path Change Settings>Allow another app if you do not find Minecraft checked in both Private & Public options.
Step 5: Now, find Minecraft’s .Exe file and add it to the list of allowed applications.
Step 6: Save the changed settings and launch the game.
Also See: Minecraft LAN Not Working Issue on Windows 10 [Fixed]
Minecraft Realm Internal Server Error 500: FIXED
So, that was all about how to fix Minecraft Realms Internal Server Error 500 on Windows PC. At first, you should try to apply the basic hacks, if they don’t work, then proceed with the other advanced solutions. We hope the above shared tips & tricks help you in the best way possible to fix Minecraft realms error 500 on PC.
Besides, if you have any further suggestions regarding the same issue, then do tell us in the comments box below. Also, you can share them on our Social Media Channels like Facebook, Twitter, Instagram, and Pinterest.