How to Fix Health Check App Not Working on Windows PC
Read the article to learn effective ways to fix Health Check app not working on Windows PC.
PC Health Check is a streamlined application developed by Microsoft that gives you information regarding the condition of your Windows-based device. The program is able to display some fundamental PC health information and assist users in performance issues; however, its most important function is that it can determine whether or not a computer is eligible for Windows 11.
However, this software may pose some issues when you check if the PCs are capable of updating to the Windows 11 OS, they find that the app does not operate at all. The Health Check program has a number of issues, such as being stuck during this installation process, but not actually opening any windows, and so on. If you’re experiencing problems that are similar to those described in this post, keep reading to learn about potential solutions.
Solutions To Fix Health Check App Not Working on PC
Listed below are a few tried and tested workarounds that you can use in order to resolve the Health Check app not working on Windows 7, 8, 10, 11. Without further ado, let’s begin!
Solution 1: Reboot your PC
The first thing you should do is restart your computer when you find the Health Check app not working on your PC. You can exit the PC Health Check software, restart your Windows computer, and then try to launch PC Health Check once more if it isn’t functioning normally on your machine. Restarting the computer is often all that is required to resolve even the most trivial of computer problems. But, unfortunately, if this isn’t enough for your case, then you can proceed with the other solutions mentioned below.
Also Read: Best Hard Drive Health Check Software For Windows
Solution 2: Repairing the Application
Repairing the application with the tool that comes in-built in Windows is the best way to fix any application that has crashed or is not functioning properly. You should always make an effort to fix the problem using this method first before you attempt anything more involved. Here is how to do it to fix the Health Check app not working on Windows 10, 11, 8, 7.
Step 1: To launch the Run box on your computer, hit the Windows + R key simultaneously from your keyboard.
Step 2: Then, type appwiz.cpl into the box, and click the OK button.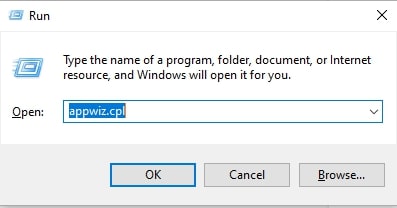
Step 3: Find the Windows PC Health Check under Programs and Features on your computer. Simply right-click on it and choose the Repair option.
Step 4: Restart the application after it has finished making the necessary repairs, and check to see if it is now functioning normally.
If this solution does not solve the problem for you, try the ones that are listed below to resolve the Health Check app not working on a Windows PC.
Solution 3: Performing the Clean Boot
There is a possibility that the PC Health Check application will not launch correctly on your computer if you have other applications or programs installed on it that are incompatible with it. In this scenario, doing the clean boot will allow you to start your Windows using the bare minimum of services & programs installed on your computer. You will be able to exclude any potentially problematic software that may be causing this Health Check program to stop functioning or crash with the help of this tactic. To do so, use the procedure shared below:
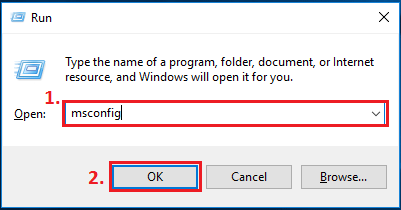
Step 1: Enter msconfig into the search box located on the taskbar, and select System Configuration from the menu that appears.
Step 2: Select the Services tab by clicking on it. Click the Disable all button once you have selected the checkbox that says Hide all Microsoft services.
Step 3: Select the Startup tab, then select Open Task Manager from the drop-down menu.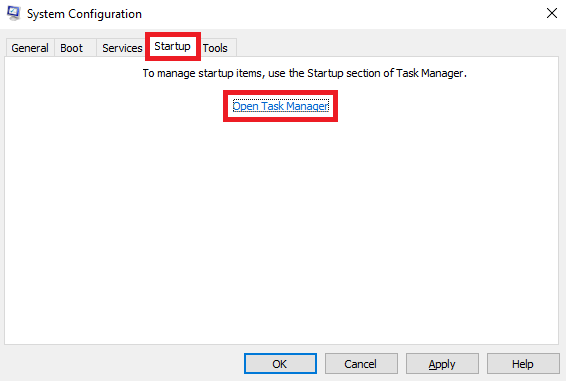
Step 4: Right-click the programs that are listed under the Startup tab, and then select the Disable option for each one individually.
Step 5: Close Task Manager, then return to the System Configuration window.
Step 6: To save the changes you’ve just made, click the “OK” button.
Step 7: To restart your computer, click the Restart button.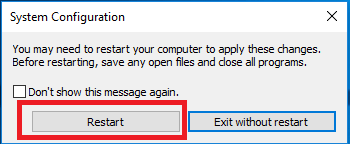
After your computer has finished restarting, run the Health Check app again. Examine it to determine whether it can be opened and continues to function appropriately.
If that’s the case, you can now check to determine if your PC is compatible with Windows 11 by using this software. If not, then try the next solution mentioned below to fix the Health Check app not working on Windows 10, 11, or older versions.
Also Read: Best SSD Health Check Software for Windows and Mac
Solution 4: Restore Corrupted System Files
The problem with the Health Check app not working properly or crashing could also be caused by missing, corrupted, or damaged system files on your computer. If you have reason to believe that this describes your situation, we advise that you use the SFC command for scanning and repairing system files a shot.
A Windows default program known as System File Checker (SFC) can assist you in diagnosing issues with your computer and repairing any system files that have become corrupted. Follow these procedures to successfully execute the SFC scan:
Step 1: In the search box located on the taskbar, type cmd, and then pick the option to Run as administrator.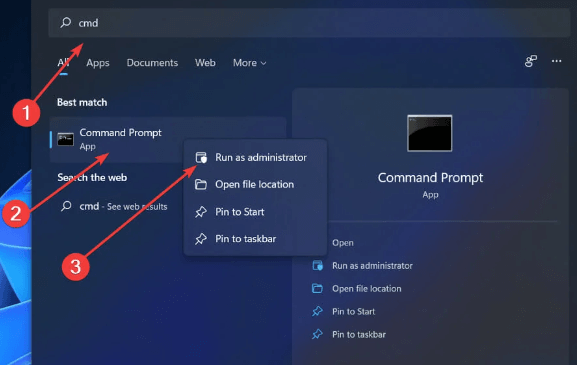
Step 2: In the Command Prompt (Admin) window, write sfc /scannow, then hit the Enter key.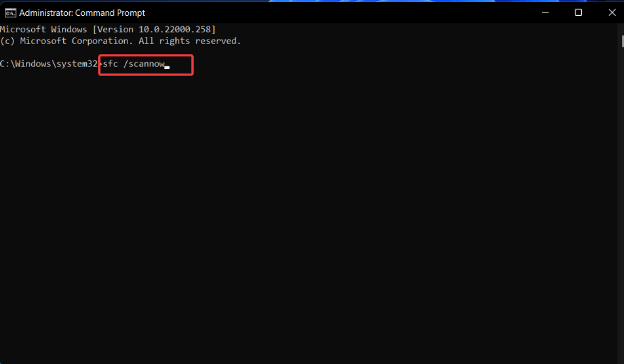
Step 3: Please be patient as SFC searches for corrupted system files and, if any are discovered, it will automatically replace them with new and compatible ones.
Once done. try restarting your computer and seeing if it helps resolve the issue.
Solution 5: Reinstalling the Health Check App
The last solution is to uninstall and reinstall the Health Check application to fix all the possible errors. This is an efficient technique to solve the problem of the tool not operating, especially if you are struck while the installation is taking place. It is very simple to reinstall this application. To do so, follow the steps below:
Step 1: Go to the Control Panel and choose Programs and Features.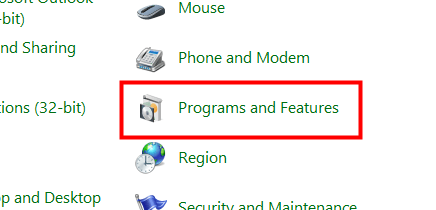
Step 2: Right-click on the Windows PC Health Check icon found in Programs and Features, and then pick Uninstall from the context menu that appears.
Step 3: In the confirmation window that appears, click Yes.
Step 4: Get the most recent version of Windows PC Health Check, then download and install it.
Step 5: Now check to see if the application can be started normally!
Also Read: How to Fix BIOS Not Detecting SSD in Computer PC
Health Check App Not Working On Windows PC: FIXED
So, this is how you can fix the Health Check App not working issue on the Windows PC with ease. Just follow all the solutions provided above closely so that you don’t face any problem while executing the solutions. If you have any doubts related to the blog or the solutions, feel free to communicate with us. We will help you in every possible way. For the same purpose, take the help of the comments section below.
If you liked our blog, do subscribe to our newsletter. Also, don’t forget to follow us on Facebook, Instagram, Tumblr, YouTube, LinkedIn, Pinterest, and Twitter to get updated with new introductions and more.


