Does your wireless Logitech mouse lag? Then, download and update Logitech mouse driver to resolve the issue. In this tutorial, we are going to put together 3 methods that come in handy.
Logitech is a globally recognized label for offering excellent computer accessories. But sometimes, when we forget to update the drivers released by the brand, then the Logitech products stop working fine as expected. That means, the production efficiency will decline and the outcomes will be affected. Additionally, we have seen numerous users complaining about the unresponsive behavior of their wireless Logitech mouse.
If you also find it relatable then follow the write-up till the end to know how to update the Logitech mouse driver on Windows 11, 10.
Simplest Way to Update Logitech Mouse Driver in Windows 11, 10
To install the latest version of the Logitech Mouse driver with ease, you can use Bit Driver Updater. It is the best driver updater utility tool that automatically scans PCs for outdated or corrupt drivers and provides only genuine drivers. Bit Driver Updater provides only WHQL-tested and signed drivers. Plus, it comes with additional features to improve overall PC performance. You can download Bit Driver Updater for Free from the button below

Easy Methods to Download, Install and Update Logitech Mouse Driver on Windows 11, 10 PC
If your Logitech mouse stopped working, then you can try to update the associated drivers to fix this issue. Below, you will learn 3 methods to perform Logitech mouse driver update on Windows 10.
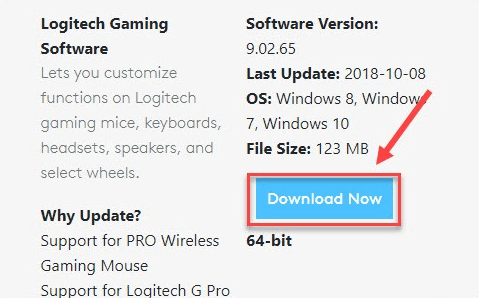
Method 1: Manually Install Logitech Mouse Driver from Official Webpage
If you are confident about your computer skills, then you can find the correct drivers on the official website of Logitech. You need to download the drivers based on your Windows operating system and the bit you are currently using.
After that, once you have the driver file downloaded, then click double on it and comply with the on-screen instructions to install the drivers on your PC.
However, installing the wrong driver will cause numerous problems to your system and also make it vulnerable. So, be careful while installing the drivers manually.
Also See: Troubleshoot Mouse Problems in Windows 10 – Fix Mouse Problems
Method 2: Use Bit Driver Updater to Automatically Update Logitech Mouse Driver (Recommended)
If the above method seems too much work, or you don’t want to put your system at stake, then you can use Bit Driver Updater to do this task automatically.
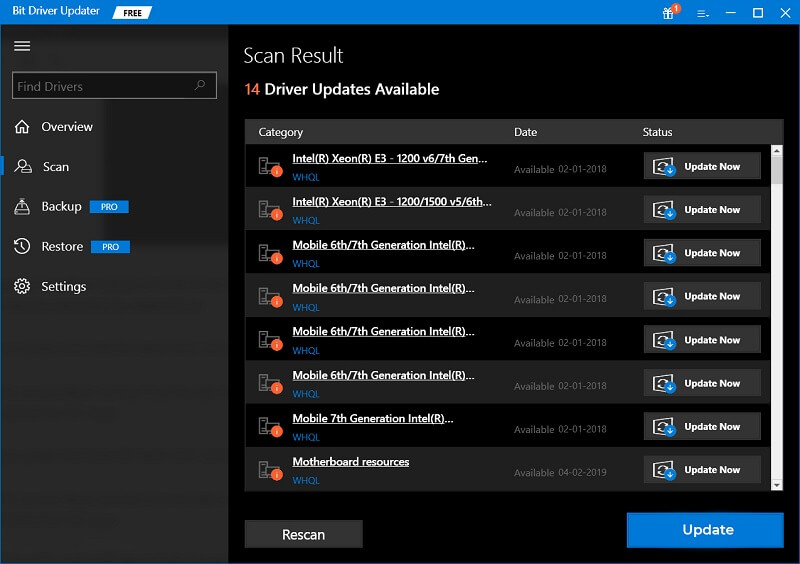
Bit Driver Updater is one of the most popular third-party utility tools that help users to find and install drivers automatically. To use this software, you only need to download, install and launch it on your PC. The rest of the work will be performed by the Bit Driver Updater.
This advanced and professional driver updater utility tool will automatically detect the operating system and the correct version, later on, will also show the available updates.
Important: So, the software is available in both versions i.e., free or pro. If in case you are using the free version, then you will have to install each required driver update manually by making a click on the Update Now button. Furthermore, the users with the pro version can update all broken, faulty, or corrupted drivers in one click by making a click on Update All.
Now, have a look at the steps below to automatically update Logitech Mouse driver:
Step 1: Get the setup file of Bit Driver Updater from the download button below.

Step 2: Run the installer and follow the wizard.
Step 3: Launch the amazing driver updater software for Windows.
Step 4: Click on Scan to scan your PC for missing, faulty or outdated drivers.

Step 5: Wait for the process to finish.
Step 6: From the scan results locate the Logitech mouse driver and click on Update Now adjacent to it.
Step 7: Wait and let the downloading process be finished.
Reboot your PC to apply the new changes and try to use your Logitech gaming mouse to test the issue. Now, you should not encounter any problems.
Also See: How to Fix Connections to Bluetooth Mouse in Windows 10 {SOLVED}
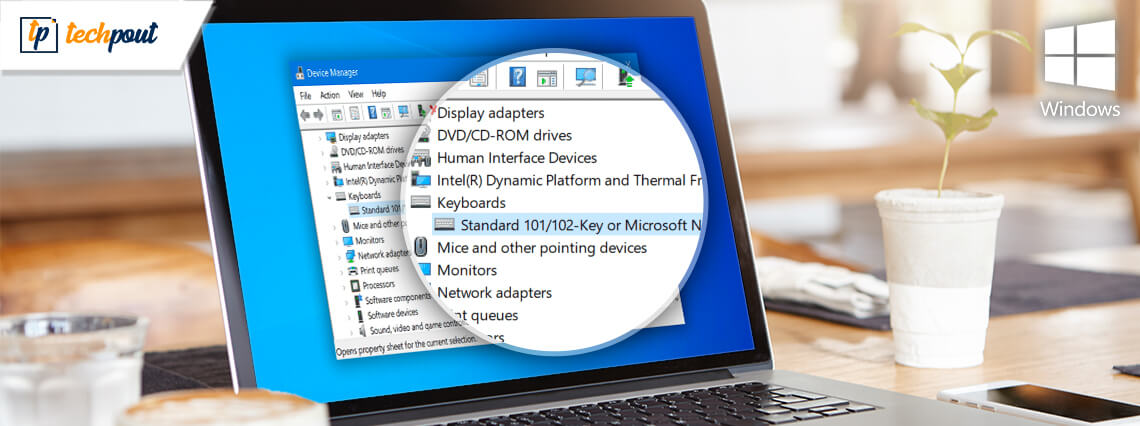
Method 3: Download and Update Logitech Mouse Driver in Device Manager
Another way to get the latest version of Logitech mouse drivers installed is using Device Manager. It is Windows in-built utility tool that can help you manage hardware and its drivers in Windows PC. To use this method, follow the steps outlined below:
Step 1: Press Windows + X keys to open Device Manager.

Step 2: In Device Manager, navigate to the Mice and other pointing devices category and double click on it.
Step 3: Then, click right on Logitech mouse driver and choose Update driver software.

Step 4: From the next window, choose Search automatically for updated driver software.
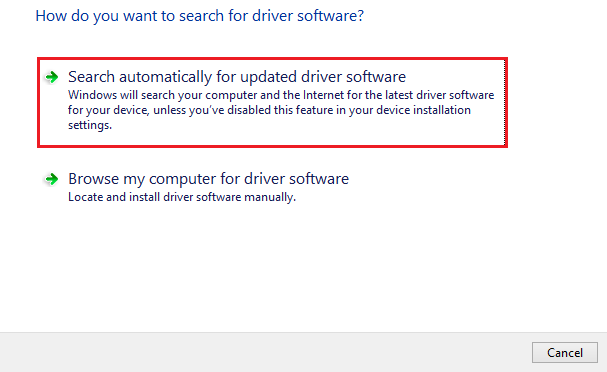
Now, the Device Manager will search for the available driver updates and later on will install them too automatically.
Bonus-Tip: How to Reinstall Logitech Mouse Driver on Windows PC?
Is your Logitech mouse not working even after a driver update? If that is the case, then you need to uninstall the currently installed drivers, afterward install the compatible drivers again. This might work for you. To do so, you can use the Windows default utility program, Device Manager. Follow the steps below:
Step 1: Open the Run Dialog box and type devmgmt.msc inside it. Then, hit the Enter key from your keyboard.

Step 2: In the Device Manager window, double click on the Mice and other pointing devices category.
Step 3: Find and right-click on the problematic Logitech mouse driver to select the Uninstall Device option.

Step 4: Next, click Yes if a box pops up for your confirmation.
Step 5: Wait and let the existing drivers be uninstalled.
Once done, then reboot your PC and visit the official website of Logitech to reinstall Logitech mouse drivers for Windows PC.
Also See: Logitech M510 Wireless Mouse Driver Download for Windows 10
Logitech Mouse Driver Download and Install: DONE
We hope using the aforementioned methods you can make your Logitech mouse driver work again and fix all related issues. In our opinion, Bit Driver Updater is a more straightforward way to update Logitech mouse driver for Windows 11,10. You should give it a try. If in case you have any sort of doubts regarding the software, feel free to share them in the comments below.
Also, please let us know in the comments below if you have any better suggestions. For more technical information, do subscribe to our Newsletter.