How to Use Windows Sandbox on Windows 11, 10
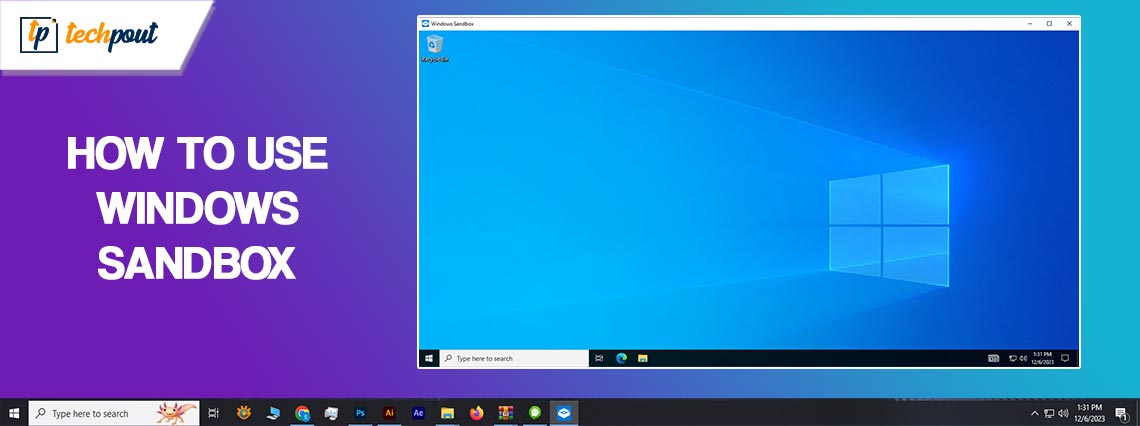
Windows Sandbox allows you to run untrusted applications on your device easily. In this guide, you will learn how to use it as well as enable or disable it. Continue reading for more information!
The most common method for putting some suspicious code running on a device is to deceive the user into installing a suspicious program on the device that is being targeted. Whenever there is a lack of understanding within the user base regarding these kinds of vulnerabilities, a device is always susceptible to a certain form of threat.
But, it seems like Microsoft has been putting in a lot of effort to find a solution to this problem. They have just announced the availability of a sandboxed version of Windows 10, 11 that runs inside Windows. The purpose of this sandbox is to separate the program that is suspected of being malicious and allow it to function inside it, thus protecting the main system from any potential threats.
What is Windows Sandbox?
Windows Sandbox, a feature launched in Windows 10 version 1903, and it has been a huge part of Windows OS ever since. However, the feature is only accessible in Pro & Enterprise editions, which means, there could be a possibility that your PC does not support it. But, nothing to worry about, there are numerous third-party tools available that help you accomplish this objective.
Windows Sandbox is a unique and lightweight desktop environment created for securely running software in isolation. This temporary virtual environment gives users the ability to enable or disable it. This indicates that if you have any reason to believe that a piece of software is malicious, you can test it in a separate environment to ensure that it does not disrupt any regular operations and does not jeopardize any files that are useful to you. Once this Windows Sandbox is closed, all the software/ apps, residual files, and other data are erased beyond all possibility.
To successfully execute Windows Sandbox on Windows 10, 11, it is necessary to check minimum system requirements. Have a look at them below:
- Windows 10, 11 Pro, or Enterprise built 18305 or above.
- Virtualization capabilities are enabled in BIOS.
- AMD64 architecture.
- 1 GB free disk space (SSD recommended)
- 4GB RAM (8GB recommended)
- 2 CPU cores.
Also Read: How to Fix Video Scheduler Internal Error on Windows 10 [Solved]
What Are The Properties of Windows Sandbox?
Have a look at the following properties of Windows Sandbox:
A component of Windows: The Windows 10 Pro, and Enterprise editions come equipped with all of the necessary components for this capability. There’s no requirement to download a VHD file!
Disposable: This means that nothing will remain on the device; everything will be discarded once the program has been closed.
Pristine: Whenever you run Windows Sandbox, it always seems like an all-new installation of Windows.
Efficient: It is efficient because it makes use of a virtual GPU, an integrated kernel scheduler, and intelligent memory management.
Secure: It utilizes hardware-based virtualization for kernel isolation, which is dependent on Microsoft’s hypervisor to run a separate kernel that isolates Windows Sandbox from the host computer.
How Do I Set Up a Windows Sandbox?
After ensuring that your computer is compatible with it, setting up Windows Sandbox is an extremely easy task to accomplish. Here is all you need to do:
Step 1: Run the Start menu and input optionalfeatures.exe. After that, press the Enter key from your keyboard.
Step 2: Next, scroll down the page until you locate Windows Sandbox feature. Once detected, then tick mark the box available beside it.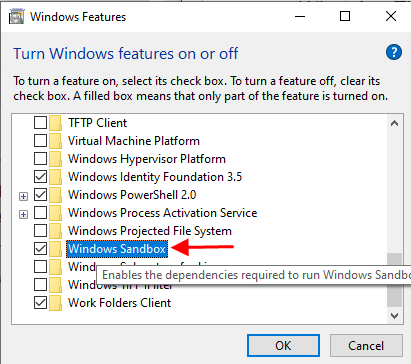
Step 3: Next, click on OK to proceed, and wait until the components are installed successfully.
Step 4: When prompted, reboot your computer.
Step 5: Now, Windows Sandbox should show up as an application in your Start menu.
See how simple and quick it is to set up Windows Sandbox on Windows 10/11. You should now be able to access the Windows Sandbox as an optional Windows feature.
Also Read: How to Get Help in Windows 10
How To Use Windows Sandbox on Windows 11, 10?
Making use of Windows Sandbox on a PC is simple and quick, follow the procedure provided below.
Step 1: Run Start.
Step 2: Look for Windows Sandbox and right-click on the correct result. Then, choose Run as administrator option to proceed.
Step 3: Then, launch File Explorer on your system.
Step 4: After that, run the folder with an untrusted program in order to test the issue.
Step 5: Next, choose the .exe file and click on the Copy icon available on the command bar.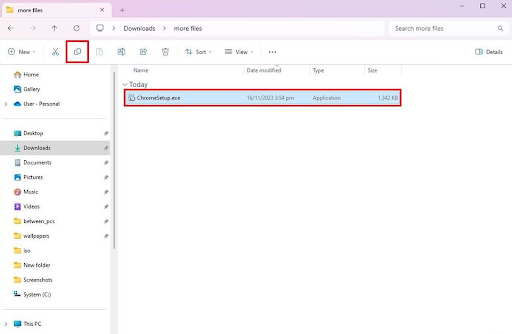
Step 6: On the desktop of Windows Sandbox, right-click the desktop, then choose the Paste option to share the installer file.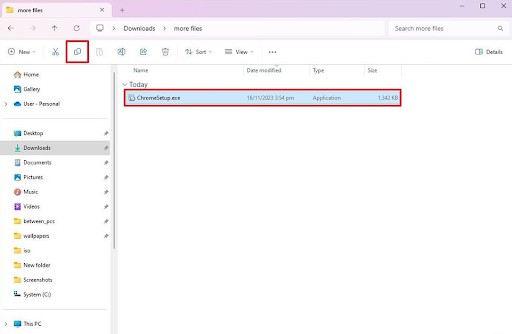
Step 7: Now, click twice on the installer to start the installation process.
Step 8: Follow the instructions on your screen to finish the installation.
Once done, you can utilize the Windows Sandbox to test the applications without even compromising your setup. In addition to this, you can also make use of this environment to use untrusted apps or websites without even affecting the configuration/ settings of your device.
How Do I Enable the Sandbox Settings on Windows 10, 11?
To enable Sandbox on Windows 11 or 10, you will need to launch the Windows Features panel on your system and select the Windows Sandbox checkbox. Following that, it will automatically be installed on your device. After that, you will be able to restart your computer and launch the Windows Sandbox application by searching for it in the search box located on the Taskbar. That’s how you can get a Sandbox on your Windows PC
Also Read: IRQL Not Less Or Equal Error in Windows 10, 11 [Fixed]
So, that was all about how one can make use of Windows Sandbox on Windows 10, 11 PCs. In this tutorial, we have provided you with complete information about Windows Sandbox; how to configure it, how to enable or disable it, and other related details.
We hope you found this piece of information helpful. If we missed out on anything and you have better tips & tricks regarding the same, then please feel free to leave us a comment below. Additionally, if you have any questions or doubts, then let us know in the comments section below.
Lastly, you can subscribe to our Newsletter and follow us on Social Media – Facebook, Instagram, Twitter, or Pinterest so you never miss a tech update.

