Images and files must have kept a lot of space in your iPhone and you must have thought to clean or transfer them. We have listed some easy ways which can help you in transferring photos from your iPhones to Mac.
Understanding the process of how to transfer photos from iPhones to Mac can be easy as both the devices belong to the same parent brand, which is Apple.
Transferring photos can make life a lot easier as users get to edit better on a higher resolution screen. Not only this, organizing and resizing the images takes no time on Mac.
In this article, we have filtered some of the fastest ways which you can use to transfer photos from iPhone to Mac.
Best Ways To Transfer Photos From iPhone To Mac
There are many ways including the wired transfer through USB cable and wireless transfer of photos. Depending on the convenience the user can choose the method. The list below also includes steps for ease and convenience of the reader.
1. Transfer Photos From iPhones To Mac Using A USB
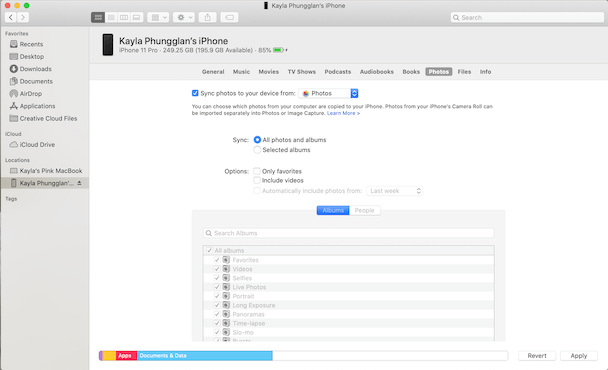
Freeing up space from iPhones and cluttering them into Mac can also become a mess, which you would never want. Keeping the storage space in mind, sort the photos and files before you transfer them. While transferring from iPhone to Mac using a USB, you can manually select the photos which you want to transfer. Follow the steps below to transfer photos from iPhone to Mac.
- Connect your iPhone to Mac using the USB cable. Before transferring the photos check that your macOS should have Catalina (10.15) or a later version to support the action.
- Open a new Finder window on your Mac.
- Under your device section, find your phone and click to connect.
- From the option available at the top select photos. Whatever option you will select after that you can only transfer those types of files.
- Now check the box of Sync Photos at the top.
- After that, you have the option of selecting photos manually or else select all the photos automatically.
- After opting for the option to transfer the photos. Click on apply to start the process.
Read Also: How to Delete Apps on iPhone and iPad
2. Transfer Photos Using The AnyTrans
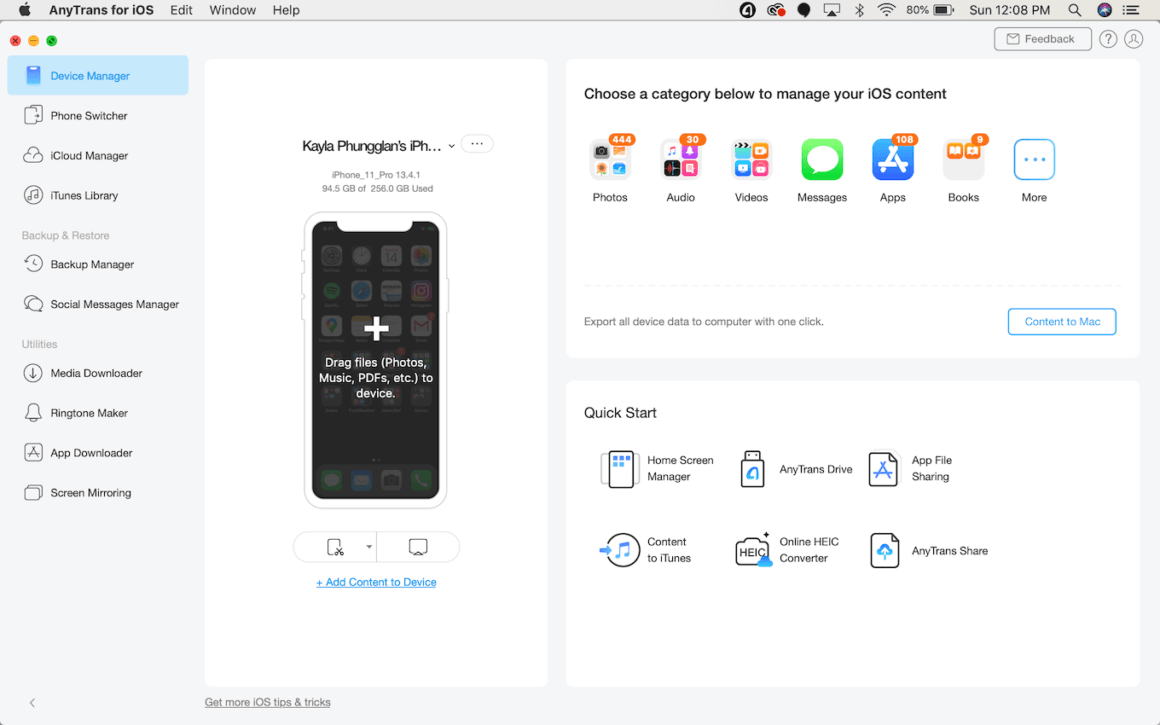
Transferring all the data in one go is what most people want, the company prefers to transfer using the iCloud feature but it has some errors which can be observed while transferring the data. We suggest you to have a third party app named AnyTrans for iOS.
AnyTrans not only offers you the option to transfer photos but as the name suggests you can use the app to transfer everything from your iPhone. With tools and media downloader, the app can help you migrate photos and files easily. Here is how you can transfer using the AnyTrans app.
- Install the app in both iPhone and Mac and run the app simultaneously.
- Connect both devices on the same network.
- Now after the devices are connected, plug in your iPhone using the USB cable.
- Once the connection is established, the app would ask for permission to access the photos.
- Now you are almost done, once the app has access then click on the Device Manager and then export the photos.
The device will transfer the files instantly and as soon as it is transferred it will be backed up on iCloud.
Read More: How To Restore An iPhone From iCloud After Reset
3. Import Using The Inbuilt Photos App
Now that is the easiest and the fastest way to transfer photos and files. All you need is both the device and a Lightning-to-USB cable which you use to charge your iPhone. Here is how you can transfer using the Photos app.
- Connect the iPhone using the Lightning-to-USB cable.
- Once the device is connected, the iPhone can get a pop up asking to trust the device.
- Allow or click on the Trust device option.
- Select the photos or videos which you want to transfer from iPhone to Mac.
- Now click on the Import button once done with selecting the photos.
That’s it, the device will transfer the photos from your iPhone to Mac. After the process is completed, your iPhone can receive a pop up asking for deleting the photos which are still on the iPhone.
Wireless Method To Transfer Photos From iPhone To Mac
There are many other options to import photos from iPhone to Mac which does not require a physically established connection. You can use the in-built feature of Apple to transfer.
1. Importing Photos From iPhone To Mac Using AirDrop

Apple devices have a special feature which establishes a non-physical connection like Bluetooth but having a lot more power than that. Using AirDrop all Apple users can share data and files from one device to another. Before transferring you need to establish a connection and activate AirDrop from both devices. Here is how you can do that easily.
Switch AirDrop On From Your iPhone
- Go to settings in your iPhone
- Tap General
- Find AirDrop and select everyone to send
Switch AirDrop On In Your Mac
- Open Finder
- Click on Go button in the menu bar and then select AirDrop
- Once the AirDrop starts, click on select everyone option
Now both the devices have been allowed to connect. After a few moments the devices will connect.
Using your iPhone select the photos which you want to share > select the sharing button > select AirDrop sharing > select your Mac. After you have selected the device to share the photos, a dropbox will appear on the screen asking for permission.
Once permitted to import from iPhone to mac will start the process.
Read More: Best iPhone and iPad Cleaner Apps
2. Sync Photos From iPhone To Mac Using The iCloud
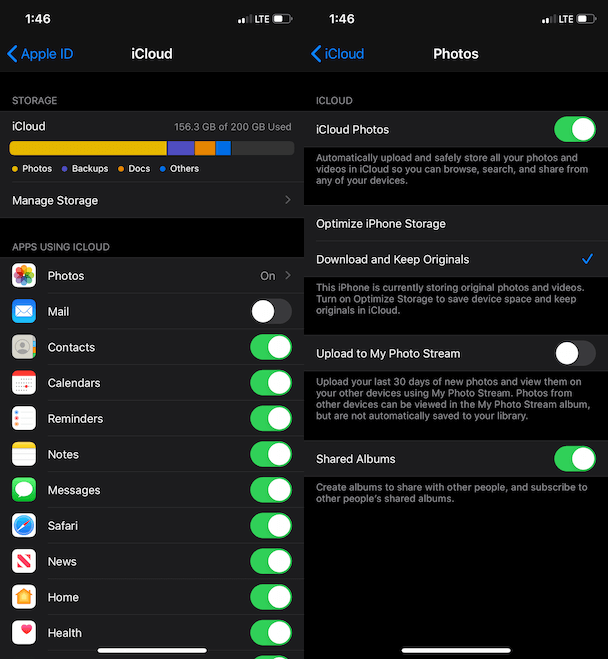
All the Apple gadgets have iCloud for backing up the data. Other than backing up the data one can sync data from one device to another. But iCloud charges some amount to backup the data storing more than 5GB, it charges $0.99/ month for 50GB and $9.99 for 2TB of the storage.
That was about iCloud, now without wasting any minute let’s see how to sync photos from iPhone to Mac using iCloud.
For syncing the photos using the iCloud you need to select the iCloud photos option in settings for both the devices and the most important thing is that both devices should be connected to the same id.
Now that you have allowed both the devices for backup in iCloud photos. You can sit back and relax as the photos will automatically sync and will be transferred from one device to another.
Read More: Best Duplicate Photo Finder & Cleaner Software
Transfer The Photos Easily
Now that you know how to transfer photos from iPhone to Mac? Having a USB cable or not, it won’t affect your photos transfer.


