How to Change Administrator on Windows 10 – Step by Step
In this article, we have shared the answer to your question of how to change administrator on Windows 10 laptop and PC. Keep reading to know more about it.
The power to change and adjust every setting in a laptop or PC is in the hands of the administrator. Many times you must have felt like changing some setting, but due to permission, you are unable to do so. In such scenarios, if you could change yourself or any other person to administrator, then the work would be a lot easier.
We know how important it can be, and to help you with this process, we have mentioned some of the best methods below. Using the methods, you can simply change the administrator on Windows 10 and change every setting without any permission. Without wasting time, let’s directly jump onto the methods and steps that are going to help you in changing settings.
How to Change Administrator on Windows Using Settings App
Changing anything in the laptop or computer is very easy with settings. Here is how you can easily follow the steps and change administrator on Windows 10.
- Click on the Windows icon from the bottom left corner of the screen.
- After that, a menu will appear; from that menu, click on the settings icon
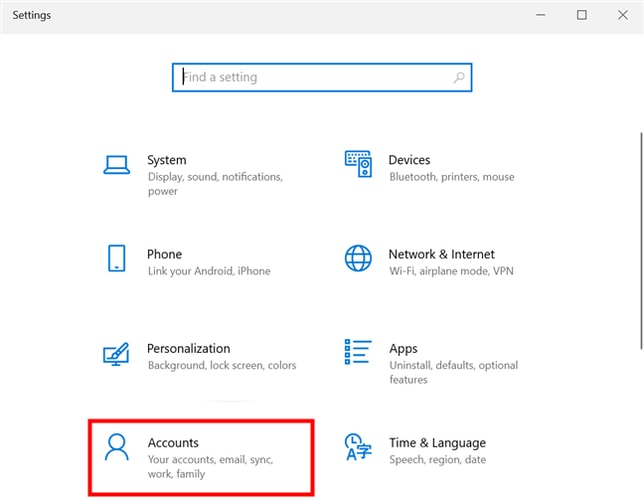
- In the settings window, select the accounts option
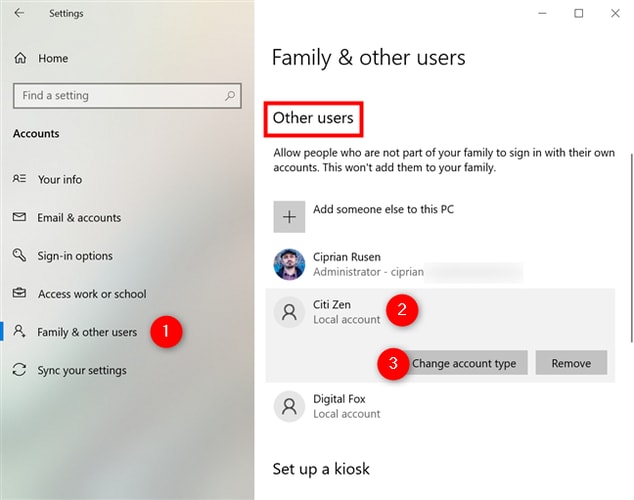
- Now choose the family and other users option. You will witness this option on the left sidebar on the screen
- Next, you have to click on the user account under the other user’s panel
- After that, select change account type. This option will appear as a pop up when you click the user account option
- Now choose Administrator from the drop-down menu that appears on the screen
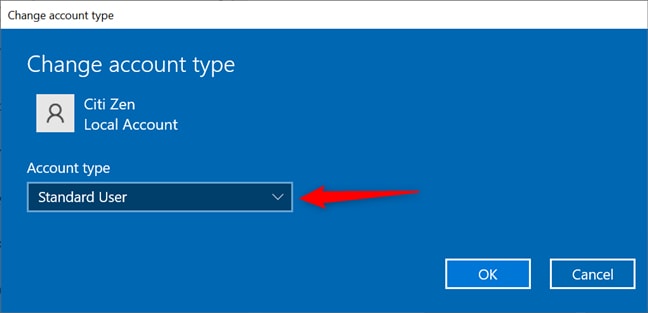
- After changing the setting, click on ‘Ok.’ After saving the settings, the account will reflect the changes
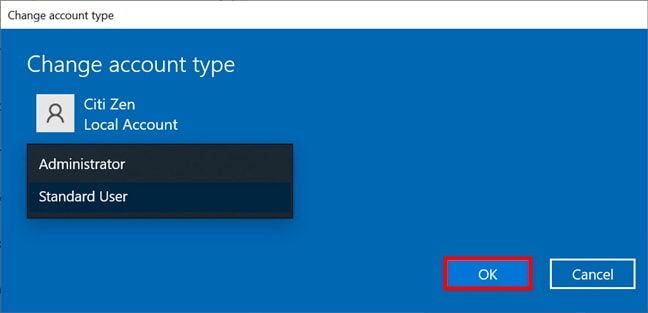
- Repeat the same steps for other users’ accounts that you wish to change.
Also Read: [Fixed] Could Not Connect To Steam Network Error
How to Change Administrator on Windows 10 Using Control Panel
If not Setting, then the Control Panel always offers you all the options to control the PC. Using the Control Panel, you can easily change the administrator. Here is how you can do it.
- Click on the search bar near the Windows icon and type Control Panel in it
- Now from the appeared list, click on the app
- Further, you will notice a separate window.
- In the window, you can witness the ‘User Account’ option. Click on the ‘Change account type’ option mentioned below the ‘User Accounts.’
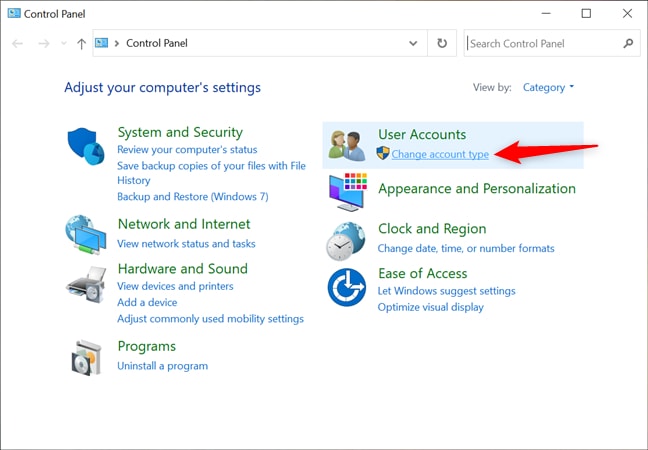
- In the next window, click on the radio button of the ‘Administrator’ option.
- Then click on ‘Change Account Type’. After some time, the changes will be reflected on your Windows 10 PC or laptop
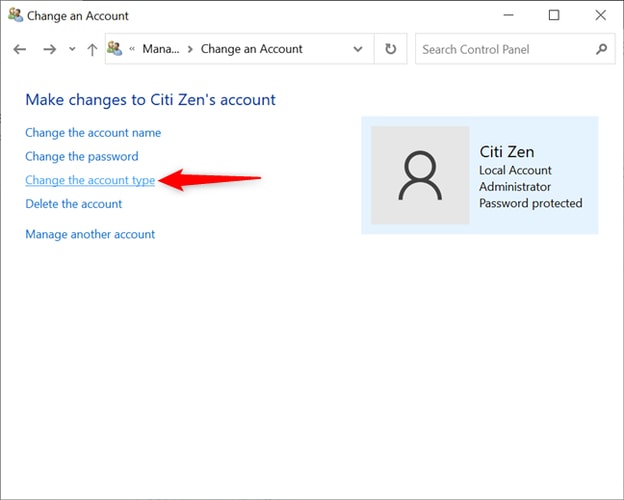
This is how you can easily change administrators using the Control Panel. You can repeat the same steps for other users as well and change administrators.
Also Read: How To Fix NVIDIA Control Panel Not Showing In Windows 10 [Solved]
How to Change Administrator on Windows 10 Using Computer Management
The next step is not so used as many users are not aware of this. If you are a new user or you don’t know much about computers, then we would recommend you to use the first two steps as they are very easy. If you want to learn a new method to perform the change, then this is a great method to try. Here is how you can change administrators on Windows.
- Click on the search bar and type computer manager in it.
- Now from the list that appeared, click on the application option.
- You will observe a new window opening; in that window, click on the ‘Local Users and Groups’ option.
- A new menu will appear below it; click on the ‘Users’ option.
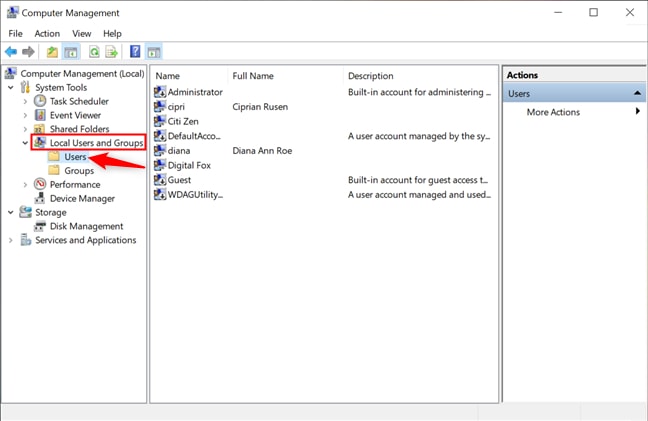
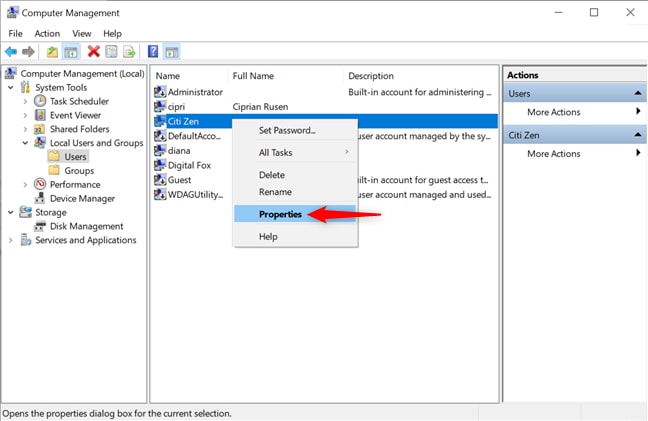
- Further, you will witness a new list of options. You can simply right-click the name which you wish to change.
- Click on the properties option to further open the window of the user.
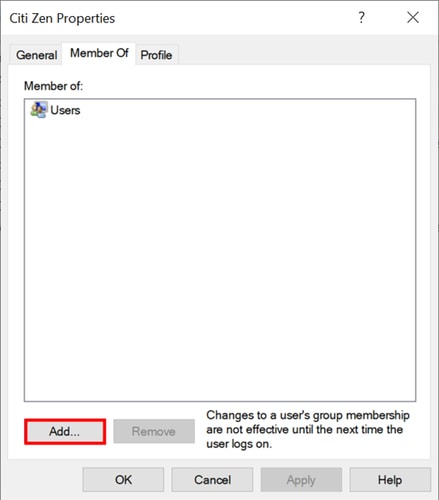
- Now click on the ‘Add’ option.
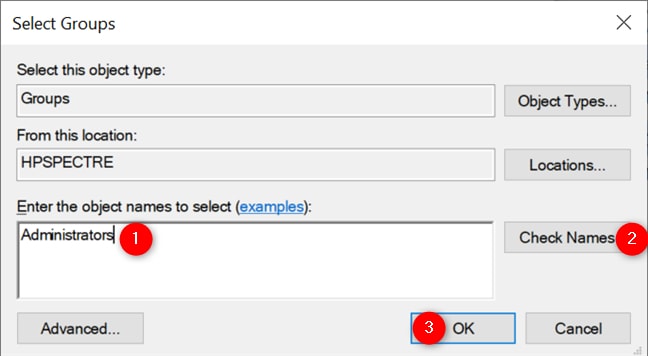
- In the next slide, select the object type to group and object name to Administrator.
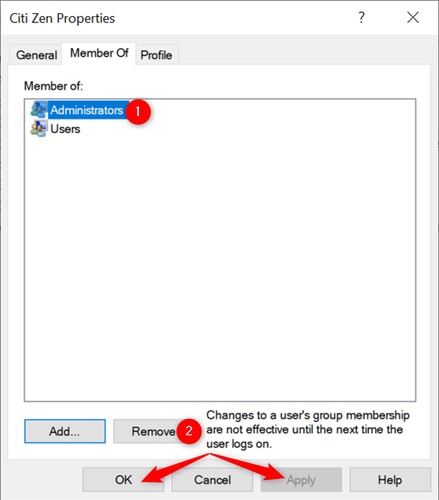
- Now the user is part of the administrator; you can save changes by clicking on ‘Apply’ and then ‘Ok’.
Also Read: Windows 10 Disk Management: Get Complete Help in Disk Management
How to Change Administrator on Windows 10 Laptop/ PC Using Netplwiz Command
This is another method that is known to very little. To become one of the few people who knows. Follow the steps as mentioned below.
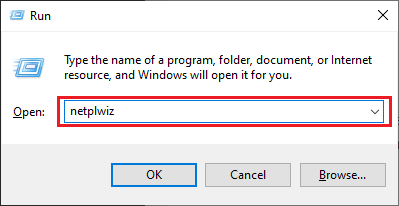
- Press the ‘Windows’ key and ‘R’ key together to open the run command.
- In the search box,,.’ run utility type “netplwiz” and press enter.
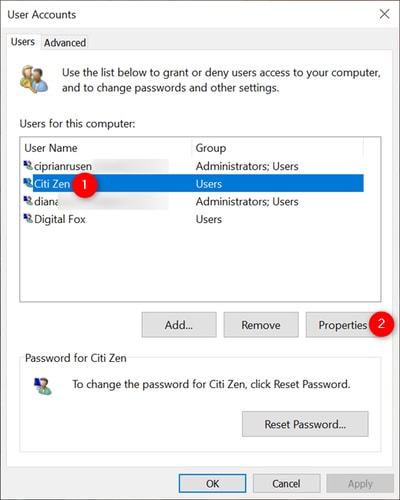
- Next, you will be redirected to the user accounts window.
- Click on the user name and then properties to change the group.
- Now click on the ‘Group Membership’ menu and select the ‘Administrator’ option.
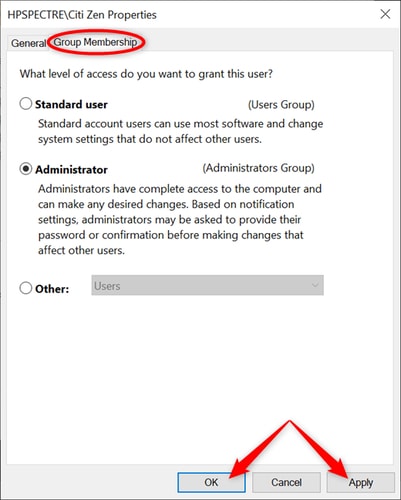
- After making changes click one ‘Apply’ and then ‘Ok’.
Also Read: Windows 10 100% Disk Usage In Task Manager [Fixed
How to Change Administrator on Windows 10 Using Command Prompt
For every issue, you can rely on Command Prompt, even for changing accounts from standard to the administrator. Here are the steps that you can follow and change the account.
- Search for Command Prompt or cmd and click on the application from the list.
- On the right side, it will open a new menu; from that menu, click on the ‘Run as administrator’ option.
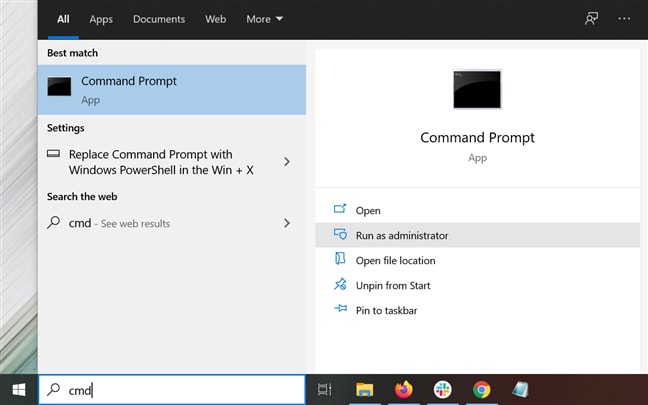
- Now in the Command prompt window, type as stated, replace the name with the user’s name, then type ‘net localgroup Administrators’ “NAME” /add’.
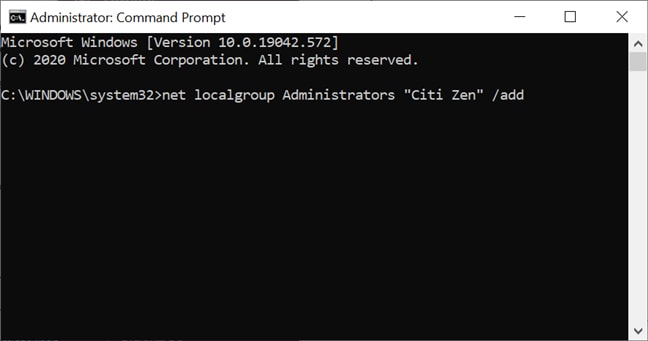
This is how you can simply change the account from standard to the administrator using Command Prompt.
Also Read: How to Update Drivers Using Command Prompt in Windows 10? Try Easy Steps!
Final Words
These were some of the methods that you can use to easily change administrators on Windows computers. You can read the method and its steps and follow the same way to change accounts from standard to administrator. We hope that we have created a helpful guide for you. If you found this article useful, then write your reviews in the comments section below. We would love to hear from you.


