Is Oculus software not installing on PC? Don’t worry, try these effective solutions to install it completely without any hassles.
Want to enjoy the virtual world? Then, there’s nothing better way than using the Oculus Headset. However, in order to make the most out of this powerful and excellent hardware, you need to install compatible software i.e., Oculus Software. The software is available for free on its official website. But, recently, numerous users have complained that they are unable to install the software on their PCs. Are you also dealing with the same? Nothing to worry about, this can be solved in the very least amount of time. This blog highlights 3 potential tactics to get rid of this annoying issue.
3 Solutions to Fix Oculus Software Not Installing on Windows PC
Here, we are going to put together a few ways that you can consider if the Oculus software installation has been stuck for a while. Now, without wasting more time, let’s read the resolutions below:
Solution 1: Reinstalling Oculus Software
If you have just installed the software and are having issues with it, then you should try to reinstall it to fix the Oculus controller not working on PC. To do so, follow the steps shared below:
Step 1: On your keyboard, altogether press Windows + R keys to invoke the Run dialog box.
Step 2: Once it opens, then type appwiz.cpl inside the text field and hit the Enter button from your keyboard.

Step 3: Now, the next prompt will open showing the arranged list of the programs installed on your system. You need to navigate to the Oculus software and right-click on the same.
Step 4: From the context menu, choose Uninstall and go with the on-screen simple instructions to uninstall the Oculus software.

Step 5: Wait and let the uninstallation process be completed. Once done, launch the File Explorer by hitting the Windows + E keyboard keys at a time.
Step 6: Head to the C:/ProgramFiles folder and choose Delete from the context menu list to remove the Oculus folder.

Step 7: Restart your computer system and invoke your default browser.
Step 8: Then, go to the official website of the Oculus.
Step 9: Select the correct hardware that you have and make a click on the Download button.
Step 10: Once you have the downloaded file, then run it by making a double click on the same, and comply with the on-screen instructions to install the Oculus software again on your computer system.
After that, try to use Oculus software to test the issue. Move on to the next solutions if the issue persists.
Also Read: How to Fix Logitech G HUB Not Loading on Windows 11, 10, 8, 7
Solution 2: Check For Windows Updates
Bugs fixes, latest security patches, new features, and performance improvements are frequently incorporated with Windows Updates. If you are facing issues while installing the Oculus software, then consider updating the Windows OS version. This might help you fix the issue. Here is how to do so:
Step 1: Press Windows + I keys at the same time.
Step 2: This will open Windows Settings, wherein you need to look for and click Update & Security.

Step 3: After that, choose Windows Update, then click on Check For Updates.
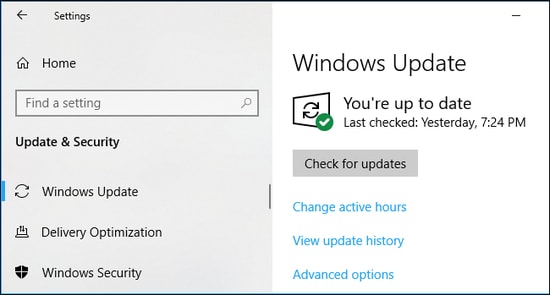
Now, your Windows starts searching for the latest system updates. If any Windows updates are found, then they will be downloaded and installed automatically. Once the latest system updates & patches are installed on your PC, try to reboot your system to check if the Oculus Quest 2 not connecting is fixed. If not, try another fix.
Also Read: How to Fix Logitech Keyboard Lagging on Windows 10, 8, 7 PC [SOLVED]
Solution 3: Updating Device Drivers
Bit Driver Updater is the best driver updater utility tool that can resolve your system’s out-of-date, missing, broken, or corrupted drivers, quickly & easily. This driver updater utility tool can automatically scan your PC for outdated & broken drivers. Later on, it also provides you with a comprehensive list of the drivers that need to be updated.
Not only this, but the driver utility boasts an in-built system optimizer that is capable of clearing junk from your PC and speeding up the overall performance of your device. Finding, downloading, and installing the most up-to-date drivers had never been so easy before. Now, it’s all about one or two clicks of the mouse.
Now, have a look at the steps below to know how Bit Driver Updater works:
Step 1: Download the setup file or Bit Driver Updater from the download button provided below.

Step 2: Run the software installer and follow the installation wizard to complete the process
Step 3: After installing, launch the driver updater utility tool and click on Scan from the left panel.

Step 4: Then, wait until the utility scans your PC for outdated or unresponsive drivers.
Step 5: Check the scan results and click on the Update Now button beside the driver you want to update. Else, you may also click on the Update All button. This will help you update all outdated drivers with a click of the mouse.

However, to update the drivers in one click, you need to rely on the pro version of Bit Driver Updater. Its pro version comes with full technical assistance and a 60-days satisfactory money-back guarantee. After updating the outdated PC drivers, the issue should get resolved and you will be able to access Oculus software without any glitches.
Also Read: How to Fix Dread Hunger Keeps Crashing on Windows 11/10/8/7
Oculus Software Not Installing on Windows PC: FIXED
Hopefully, now your Oculus software will be working fine as you expect. Unfortunately, if the above suggestions didn’t help you, then you need to submit a Support Ticket to the company’s official technical assistance team.
So, that was all about how to fix Oculus software not installing problems on Windows PC. For further help, feel free to contact us through the comments below. Lastly, if you liked the information shared in this tutorial, then do subscribe to our Newsletter. Also, you can follow us on Facebook, Twitter, Instagram, and Pinterest.